Home
This module for FreeCAD is the fastest and easiest way to get started with CadQuery.

If you're a user, please read on below to get started. If you're a developer, you might want to have a look at the Developer Documentation.
Requires FreeCAD 0.14 or newer, FreeCAD 0.17 or above recommended
Download the archive for the latest release of this project, extract the archive, and copy the cadquery-freecad-module directory to FreeCAD's Mod directory on your system, renaming the module's directory if needed. The module is implemented completely in Python so it should just work the next time you start FreeCAD. Some typical Mod directory locations are as follows.
Linux
- ~/.FreeCAD/Mod <-- Best place to install under linux
- /usr/lib/freecad/Mod
- /usr/local/lib/freecad/Mod
Windows
- C:\Program Files\FreeCAD 0.1x\Mod (where x is the last digit of the FreeCAD version you are running)
- C:\Program Files (x86)\FreeCAD 0.1x\Mod
Mac
- /Applications/FreeCAD.app/Contents/Mod
- /Applications/FreeCAD.app/Mod
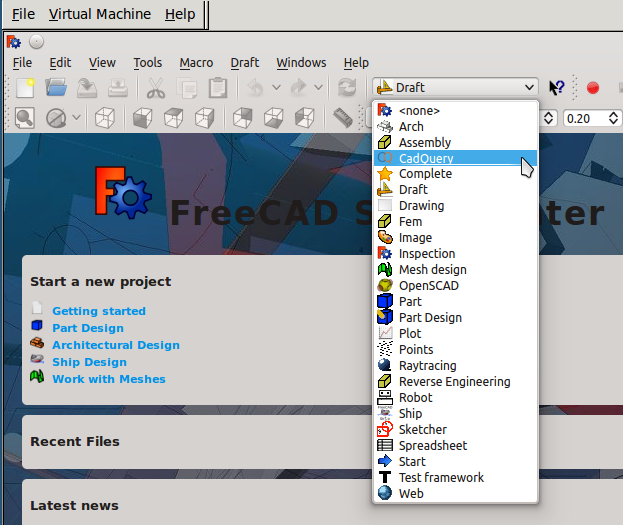
Once you have installed the module and started FreeCAD, you should see a CadQuery entry in the Workbenches pull down list.
Once you have selected the CadQuery workbench, a CadQuery menu will appear in the menu bar.
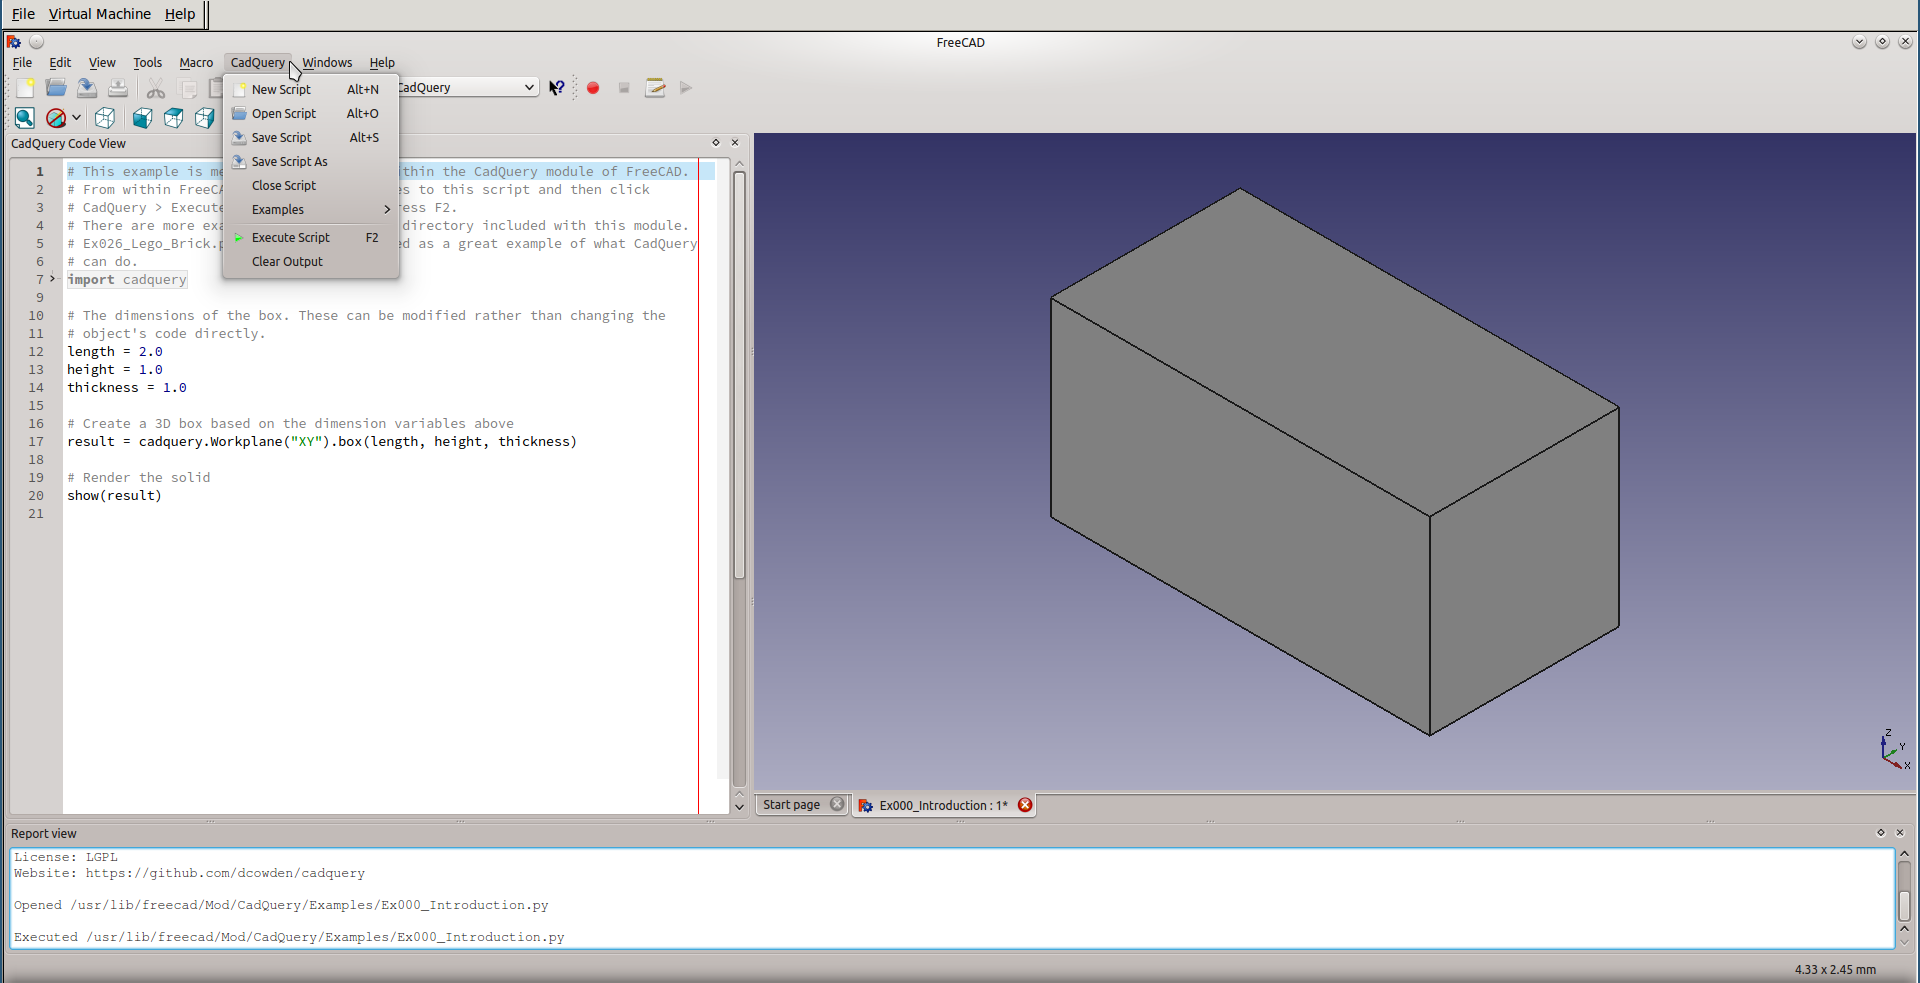
The menu items are as follows, and many of the items have associated shortcut keys listed.
- New Script (Alt+N) - Starts a new CadQuery script, using a template to help get you started.
- Open Script (Alt+O) - Allows you to open a CadQuery script that was previously created.
- Save Script (Alt+S) - Saves the current CadQuery script to disk. Presents you with a Save-As dialog if this is the first time saving the file.
- Save Script As - Allows you to save a copy of your script with a different name.
- Close Script - Closes the current CadQuery script and removes it from the code and 3D views.
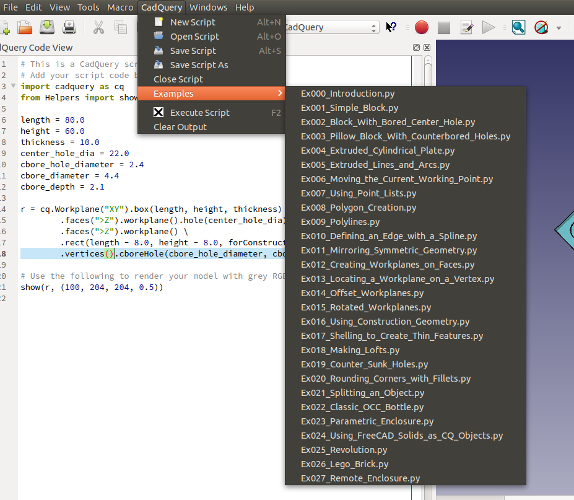
- Examples (sub-menu) - Holds a list of all the CadQuery examples that are bundled with this module. They're a great tool for learning CadQuery.
- Execute Script (F2) - Takes the code in your script and executes it to generate geometry in the 3D view.
- Clear Output - Clears all output from the Report View. This comes in handy during a heavy script debugging session.
There are three main sections to the CadQuery workbench.
- CadQuery Code View - This is the full-featured editor where you enter your CadQuery code to be executed. It has features such as auto-complete, syntax highlighting and checking, line numbers, and code folding. This is all thanks to the PyQode project.
- 3D View - This is the standard FreeCAD 3D view. It displays the geometry generated by the script in the CadQuery Code View when the script is executed.
- Report View - This is also the standard FreeCAD report view, but it is used to display output and errors from the script in the CadQuery Code View. If your script doesn't execute properly, this is the first place to look.
Now that you're familiar with the environment, you can start looking at examples. You can choose any of the included examples from the Examples sub-menu, and then press F2 or select the Execute Script menu item to execute the example. Complete documentation for CadQuery is available on the ParametricParts.com documentation page.
We have a tutorials page for CadQuery to help you get up to speed on CadQuery scripting.
The CadQuery documentation has a reference page that list all the operations and functions available in the CadQuery API.
There are also examples bundled with this module that start from the basics and advance through advanced scripting. To access them, expand the Examples submenu under the CadQuery menu.
An Advanced Usage document is included in this Wiki. It explains how to alter settings that change the operation of the module, and how to access environment variables that are set when a script is executed.
If you have any questions, we have a Google Group that you can join to get help from the core developers and other users.
You may get a No module named QtNetwork error on Ubuntu based systems when you select the module in FreeCAD. If you do, run the following command line from a terminal to fix this issue.
sudo apt-get install python-pyside.qtnetwork
When running on Ubuntu 14.04 with the default version of FreeCAD included in the repositories, you may get a No module named PySide or No module named QtGui error. If you do, run the following line to install the missing packages.
sudo apt-get install libboost-python1.54.0 libnglib-4.9.13 liboce-foundation10 liboce-modeling10 liboce-ocaf-lite10 liboce-ocaf10 liboce-visualization10 libpyside1.2 libshiboken1.2 python-pyside.qtcore python-pyside.qtgui python-pyside.qtsvg python-pyside.qtuitools python-pyside.qtxml