


This Spigot plugin provides a compact and efficient way to build logic gates directly within your Minecraft world.
- Extensive Gate Selection: Build one of the 7 basic logic gates (NOT, OR, AND, XOR, NOR, NAND, XNOR) and additional gates such as implication, TIMER (oscillator), or RS-Latch (memory gate).
- Intuitive Interface: Choose gates using a graphical interface (GUI).
- High Performance: The plugin runs efficiently thanks to a system of synchronization with server ticks, task queuing, batch processing, and many optimization techniques.
- Lightweight and Efficient: The plugin's compact size (under 60kB) contributes to its efficient performance and low resource usage.
- Ready to Use: After installation, the plugin is immediately ready to use, no configuration is required.
- Easy Internationalization: Add your own plugin translations by editing the messages.yml file.
- JSON Saving: Gates are saved in JSON format, which makes them easy to process by external software.
- Unlimited Possibilities: Develop and create even more advanced Redstone mechanisms.
- WorldEdit Integration: The plugin integrates with the WorldEdit API, allowing you to copy and paste gates.
🔗 Online documentation: https://logicgates.bednarskiwsieci.pl
- Download the latest
LogicGates.jarfrom Releases - Place the JAR file in your server's
plugins/directory - Restart your Minecraft server
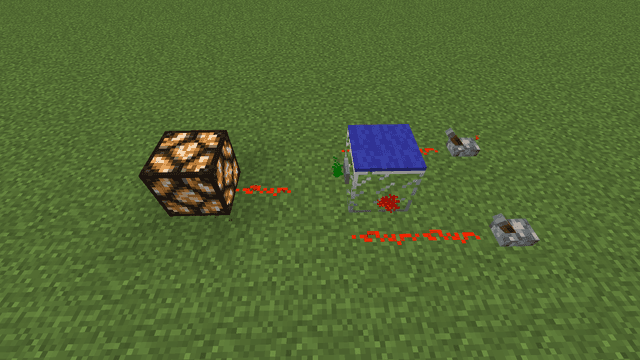
The core element of every logic gate is the minecraft:glass (Glass) block, which serves as the main component. This is where the input and output signals are connected.
Each gate performs a specific logical operation based on the redstone signals provided at its inputs. The inputs are marked with particle colors to help with identification and proper connection:
- Red – first input
- Blue – second input
- Light Blue – third input (for gates with three input signals)
The gate's output is marked with a green color and transmits the result of the logical operation to other components in the circuit using redstone signals.
We welcome contributions! Please follow these steps:
- Fork the repository
- Create a feature branch (
git checkout -b feature/amazing-feature) - Commit your changes
- Push to the branch
- Open a Pull Request
Report issues here
Distributed under MIT License. See LICENSE for details.
