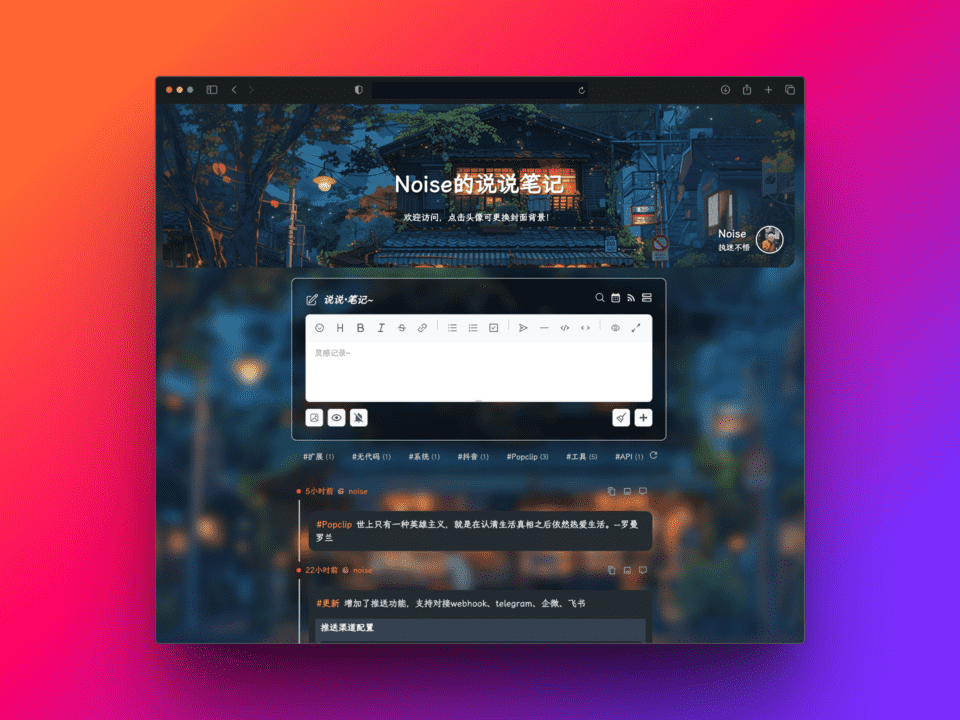
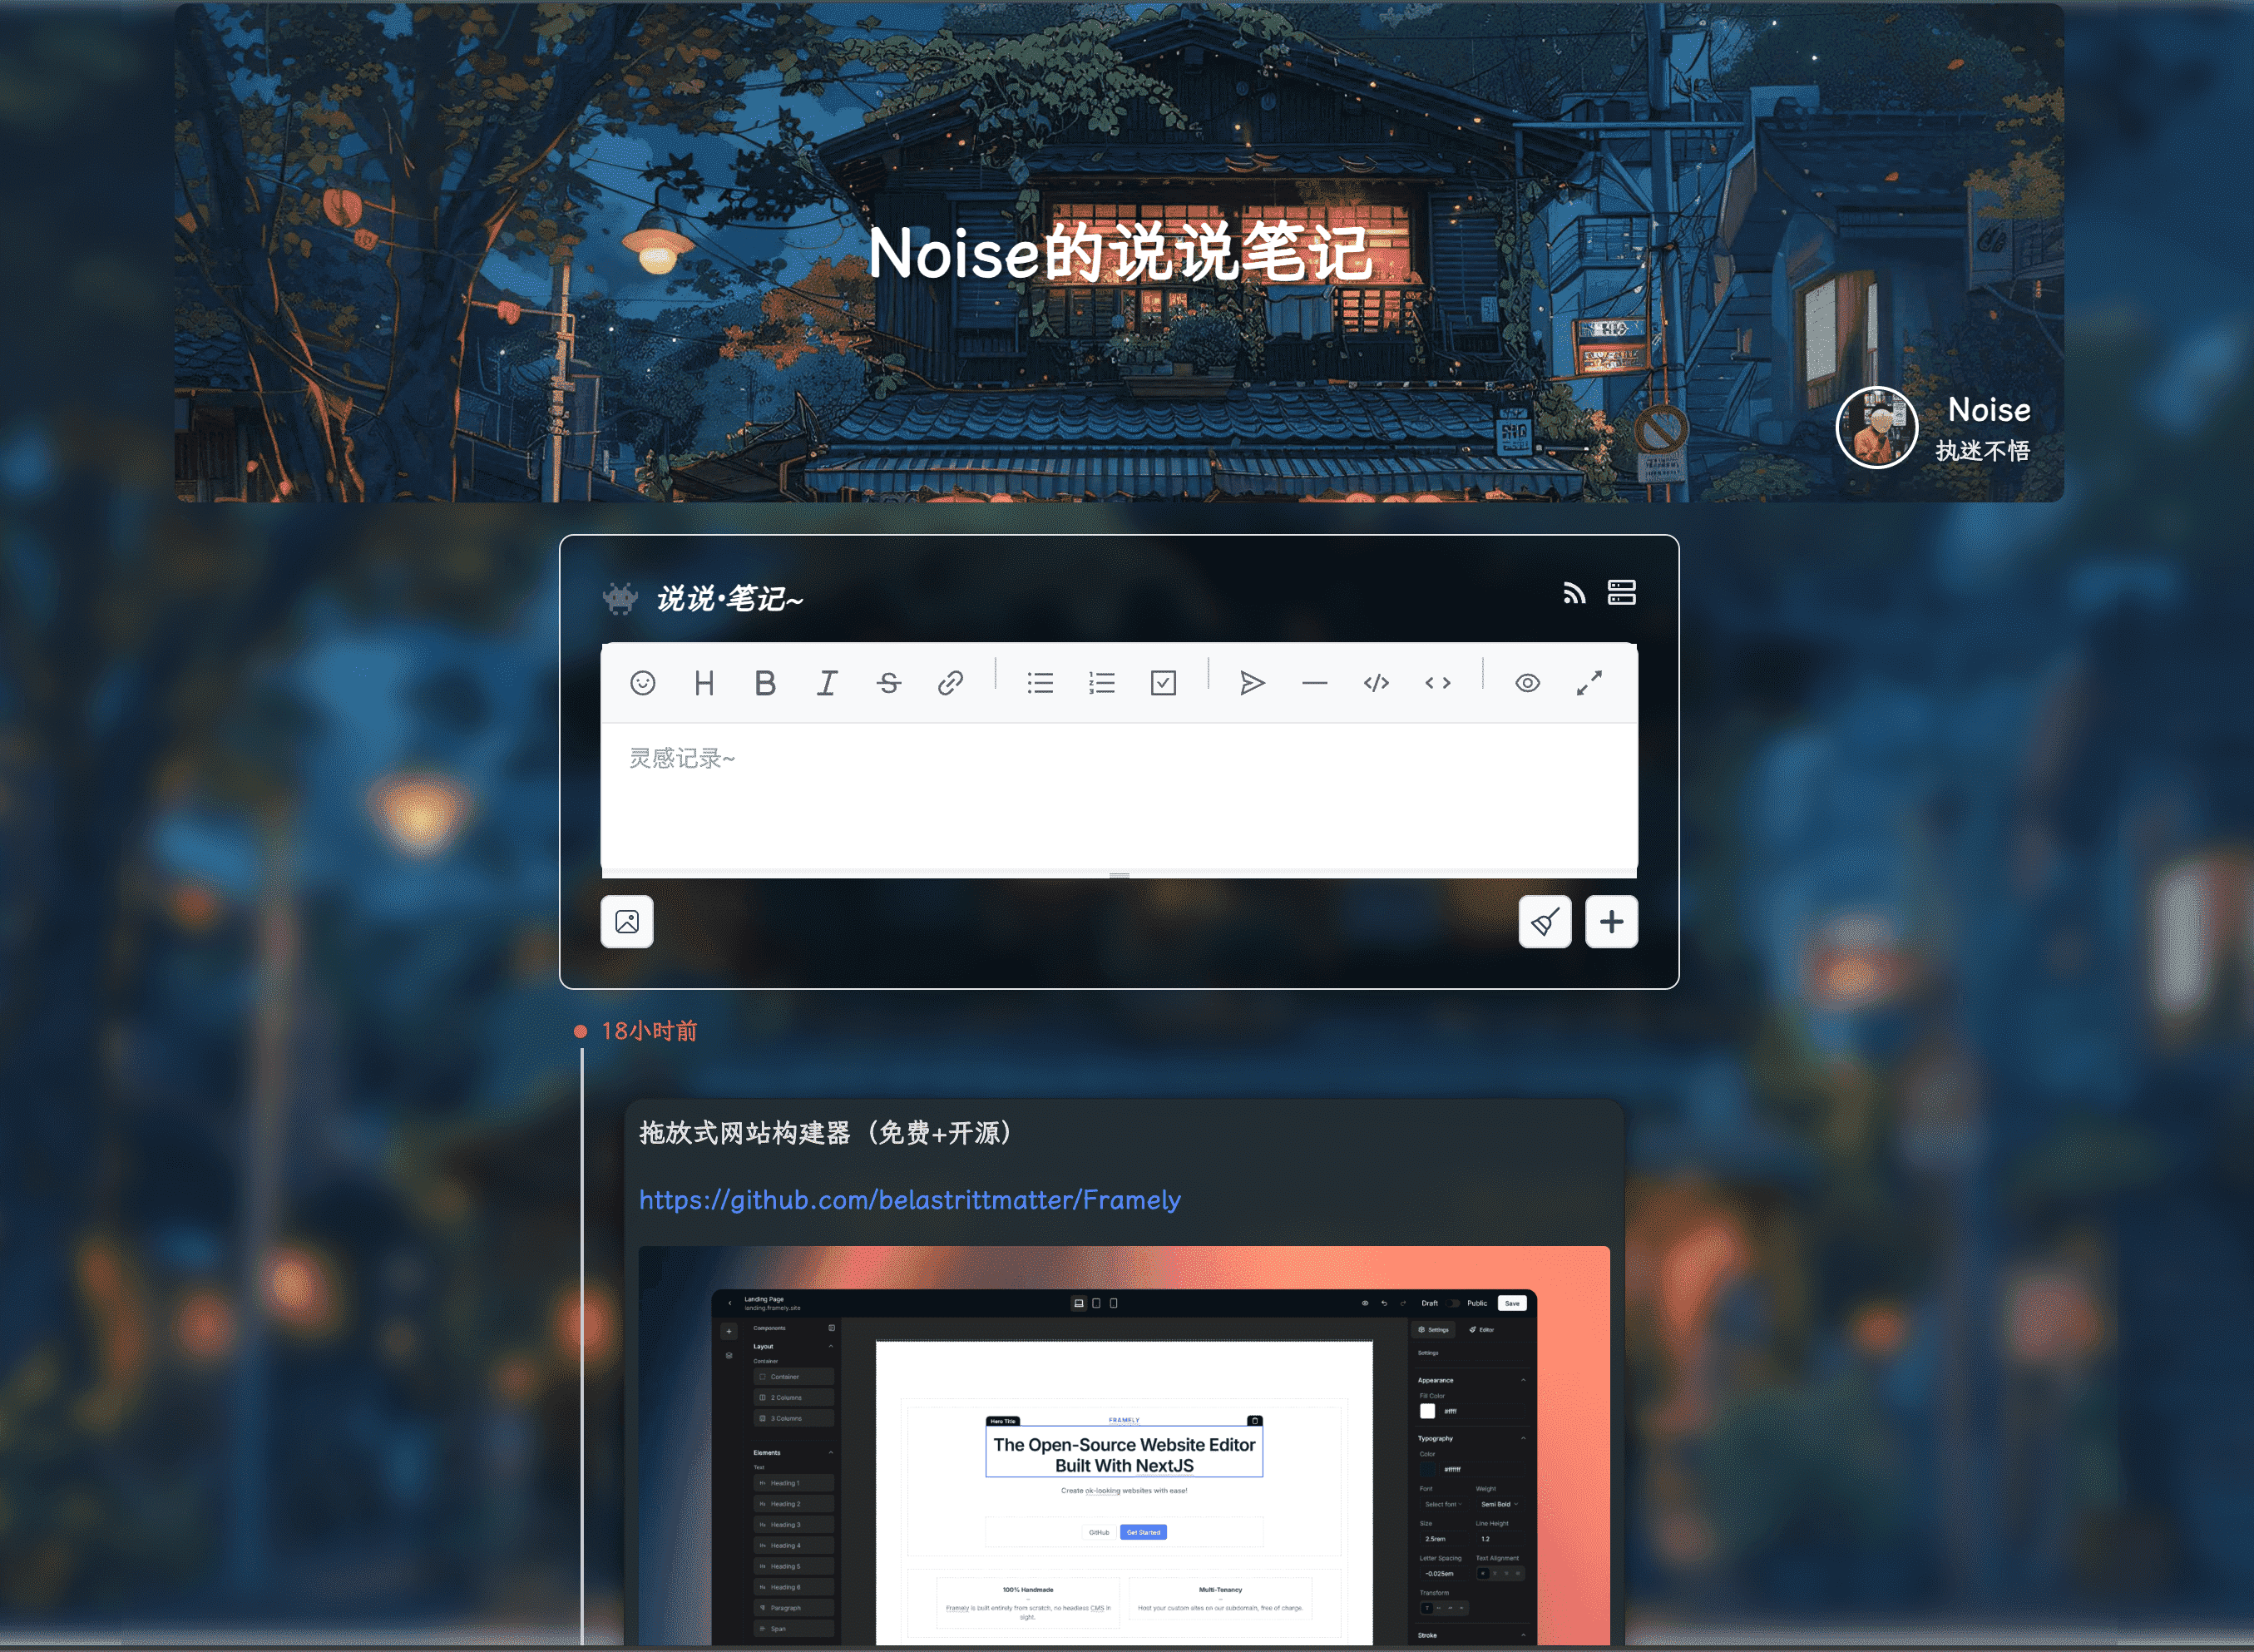
这是基于Ech0基本框架的二次开发、魔改及完善,类似朋友圈样式风格,支持后台配置修改如背景图、个性签名等,支持api 获取内容、更新操作等,支持对b站视频、网易云音乐、youtube等的解析添加、支持一键复制,一键生成内容图片、支持http post发送内容到平台,支持对接webhook、telegram、企业微信、飞书的一键推送,支持内容热力图组件等个性化组件,它完全属于个人的自定化使用,会加入定制化的一些功能,由于代码已重构,不同步于原版
原版介绍
Ech0 是一款专为轻量级分享而设计的开源自托管平台,支持快速发布与分享你的想法、文字与链接。简单直观的操作界面,轻松管理你的内容,让分享变得更加自由,确保数据完全掌控,随时随地与世界连接。
原版地址:https://github.com/lin-snow/Ech0
- 自适应高度和拖拽调整功能
- 扩展的工具栏功能
- 完整的响应式支持
- 平滑的过渡动画效果
- 优化的间距和字体设置
- md格式图片即时预览
- 添加定制化的组件
- 调整页面内容自适应高度和宽度
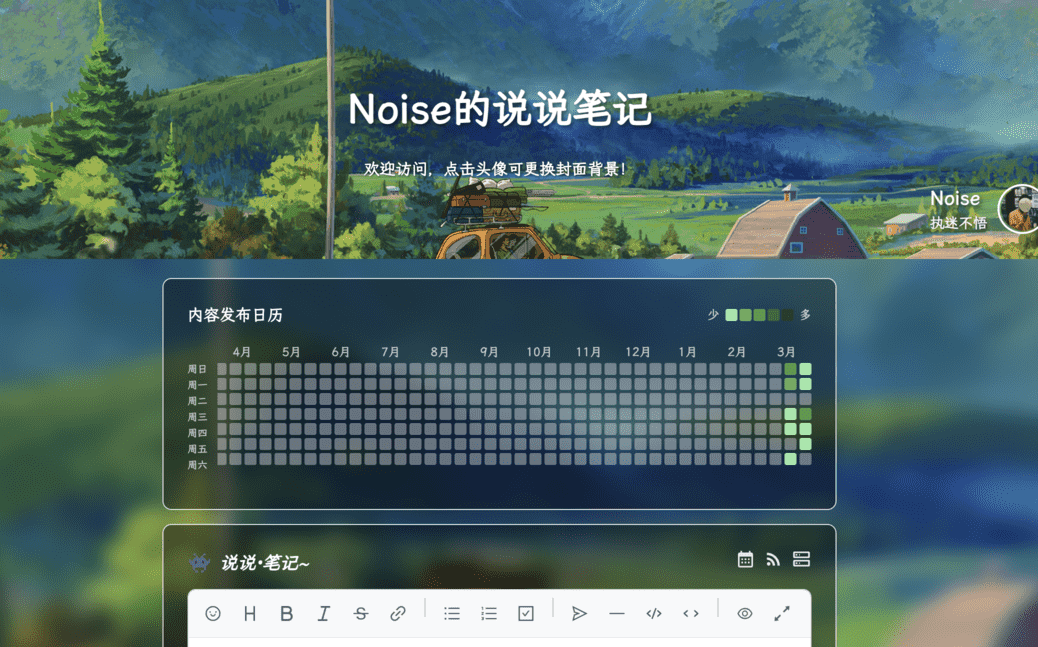
- 添加随机背景图的展示并带有模糊效果
- 增加md 格式下对网易云音乐、哔哩哔哩视频、youtube、qq 音乐的解析渲染
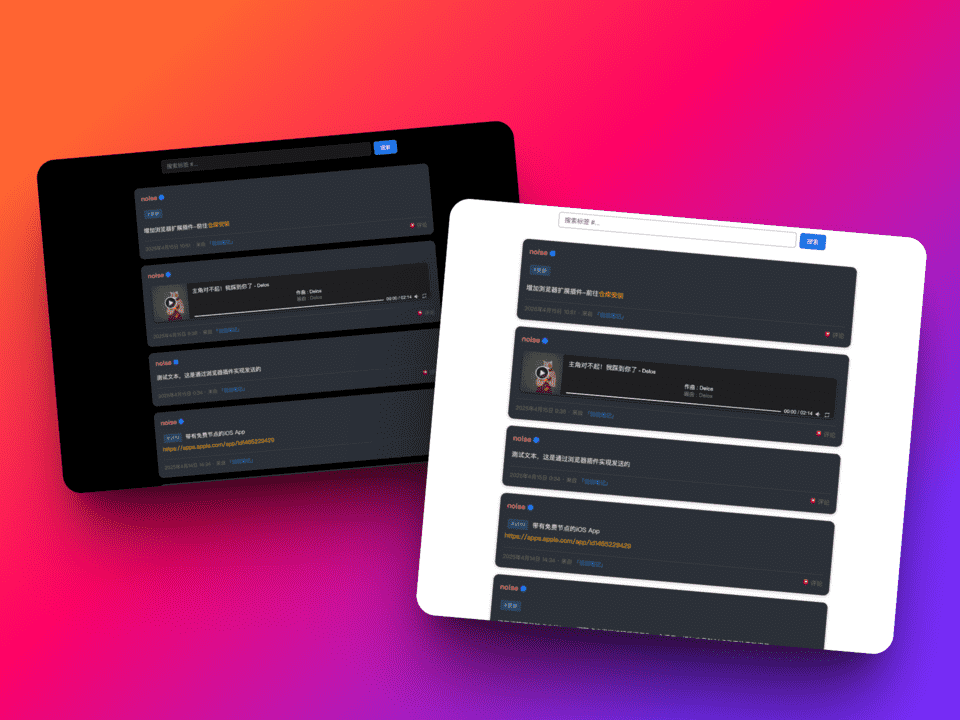
- 调整信息条目的背景ui 及显示尺寸的优化
- 调整ui及加载响应页面的整体显示效果
- 添加朋友圈样式主图banner,并和背景图使用相同
- 所有链接都可通过新标签页打开
- 长内容的折叠展开处理
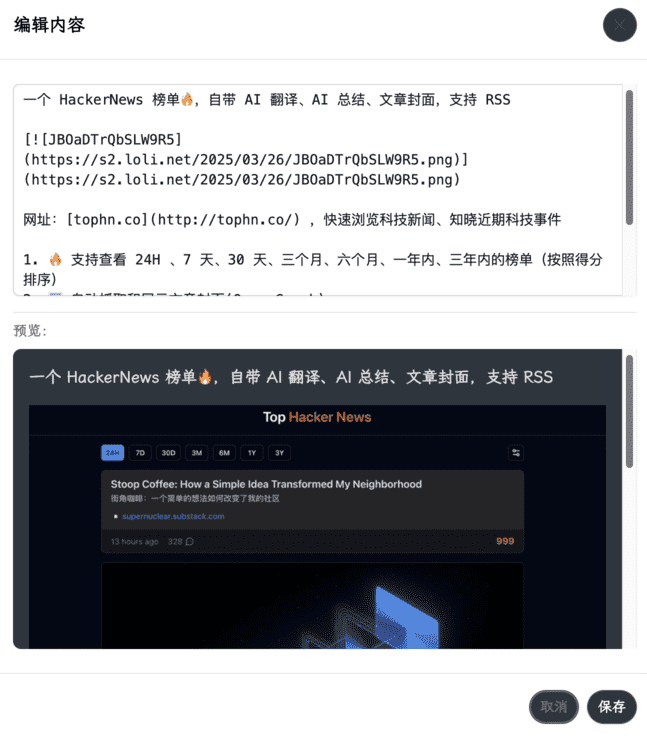
- 完善的二次编辑及预览保存
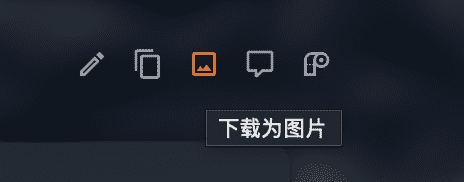
- 一键复制及生成内容图片的功能化组件
- 增加标签系统路由及组件
- 调整jwk验证为session方式,同时调整token的验证机制
- 调整优化数据库的迁移及连接处理
- 增加不同的路由及调整控制器
- 增加额外的外挂插件文件
- 增加定期清理缓存
-
优化图片灯箱效果,去除重复的灯箱代码,优化点击上一页/下一页时的加载逻辑和速度
-
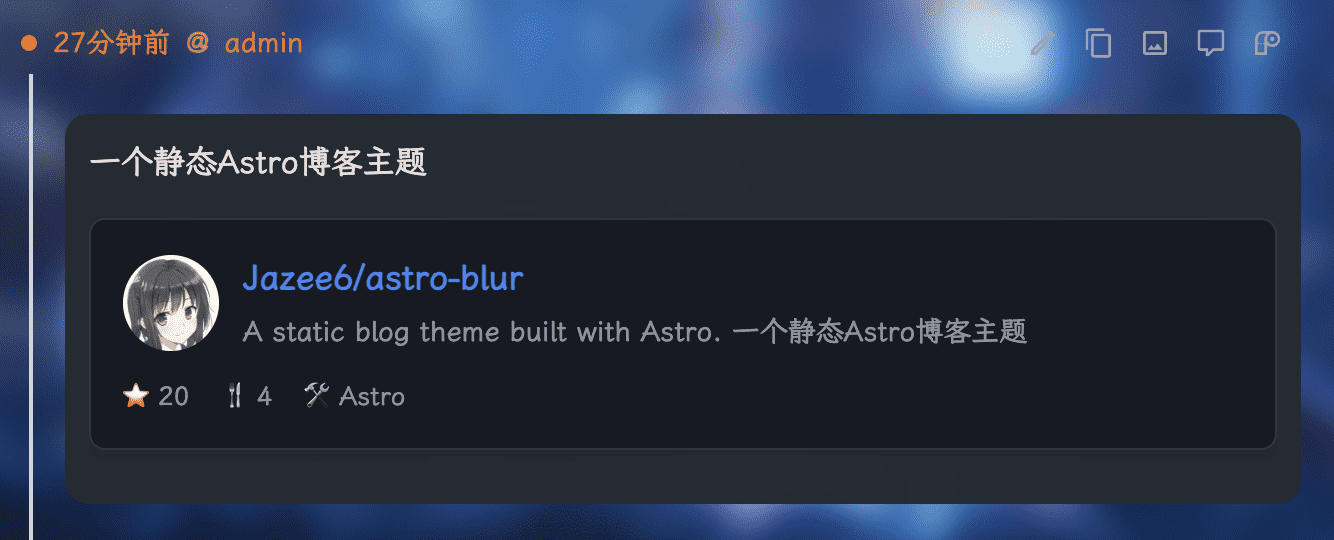
调整github卡片渲染时文本和头像的容器大小,优化卡片显示效果
-
增加github链接的预览卡片渲染功能
-
增加图床组件,支持图片上传至github 并可设置cdn 加速
-
增加了视频附件的上传路由及控制图标,调整了附件图片、视频上传时的逻辑(直接添加到编辑器中)修复了登录后刷新页面无法存储登录状态的bug
此次调整的附件上传依旧为本地存储,推荐NAS 玩家使用,其它用户不推荐,会占用带宽
-
修复rss指向前端地址bug,修复消息内容id指向链接不能定位的bug
-
增加完善web组件,可以在任意网站内嵌入该组件
-
增加浏览器扩展插件,位于chromeExpand文件夹内
-
修复标签不能被点击的bug,调整点击发送按钮后提示为一个提示,增加未登陆时点发表的登陆提示
-
增加一键部署无服务器平台-fly.io、zeabur、railway、vercel
-
增加扩展-快捷指令及popclip一键发布内容到站点
-
增加推送渠道(webhook、tg、企业微信、飞书)及实现一键推送-编辑器组件
-
添加支持双格式认证
- Authorization: Bearer your_token_here
- Authorization: your_token_here
-
增加了标签系统和图片api 路由
-
增加后台系统版本检测
-
增加远程数据库PostgreSQL、MySQL的连接支持,默认SQLite
-
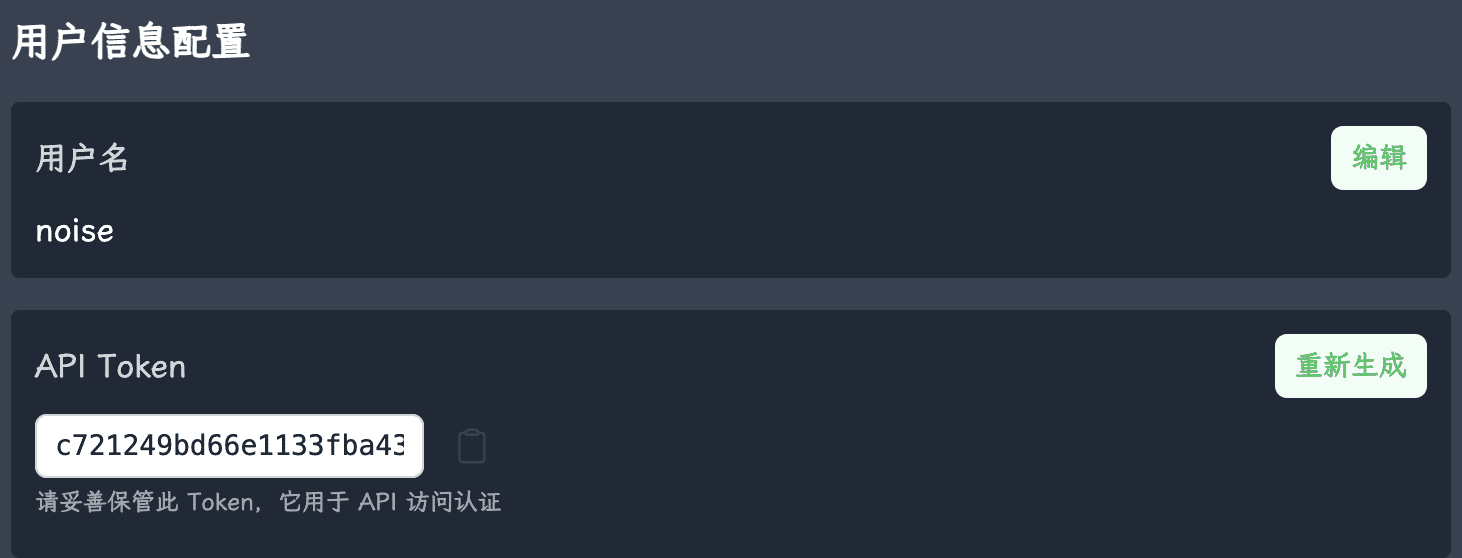
除了session 认证外增加Token认证,后台可设置更改,方便使用api发布信息
-
增加搜索功能组件
-
增加内容发布日历-热力图组件,默认不显示,点击日历图标后显示
-
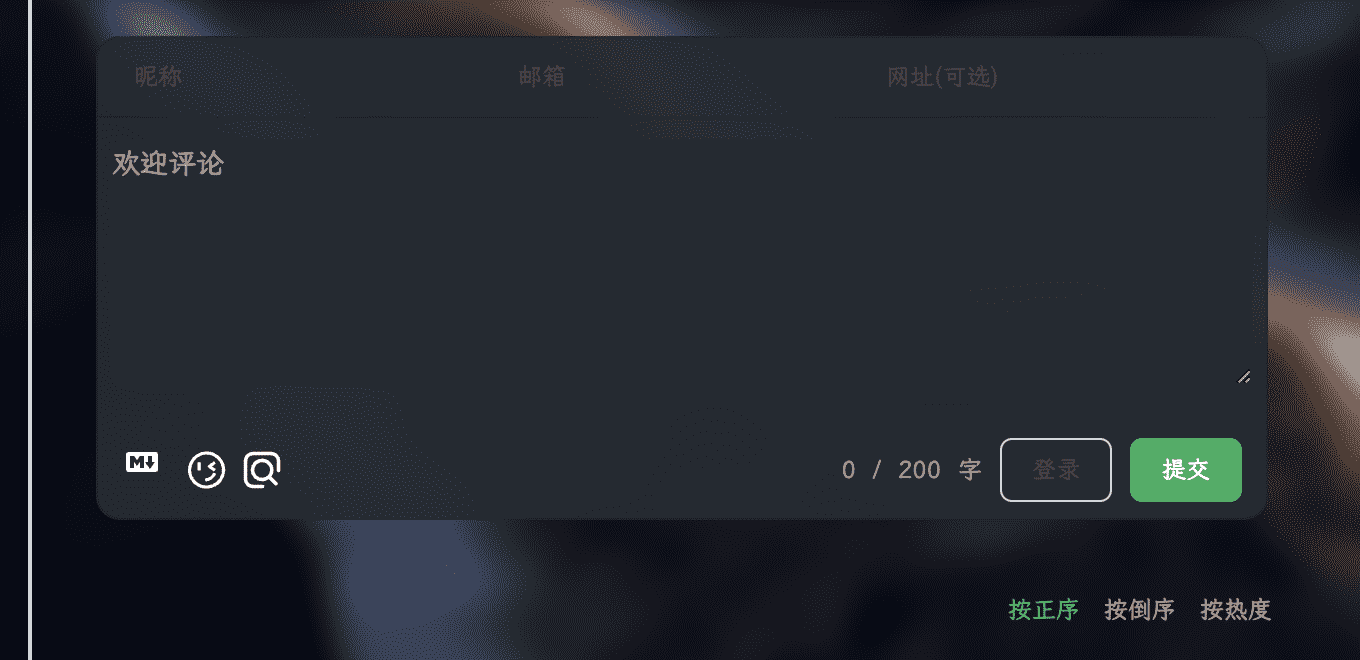
添加每条笔记条目的评论功能(属于外挂评论,因为容易集成和省事)
-
增加md格式图片下Fancybox灯箱模式(包括编辑器及笔记列表中),引入medium-zoom、fancybox组件
-
增加笔记内容显示高度的显示,超过700px时会折叠显示
-
内容条目上方添加一键复制功能
-
增加笔记内容二次编辑修改功能(管理员或原发布者权限)
-
优化编辑器预览及修改内容的预览样式
-
增加生成内容卡片的功能
-
添加了笔记内容发布者名称的显示(时间状态右侧)
-
修改删除逻辑,允许发布者删除自己的信息
-
将管理员判断逻辑移到了 services 层
-
调整后台界面
-
优化载入速度及调整背景图片载入逻辑
-
优化生成卡片图片效果
-
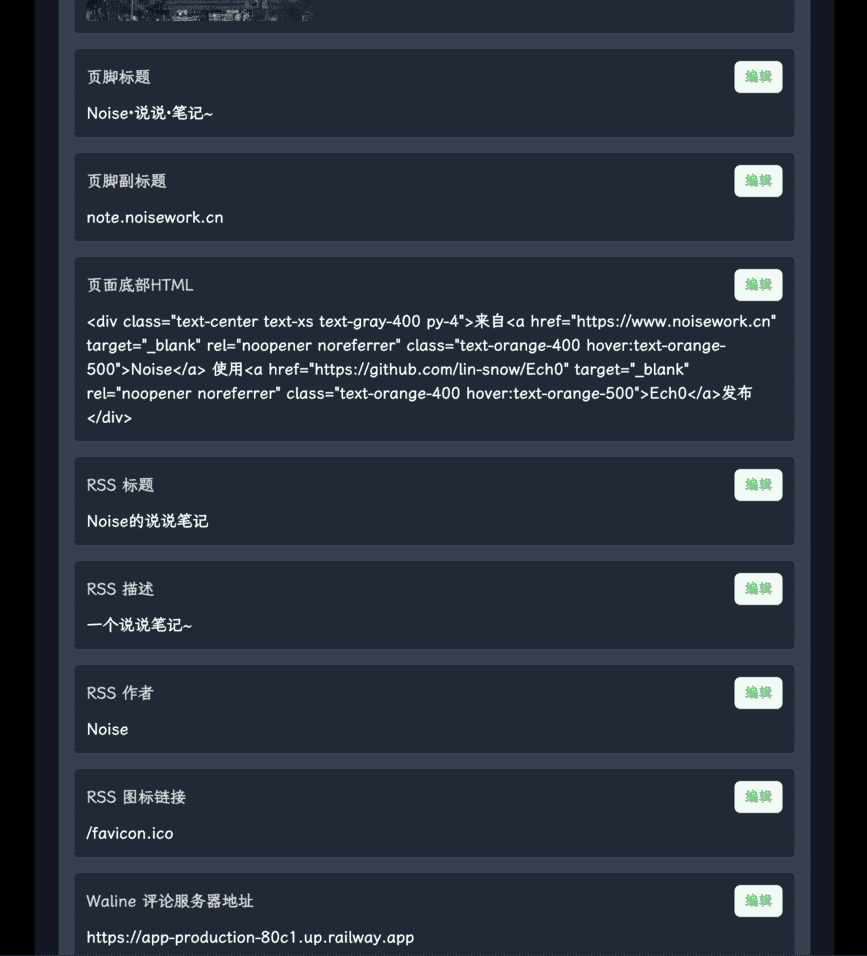
增加后台数据配置,包括评论、底部页脚、rss设置等
-
增加数据库文件的备份、上传


💡 部署完成后访问 ip:1314 即可使用
一键部署
docker run -d \
  --name Ech0-Noise \
  --platform linux/amd64 \
  -p 1314:1314 \
  -v /opt/data/noise.db:/app/data/noise.db \
  noise233/echo-noise
/opt/data/noise.db是你本地的原有数据库文件,如果没有,可以去掉这个挂载命令,它也会自动创建
默认用户名:admin
默认用户密码:admin
在该目录下执行以下命令启动服务(不修改环境变量时默认使用本地数据库.db 文件):
docker-compose up -d数据库使用 Neon PostgreSQL 云数据库服务,其它也支持
请先前往官网https://console.neon.tech部署好你的基础数据库
以下部署文件已放入根目录下的noise文件夹内
部署成功示例:
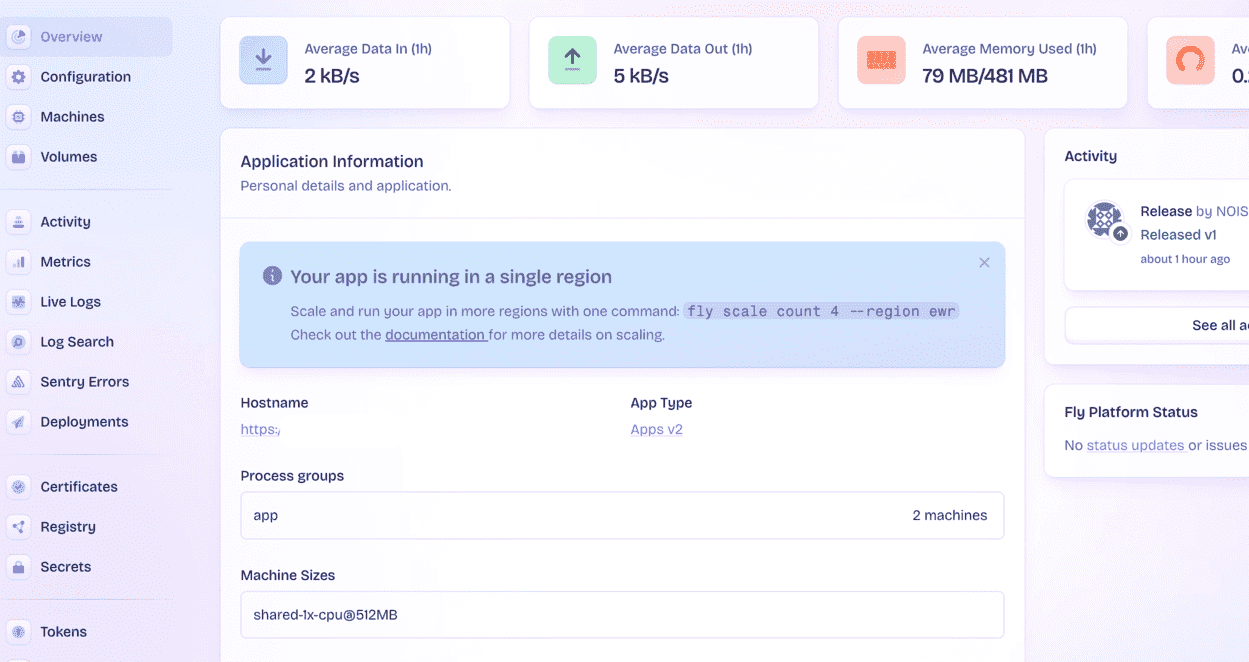
fly.toml
app = 'ech0-noise'    # 修改为你的自定义容器名
primary_region = 'hkg'

[experimental]
  auto_rollback = true

[build]
  image = 'noise233/echo-noise'
  dockerfile = 'Dockerfile'

[env]
  CGO_ENABLED = '1'
  DB_HOST = 'example.aws.neon.tech' # 修改为数据库的HOST地址
  DB_NAME = 'noise'        # 修改为数据库的名称
  DB_PASSWORD = 'example'  # 修改为数据库的密码
  DB_PORT = '5432'
  DB_SSL_MODE = 'require'
  DB_TYPE = 'postgres'
  DB_USER = 'noise_owner'  # 修改为数据库的用户名
  TZ = 'Asia/Shanghai'

[http_service]
  internal_port = 1314
  force_https = true
  auto_stop_machines = 'stop'
  auto_start_machines = true
  min_machines_running = 0

[[services]]
  protocol = 'tcp'
  internal_port = 1314

  [[services.ports]]
    port = 1314

[[vm]]
  memory = '512mb'
  cpu_kind = 'shared'
  cpus = 1
部署命令 在准备好 fly.toml 文件后,你可以使用以下命令来部署你的应用到 Fly.io:
fly launch
fly deploy
确保你已经安装并配置好了 Fly.io 的 CLI 工具,并且已经登录到你的 Fly.io 账号。如果你还没有安装 Fly.io CLI,可以通过以下命令安装:
curl -L https://fly.io/install.sh | sh
安装完成后,使用 fly auth login 登录到你的 Fly.io 账号。
zeabur.toml
app = "ech0-noise"

[build]
  dockerfile = "Dockerfile"
  image = "noise233/echo-noise"

[env]
  DB_TYPE = "postgres"
  DB_HOST = 'example.aws.neon.tech' # 修改为数据库的HOST地址
  DB_PORT = "5432"
  DB_USER = 'noise_owner'  # 修改为数据库的用户名
  DB_PASSWORD = 'example'  # 修改为数据库的密码
  DB_NAME = 'noise'        # 修改为数据库的名称
  DB_SSL_MODE = "require"
  CGO_ENABLED = "1"
  TZ = "Asia/Shanghai"

[http_service]
  internal_port = 1314
  force_https = true

[[services]]
  protocol = "tcp"
  internal_port = 1314

  [[services.ports]]
    port = 1314

[[vm]]
  memory = "512mb"
  cpu_kind = "shared"
  cpus = 1
zeabur deploy
railway.toml
app = "ech0-noise"

[build]
  dockerfile = "Dockerfile"
  image = "noise233/echo-noise"

[env]
  DB_TYPE = "postgres"
  DB_HOST = 'example.aws.neon.tech' # 修改为数据库的HOST地址
  DB_PORT = "5432"
  DB_USER = 'noise_owner'  # 修改为数据库的用户名
  DB_PASSWORD = 'example'  # 修改为数据库的密码
  DB_NAME = 'noise'        # 修改为数据库的名称
  DB_SSL_MODE = "require"
  CGO_ENABLED = "1"
  TZ = "Asia/Shanghai"

[service]
  internal_port = 1314
  protocol = "tcp"

[service.ports]
  port = 1314

[vm]
  memory = "512mb"
  cpu_kind = "shared"
  cpus = 1
railway up
注意
如果你是直接在平台拉取项目部署而不是通过命令部署,你需要拷贝fork本项目并将fly.toml、railway.toml、zeabur.toml文件放入根目录下才能一键部署
依赖环境
后端: Go 1.24.1+
前端: NodeJS v22.13.0,NPM
启动 在根目录下:
后端:
go run cmd/server/main.go
前端: 将.env文件中的prod那一行注释掉,然后保留dev即可
cd web # 进入前端目录

npm run dev
本地数据库直接docker部署即可
远程数据库服务则可以通过环境变量连接
连接远程 PostgreSQL:
docker run -d \
  --name Ech0-Noise \
  --platform linux/amd64 \
  -p 1314:1314 \
  -e DB_TYPE=postgres \
  -e DB_HOST=your.postgres.host \
  -e DB_PORT=5432 \
  -e DB_USER=your_username \
  -e DB_PASSWORD=your_password \
  -e DB_NAME=noise \
  -v /opt/data/images:/app/data/images \
  noise233/echo-noise
连接远程 MySQL:
docker run -d \
  --name Ech0-Noise \
  --platform linux/amd64 \
  -p 1314:1314 \
  -e DB_TYPE=mysql \
  -e DB_HOST=your.mysql.host \
  -e DB_PORT=3306 \
  -e DB_USER=your_username \
  -e DB_PASSWORD=your_password \
  -e DB_NAME=noise \
  -v /opt/data/images:/app/data/images \
  noise233/echo-noise
注意事项:
- 确保远程数据库允许外部连接
- 检查防火墙设置
- 使用正确的数据库连接信息
- 建议使用加密连接
- 注意数据库的字符集设置
对于 Neon PostgreSQL 这样的云数据库服务,需要使用特定的连接参数。以下是连接命令:
docker run -d \
  --name Ech0-Noise \
  --platform linux/amd64 \
  -p 1314:1314 \
  -e DB_TYPE=postgres \
  -e DB_HOST=your.host \
  -e DB_PORT=5432 \
  -e DB_USER=user_owner \
  -e DB_PASSWORD=password \
  -e DB_NAME=yourname \
  -e DB_SSL_MODE=require \
  -v /opt/data/images:/app/data/images \
  noise233/echo-noise
注意事项:
- 添加了
DB_SSL_MODE=require环境变量,因为 Neon 要求 SSL 连接 - 使用了连接 URL 中提供的主机名、用户名、密码和数据库名
- 保持图片目录的挂载
对于所有数据库类型(SQLite/PostgreSQL/MySQL),点击后台数据库下载按钮后,都会先备份数据库文件
- 然后会将包含数据库备份和图片打包成 zip 文件
- zip 文件中会包含:
- 数据库备份文件(.db/.sql)
- images 目录下的所有图片
备份过程:
本地 -> 执行备份命令 -> 生成备份文件 -> 打包下载

恢复过程:
上传备份文件 -> 解压缩 -> 执行恢复命令 -> 导入到云数据库
恢复要求:
- SQLite本地数据库备份和上传时默认使用的文件名是一致为noise.db
- 非本地数据库PostgreSQL/MySQL请命名为database.sql并放入database.zip来恢复
- 如果备份时zip中有图片文件夹则同时会恢复 images 目录下的所有图片
因api众多...需待更新完善...
(获取信息是get,发布是post)
先到后台获取api token,然后可以参考下面的命令运行或使用其它服务(记得将https://your.localhost.com 更改为你自己的服务地址)
# 发送纯文本信息
curl -X POST 'https://your.localhost.com/api/token/messages' \
-H 'Content-Type: application/json' \
-H 'Authorization: Bearer c721249bd66e1133fba430ea9e3c32f1' \
-d '{
  "content": "测试信息",
  "type": "text"
}'
# 方式1:使用 Markdown 语法发送文本
curl -X POST 'https://your.localhost.com/api/token/messages' \
-H 'Content-Type: application/json' \
-H 'Authorization: c721249bd66e1133fba430ea9e3c32f1' \
-d '{
"content": "# 标题\n这是一段文字\n",
"type": "text"
}'
# 方式2:使用 type: image 发送图片消息
curl -X POST 'https://your.localhost.com/api/token/messages' \
-H 'Content-Type: application/json' \
-H 'Authorization: c721249bd66e1133fba430ea9e3c32f1' \
-d '{
"content": "图片描述文字",
"type": "image",
"image": "https://example.com/image.jpg"
}'
如果你想使用session 认证方式
curl -v -X POST 'https://your.localhost.com/api/messages' \
-H 'Content-Type: application/json' \
--cookie "your_session_cookie" \
-d '{
  "content": "测试信息",
  "type": "text"
}'
对于图文混合消息,可以这样发送:
curl -X POST 'https://your.localhost.com/api/token/messages' \
-H 'Content-Type: application/json' \
-H 'Authorization: c721249bd66e1133fba430ea9e3c32f1' \
-d '{
"content": "# 这是标题\n\n这是一段文字说明\n\n\n\n继续写文字内容",
"type": "text"
}'或者使用 multipart 类型:
curl -X POST 'https://your.localhost.com/api/token/messages' \
-H 'Content-Type: application/json' \
-H 'Authorization: c721249bd66e1133fba430ea9e3c32f1' \
-d '{
"content": "# 这是标题\n\n这是一段文字说明",
"type": "multipart",
"image": "https://example.com/image.jpg"
}
- 路径:
/api/frontend/config - 方法: GET
- 描述: 获取前端配置信息
- 示例请求:
curl http://localhost:8080/api/frontend/config- 路径:
/api/login - 方法: POST
- 描述: 用户登录接口
- 请求体:
{
    "username": "admin",
    "password": "password"
}- 示例请求:
curl -X POST http://localhost:8080/api/login \
     -H "Content-Type: application/json" \
-d '{"username":"admin","password":"password"}'- 路径:
/api/register - 方法: POST
- 描述: 用户注册接口
- 请求体:
{
    "username": "newuser",
    "password": "password",
    "email": "user@example.com"
}- 示例请求:
curl -X POST http://localhost:8080/api/register \
     -H "Content-Type: application/json" \
-d '{"username":"newuser","password":"password","email":"user@example.com"}'- 路径:
/api/status - 方法: GET
- 描述: 获取系统运行状态
- 示例请求:
curl http://localhost:8080/api/status- 路径:
/api/messages - 方法: GET
- 描述: 获取所有公开消息
- 示例请求:
curl http://localhost:8080/api/messages- 路径:
/api/messages/:id - 方法: GET
- 描述: 获取指定ID的消息
- 示例请求:
curl http://localhost:8080/api/messages/1- 路径:
/api/messages/page - 方法: POST或GET
- 描述: 分页获取消息列表
- 请求体:
{
    "page": 1,
    "pageSize": 10
}- 示例请求:
curl -X POST http://localhost:8080/api/messages/page \
     -H "Content-Type: application/json" \
-d '{"page":1,"pageSize":10}'- 路径:
/api/messages/calendar - 方法: GET
- 描述: 获取消息发布热力图数据
- 示例请求:
curl http://localhost:8080/api/messages/calendar- 路径:
/api/messages/search - 方法: GET
- 参数:
- keyword: 搜索关键词
- page: 页码
- pageSize: 每页数量
- 示例请求:
curl "http://localhost:8080/api/messages/search?keyword=测试&page=1&pageSize=10"- 路径:
/rss - 方法: GET
- 描述: 获取 RSS 订阅内容
- 示例请求:
curl http://localhost:1314/rss- 路径:
/api/messages - 方法: POST
- 描述: 发布新消息
- 请求体:
{
    "content": "消息内容",
    "private": false,
    "imageURL": ""
}- 示例请求:
curl -X POST http://localhost:8080/api/messages \
     -H "Content-Type: application/json" \
     -H "Cookie: session=xxx" \
-d '{"content":"测试消息","private":false}'- 路径:
/api/messages/:id - 方法: PUT
- 描述: 更新指定消息
- 请求体:
{
    "content": "更新后的内容"
}- 示例请求:
curl -X PUT http://localhost:8080/api/messages/1 \
     -H "Content-Type: application/json" \
     -H "Cookie: session=xxx" \
-d '{"content":"更新后的内容"}'- 路径:
/api/messages/:id - 方法: DELETE
- 描述: 删除指定消息
- 示例请求:
curl -X DELETE http://localhost:8080/api/messages/1 \
-H "Cookie: session=xxx"- 路径:
/api/user - 方法: GET
- 描述: 获取当前登录用户信息
- 示例请求:
curl http://localhost:8080/api/user \
-H "Cookie: session=xxx"- 路径:
/api/user/change_password - 方法: PUT
- 请求体:
{
    "oldPassword": "旧密码",
    "newPassword": "新密码"
}- 示例请求:
curl -X PUT http://localhost:8080/api/user/change_password \
     -H "Content-Type: application/json" \
     -H "Cookie: session=xxx" \
-d '{"oldPassword":"old","newPassword":"new"}'- 路径:
/api/user/update - 方法: PUT
- 示例请求:
curl -X PUT http://localhost:8080/api/user/update \
     -H "Content-Type: application/json" \
     -H "Cookie: session=xxx" \
-d '{"username":"newname"}'- 路径:
/api/user/logout - 方法: POST
- 示例请求:
curl -X POST http://localhost:8080/api/user/logout \
-H "Cookie: session=xxx"- 路径:
/api/user/token - 方法: GET
- 示例请求:
curl http://localhost:8080/api/user/token \
-H "Cookie: session=xxx"- 路径:
/api/user/token/regenerate - 方法: POST
- 示例请求:
curl -X POST http://localhost:8080/api/user/token/regenerate \
-H "Cookie: session=xxx"- 路径:
/api/settings - 方法: PUT
- 请求体:
{
    "allowRegistration": true,
    "frontendSettings": {
        "siteTitle": "网站标题",
        "subtitleText": "副标题",
        "avatarURL": "头像URL",
        "username": "显示用户名",
        "description": "描述",
        "backgrounds": ["背景图URL"],
        "cardFooterTitle": "页脚标题",
        "cardFooterLink": "页脚链接",
        "pageFooterHTML": "页脚HTML",
        "rssTitle": "RSS标题",
        "rssDescription": "RSS描述",
        "rssAuthorName": "RSS作者",
        "rssFaviconURL": "RSS图标URL",
        "walineServerURL": "评论系统URL"
    }
}- 示例请求:
curl -X PUT http://localhost:8080/api/settings \
     -H "Content-Type: application/json" \
     -H "Cookie: session=xxx" \
-d '{"allowRegistration":true,"frontendSettings":{"siteTitle":"我的网站"}}'- 路径:
/api/backup/download - 方法: GET
- 示例请求:
curl http://localhost:8080/api/backup/download \
     -H "Cookie: session=xxx" \
--output backup.sql- 路径:
/api/backup/restore - 方法: POST
- 描述: 从备份文件恢复数据
- 示例请求:
curl -X POST http://localhost:8080/api/backup/restore \
     -H "Cookie: session=xxx" \
-F "file=@backup.sql"- 路径:
/api/images/upload - 方法: POST
- 描述: 上传图片文件
- 示例请求:
curl -X POST http://localhost:8080/api/images/upload \
     -H "Cookie: session=xxx" \
-F "file=@image.jpg"- 路径:
/api/notify/config - 方法: GET
- 描述: 获取当前推送渠道配置
- 示例请求:
curl -X GET http://localhost:8080/api/notify/config \
-H "Cookie: session=xxx"- 路径:
/api/notify/config - 方法: PUT
- 描述: 更新推送渠道配置
- 请求体示例:
{
  "webhookEnabled": true,
  "webhookURL": "https://webhook.example.com",
  "telegramEnabled": true,
  "telegramToken": "bot123:ABC",
  "telegramChatID": "-100123456",
  "weworkEnabled": false,
  "weworkKey": "",
  "feishuEnabled": true,
  "feishuWebhook": "https://open.feishu.cn/xxx",
  "feishuSecret": "signature_key"
}- 示例请求:
curl -X PUT http://localhost:8080/api/notify/config \
     -H "Cookie: session=xxx" \
     -H "Content-Type: application/json" \
     -d '{
           "webhookEnabled": true,
           "webhookURL": "https://webhook.example.com"
}'- 路径:
/api/notify/test - 方法: POST
- 描述: 测试指定推送渠道
- 请求体示例:
{
  "type": "telegram"
}- 示例请求:
curl -X POST http://localhost:8080/api/notify/test \
     -H "Cookie: session=xxx" \
     -H "Content-Type: application/json" \
-d '{"type": "telegram"}'- 路径:
/api/notify/send - 方法: POST
- 描述: 手动触发推送(需已配置推送渠道)
- 请求体示例:
{
  "content": "测试消息内容",
  "images": ["https://example.com/image.jpg"],
  "format": "markdown"
}- 示例请求:
curl -X POST http://localhost:8080/api/notify/send \
     -H "Cookie: session=xxx" \
     -H "Content-Type: application/json" \
     -d '{"content": "紧急通知!"}'
注意事项:
- 所有需要认证的接口都需要在请求头中携带有效的 session cookie
- 部分接口可能需要管理员权限
- 所有请求示例中的域名和端口号需要根据实际部署情况调整
- 文件上传接口需要使用 multipart/form-data 格式
- Token 认证接口可以使用 Token 替代 session 进行认证
目前会构建两个版本,
稳定版:latest镜像
实验版:last镜像
如果你需要构建自己的镜像发布-示例:
docker buildx build --platform linux/amd64,linux/arm64 -t noise233/echo-noise:latest --push --no-cache .
其中,你需要设置设置源数据库和目标数据库的路径,源数据库为memos_prod.db(memos数据)目标数据库为database.db(本站数据库),你还需要修改构建插入的数据中的用户名为你自己的用户名,分别迁移了原文本内容、发布时间,可以在noise/memos迁移文件夹中找到该脚本
,运行python3 main.py即可,
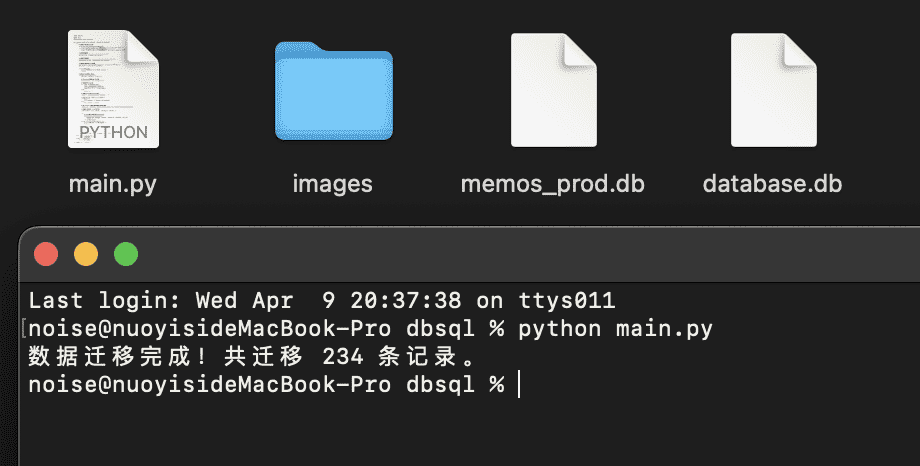
迁移结束后将你的数据库文件和原图片文件夹(有的话)打包为zip格式,进入站点后台选择恢复数据上传即可。
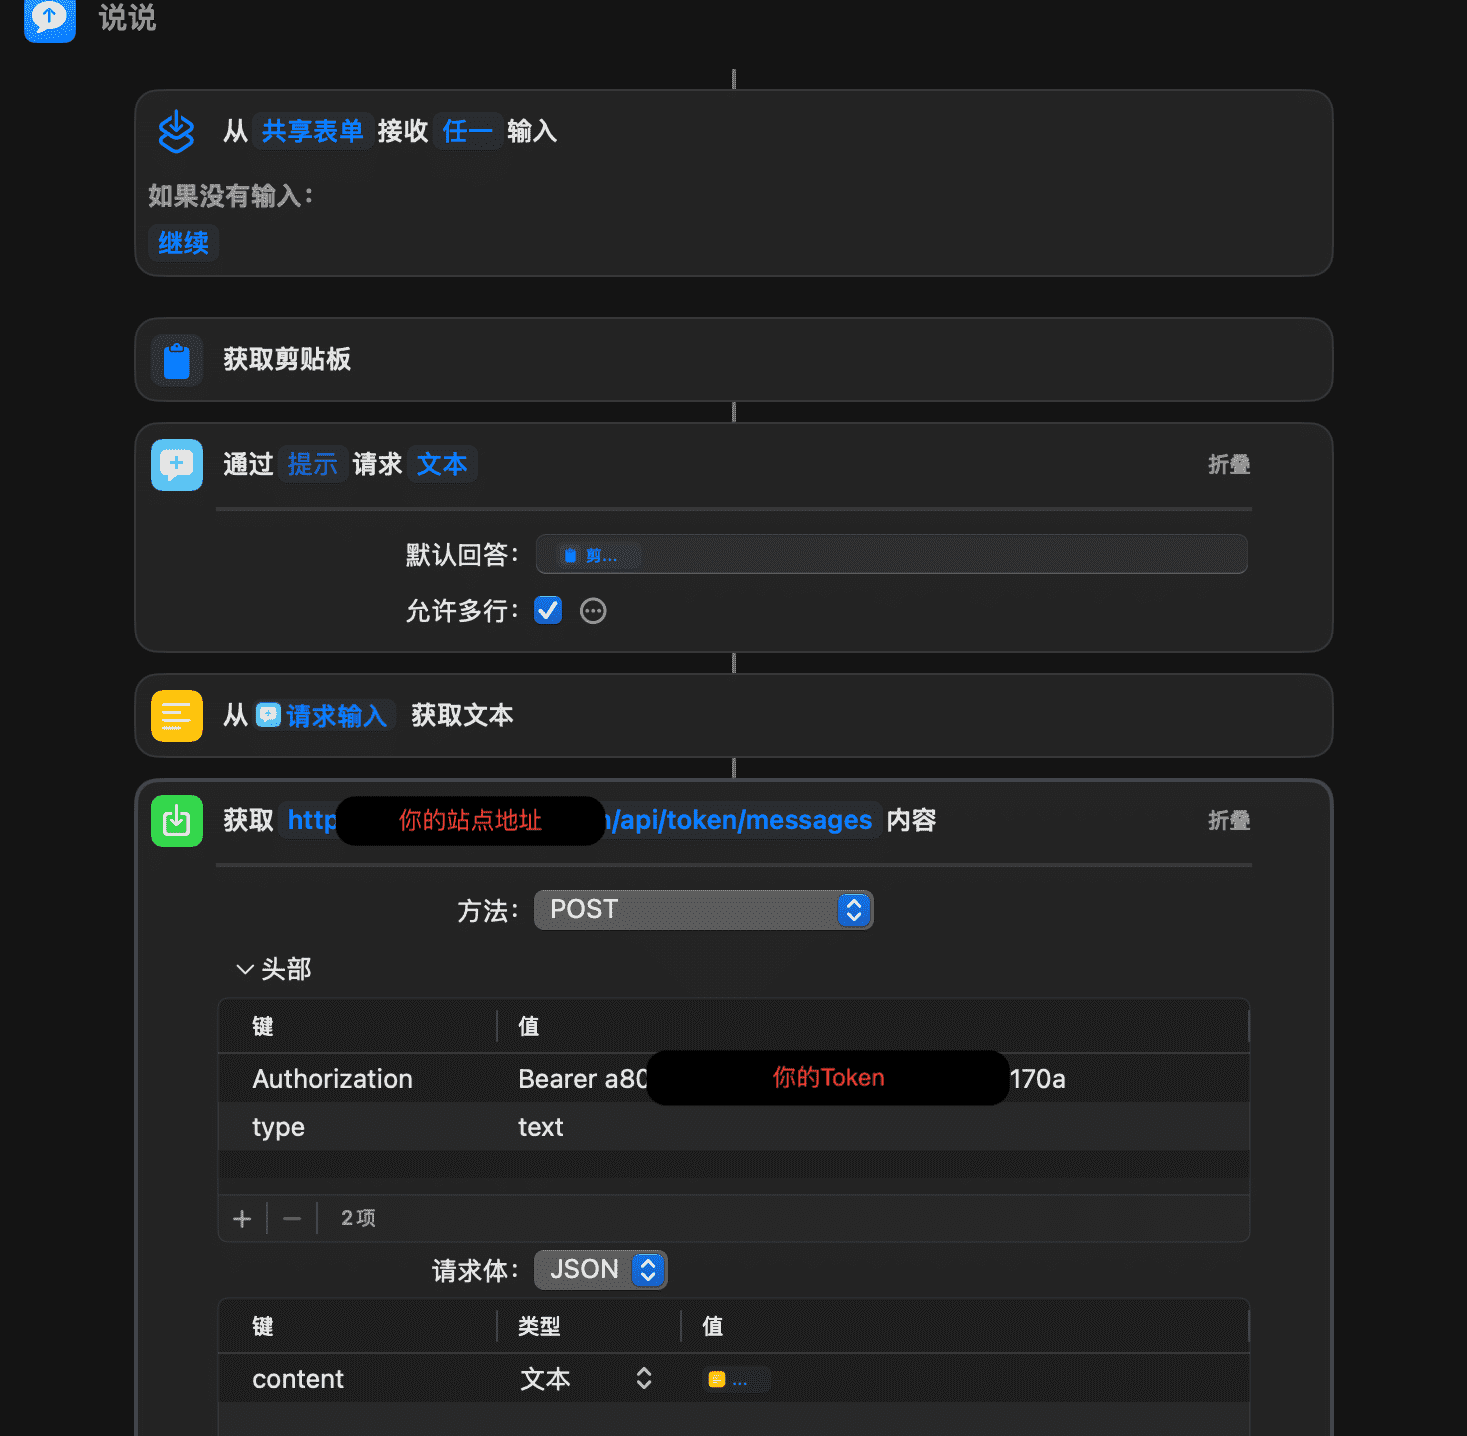
选中后自动识别安装,发送时会自动添加一个popclip开头的标签,token可在后台找到
// #popclip extension for Send to Shuo
// name: 说说笔记
// icon: square filled 说
// language: javascript
// module: true
// entitlements: [network]
// options: [{
//   identifier: "siteUrl",
//   label: "服务端地址",
//   type: "string",
//   defaultValue: "https://note.noisework.cn",
//   description: "请确保地址正确,不要带末尾斜杠"
// }, {
//   identifier: "token",
//   label: "API Token",
//   type: "string",
//   description: "从设置页面获取最新Token"
// }]

async function sendToShuo(input, options) {
    try {
        // 参数预处理
        const siteUrl = (options.siteUrl || "").replace(/\/+$/g, "");
        const token = (options.token || "").trim();
        const content = (input.text || "").trim();

        // 验证参数
        if (!/^https:\/\/[\w.-]+(:\d+)?$/.test(siteUrl)) {
            throw new Error("地址格式错误,示例: https://note.noisework.cn");
        }
        if (!token) throw new Error("Token不能为空");
        if (!content) throw new Error("选中文本不能为空");

        // 发送请求
        await sendRequestWithXMLHttpRequest(siteUrl, token, content);
        PopClip.showText("✓ 发送成功");
    } catch (error) {
        handleRequestError(error);
    }
}

// 使用 XMLHttpRequest 实现网络请求
function sendRequestWithXMLHttpRequest(siteUrl, token, content) {
    return new Promise((resolve, reject) => {
        const xhr = new XMLHttpRequest();
        const url = `${siteUrl}/api/token/messages`;

        xhr.open("POST", url, true);
        xhr.setRequestHeader("Content-Type", "application/json");
        xhr.setRequestHeader("Authorization", `Bearer ${token}`);

        xhr.timeout = 10000; // 设置超时时间(10秒)

        // 设置回调函数
        xhr.onreadystatechange = () => {
            if (xhr.readyState === XMLHttpRequest.DONE) {
                if (xhr.status >= 200 && xhr.status < 300) {
                    resolve(xhr.responseText);
                } else {
                    let errorMsg = `请求失败 (${xhr.status})`;
                    try {
                        const data = JSON.parse(xhr.responseText);
                        errorMsg = data.message || errorMsg;
                    } catch {}
                    reject(new Error(errorMsg));
                }
            }
        };

        // 处理网络错误
        xhr.onerror = () => reject(new Error("网络错误"));

        // 处理超时错误
        xhr.ontimeout = () => reject(new Error("请求超时"));

        try {
            // 发送请求
            const payload = JSON.stringify({
                content: `#Popclip\n${content}`,
                type: "text"
            });
            xhr.send(payload);
        } catch (error) {
            reject(new Error("请求发送失败: " + error.message));
        }
    });
}

// 错误处理
function handleRequestError(error) {
    console.error("请求错误:", error);

    const errorMap = {
        "Failed to fetch": "无法连接到服务器",
        "aborted": "请求超时",
        "网络错误": "网络错误",
        "401": "认证失败,请检查Token",
        "404": "API地址不存在"
    };

    const message = Object.entries(errorMap).find(([key]) =>
        error.message.includes(key)
    )?.[1] || `请求错误: ${error.message.split('\n')[0].slice(0, 50)}`;

    PopClip.showText(`❌ ${message}`);
}

exports.actions = [{
    title: "发送至说说笔记",
    code: sendToShuo,
    icon: "square filled 说"
}];
前往chromeExpand查看说明,安装请在浏览器扩展页面点击加载已解压缩文件夹安装
配置(htmlwidgets内)
修改前端html即可
<script>
        window.note = {
            host: 'https://note.noisework.cn', // 修改为你的服务器地址
            limit: '10',
            domId: '#note',
            commentServer: 'https://yoursite.com', // 修改为你的评论服务器地址
            sourceName: '「说说笔记」' // 添加来源名称配置
        };
数据库可以直接迁移吗
1、直接上传至部署时挂载的路径中,重新启用,或者在容器文件夹/app/data/noise.db直接替换即可
2、使用后台数据库管理备份功能,支持一键下载、上传
数据库文件下载为zip格式,上传也必须为zip,本地数据库恢复包中必须有noise.db文件
👉如何自定义化前端数据后添加到数据库?
需要在setting.go、migrate.go、models.go、controllers.go同时写入前端参数的后端定义,并修改前端参数信息为后端可读取的参数,其中controllers.go为控制器
- database.go 用于数据库连接管理
- migrate.go 用于数据库迁移和数据初始化
👉前端基本在web目录下,目前模版文件为components目录文件,pages下index.vue为父级模版
👉建议:不要和我一样在同一个文件里修改添加,造成一个文件上千行代码...请尽量使用父子层级来添加代码
- 卡片生成的美化
- 优化编辑器
- 增加发布热力图组件
- 加入搜索功能
- post请求发布内容到站内
- 后台和前端数据的匹配完善
- 加入标签路由及组件
- 加入一键推送
- 其它组件的添加
Caution
本版本是在原版旧版本基础上进行改进,不保证兼容原版,但会进行优化,出于对原版的尊重和保护,本版仅在完善到一定程度才会开放开源