
- Python Module for VMware Cloud Foundation Health Monitoring in VMware Aria Operations
This content supports the Health Reporting and Monitoring for VMware Cloud Foundation validated solution which enables the user to monitor the operational state of your VMware Cloud Foundation environment through custom dashboards, alerts, and notifications. These custom dashboards are intended to serve as an extension to native VMware Aria Operations dashboards and dashboards that are enabled using the respective management packs.
- VMware Cloud Foundation 5.2
- VMware Cloud Foundation 5.1
- VMware Cloud Foundation 5.0
- VMware Cloud Foundation 4.5
- Microsoft Windows Server 2019 and 2022
- VMware Photon OS 3.0 and 4.0
Follow the Python Beginners Guide to download and install Python.
Install required Python libraries by running the following commands on the host virtual machine:
pip install requests
pip install setuptools
pip install paramiko
pip install maskpass==0.3.1- PowerShell Core 7.2.0 or later
- PowerShell Module for VMware Cloud Foundation Reporting - latest version
Follow the Implementation of Health Reporting and Monitoring for VMware Cloud Foundation from Health Reporting and Monitoring for VMware Cloud Foundation
For disconnected environments (e.g., dark-site, air-gapped), you can save the Health Reporting and Monitoring Python module and its dependencies from the PyPI using the below instructions.
-
On the target system, create a directory to save the Python modules
mkdir -p /opt/vmware/hrm-modules -
From a system with an Internet connection, make a modules directory and create a new file
requirements.txtinside it.mkdir -p /home/hrm-modules/ cd /home/hrm-modules/ vi requirements.txt
-
Add below content to the
requirements.txtfile and save it.requests setuptools paramiko maskpass==0.3.1
-
Create another file
module.txtin the same location.vi module.txt -
Add below content to the
module.txtfile and save it.vmware-cloud-foundation-health-monitoring -
From a system with an Internet connection, save the module and its dependencies from PyPI by running the following commands in the terminal:
pip download -r module.txt
pip download -r requirements.txt
-
From the system with an Internet connection, copy the module and its dependencies to a target system by running the following commands in the terminal:
scp -r /home/vcf/hrm-modules/* username@remote_host:/opt/vmware/hrm-modules/ -
On the target system, install the module and its dependencies by running the following commands in the terminal:
cd /opt/vmware/hrm-modules
pip install -r requirements.txt --no-index --find-links .
pip install -r module.txt --no-index --find-links . -t /opt/vmware/hrm-<sddc_manager_vm_name>
-
From a system with an Internet connection, make a modules folder
F:\hrm-modules. -
Create a new file
requirements.txtinside the modules folder. -
Add the below content to the
requirements.txtfile and save it.requests setuptools paramiko maskpass==0.3.1
-
In the modules folder
f:\hrm-modules, create a new filemodule.txt -
Add below content to
module.txtfile and save it.vmware-cloud-foundation-health-monitoring -
From a system with an Internet connection, save the module and its dependencies from PyPI by running the following commands from cmdline:
cd f:\hrm-modules
pip download -r module.txt
pip download -r requirements.txt
-
From the system with the Internet connection, copy the module and its dependencies to a target system by running the following commands in the PowerShell console:
Copy-Item -Path F:\hrm-modules\* -Destination '\\<destination_host>\C$\vmware\hrm-modules
-
On the target system, install the module and its dependencies by running the following commands in the terminal:
cd c:\vmware\hrm-modules
pip install -r requirements.txt --no-index --find-links .
pip install -r module.txt --no-index --find-links . -t c:\vmware\hrm-<sddc_manager_vm_name>
Once the Python modules are installed, continue to follow the Implementation of Health Reporting and Monitoring for VMware Cloud Foundation from Health Reporting and Monitoring for VMware Cloud Foundation
-
Log in to the host virtual machine at
<host_virtual_machine_fqdn>:22as therootuser by using a Secure Shell (SSH) client. -
Update the Python Module for Health Reporting and Monitoring in VMware Aria Operations.
pip install vmware-cloud-foundation-health-monitoring --target=/opt/vmware/hrm-<sddc_manager_vm_name> --upgrade -
Provide execute permissions to the files in the
hrm-<sddc_manager_vm_name>directory.chmod -R 755 /opt/vmware/hrm-<sddc_manager_vm_name> -
Switch to the
hrm-<sddc_manager_vm_name>/maindirectory.cd /opt/vmware/hrm-<sddc_manager_vm_name>/main -
Edit the
env.jsonfile and configure the values according to your VMware Cloud Foundation Planning and Preparation Workbook.vi env.json -
Encrypt the service account passwords.
python encrypt-passwords.py -
Enter the password for the VMware Aria Operations service account.
-
Enter the password for the SDDC Manager service account.
-
Enter the password for the SDDC Manager appliance local user.
-
Repeat this procedure for each VMware Cloud Foundation instance.
-
Log in to the host virtual machine at
<host_virtual_machine_fqdn>as theAdministratoruser by using a Remote Desktop Connection (RDC) client and open a PowerShell console. -
Start Windows Command Prompt.
-
Update the Python Module for Health Reporting and Monitoring in VMware Aria Operations.
pip install vmware-cloud-foundation-health-monitoring --target=C:\vmware\hrm-<sddc_manager_vm_name>\ --upgrade -
Change to the
hrm-<sddc_manager_vm_name>\mainfolder.cd c:\vmware\hrm-<sddc_manager_vm_name>\main -
Edit the
env.jsonfile and configure the values according to your VMware Cloud Foundation Planning and Preparation Workbook.notepad env.json -
Encrypt the service account passwords.
python encrypt-passwords.py -
Enter the password for the VMware Aria Operations service account.
-
Enter the password for the SDDC Manager service account.
-
Enter the password for the SDDC Manager appliance local user.
-
Repeat this procedure for each VMware Cloud Foundation instance.
-
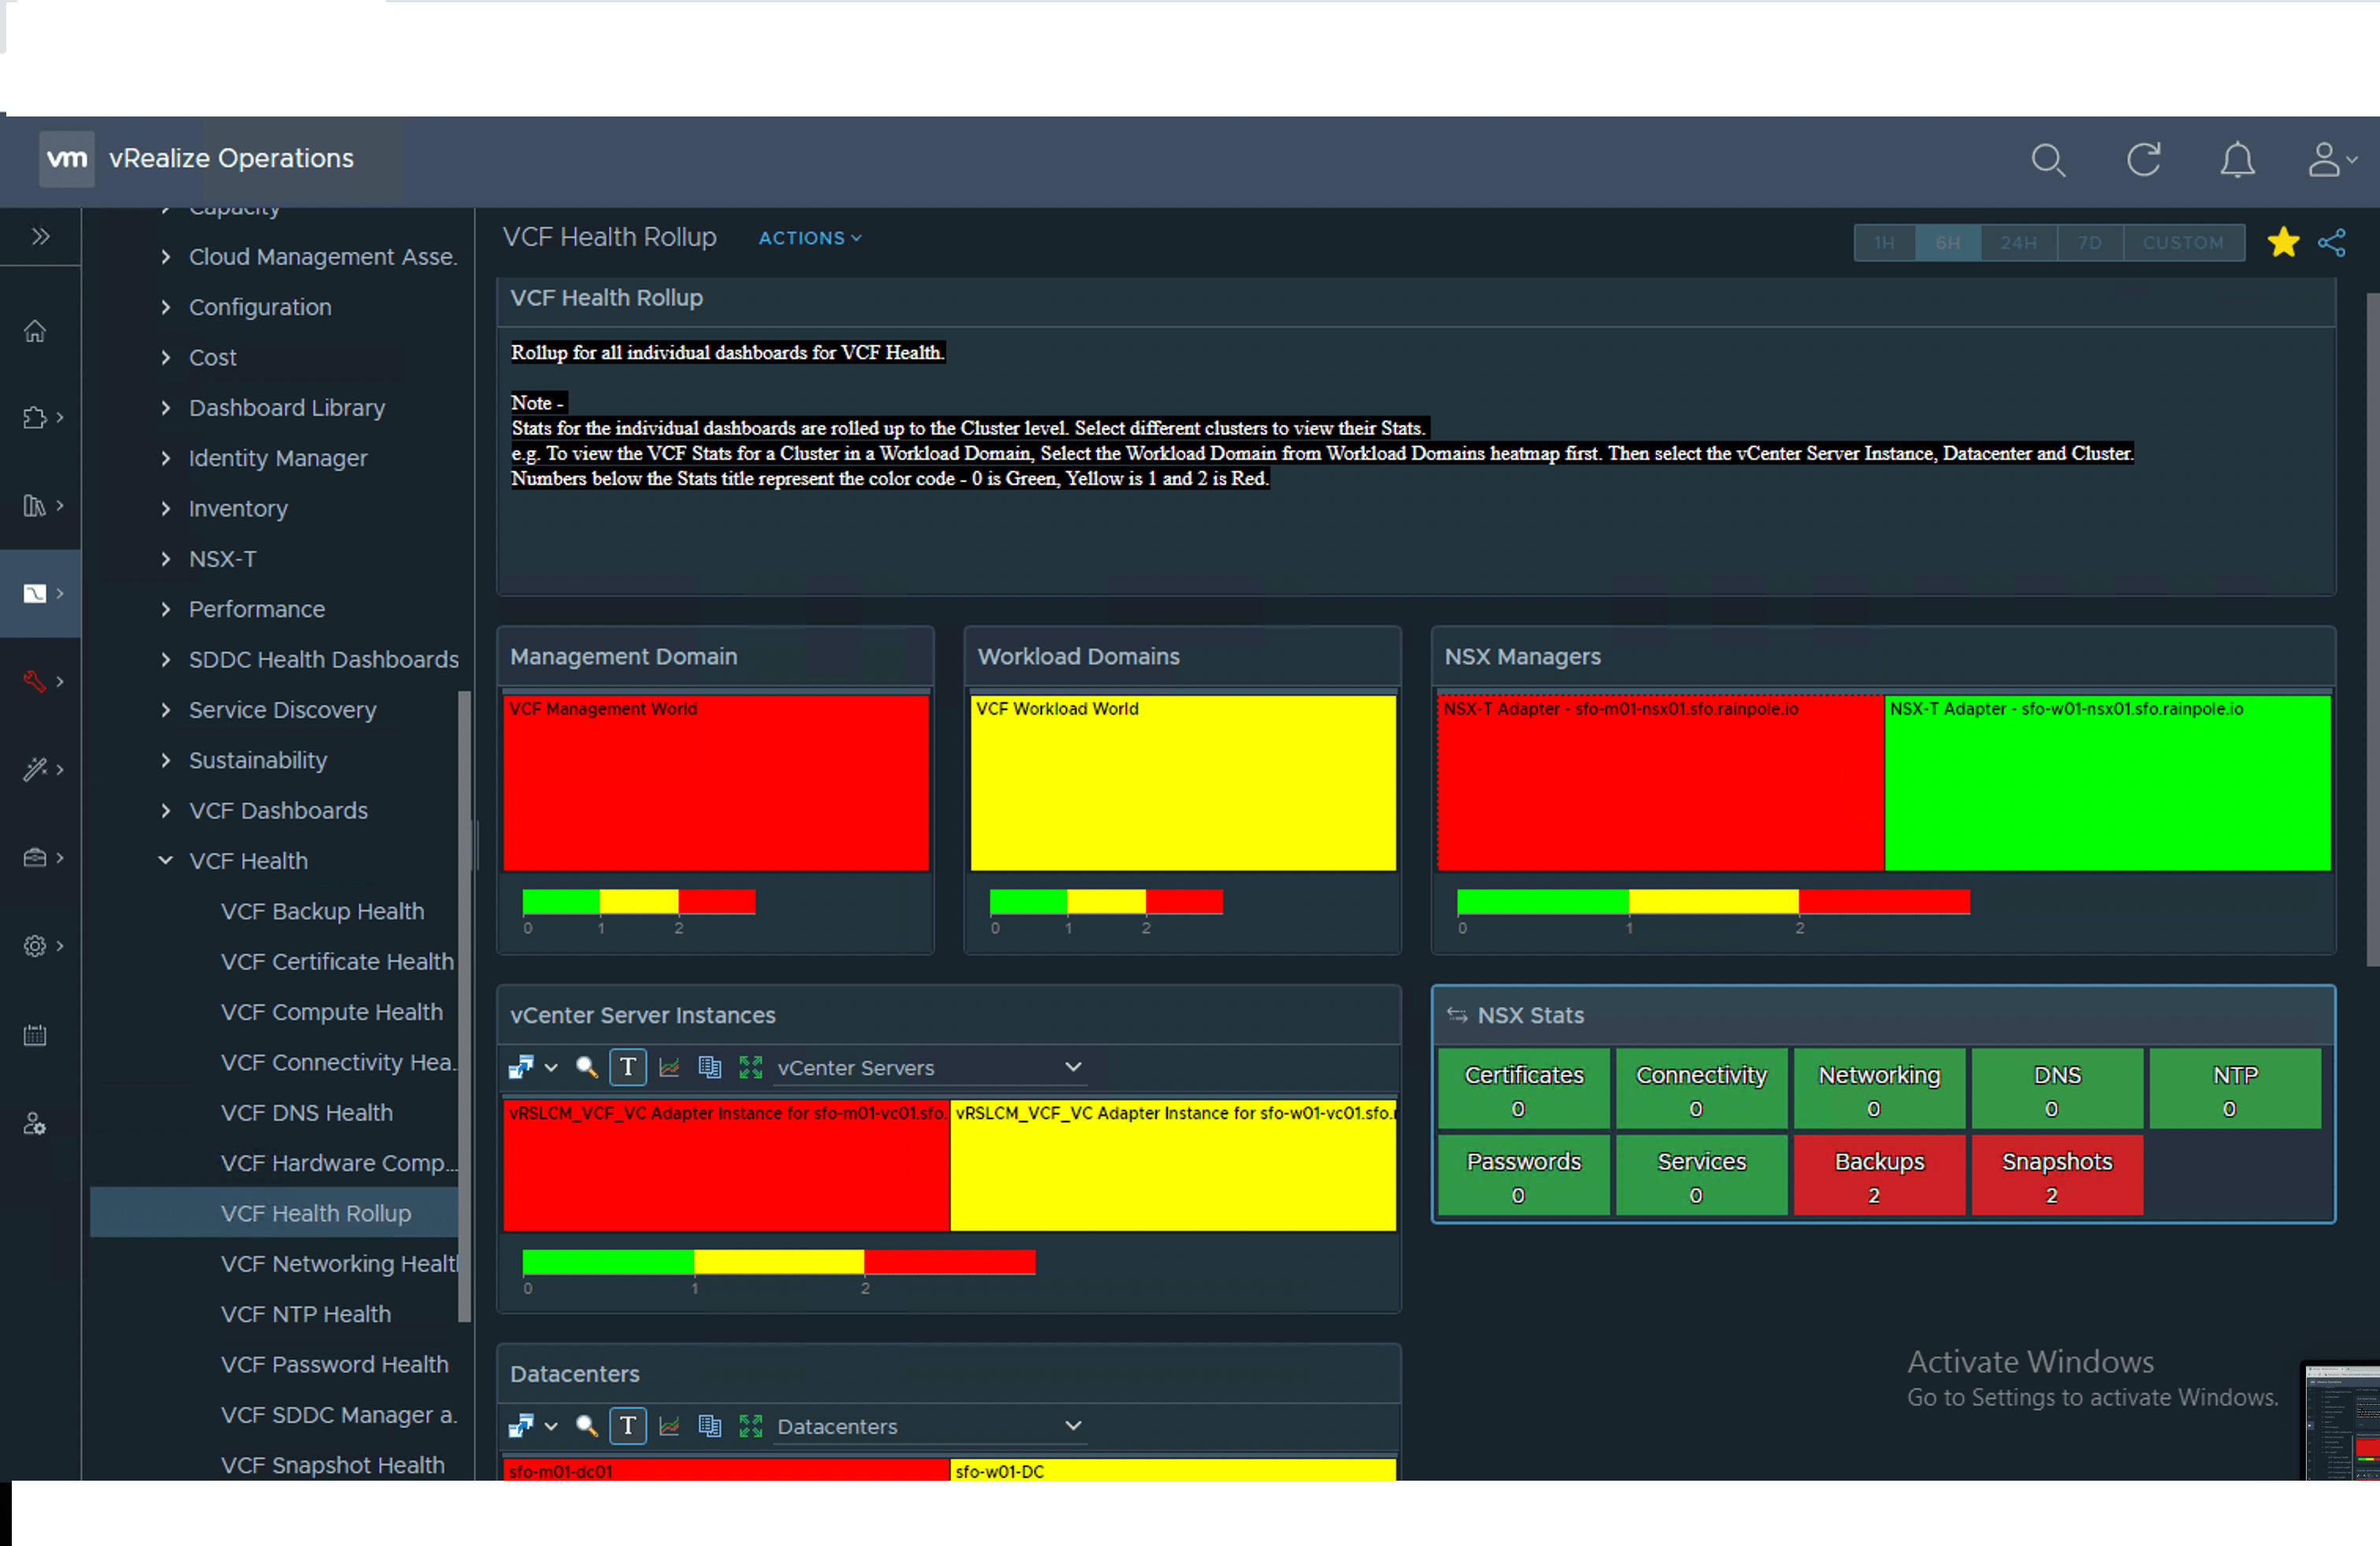
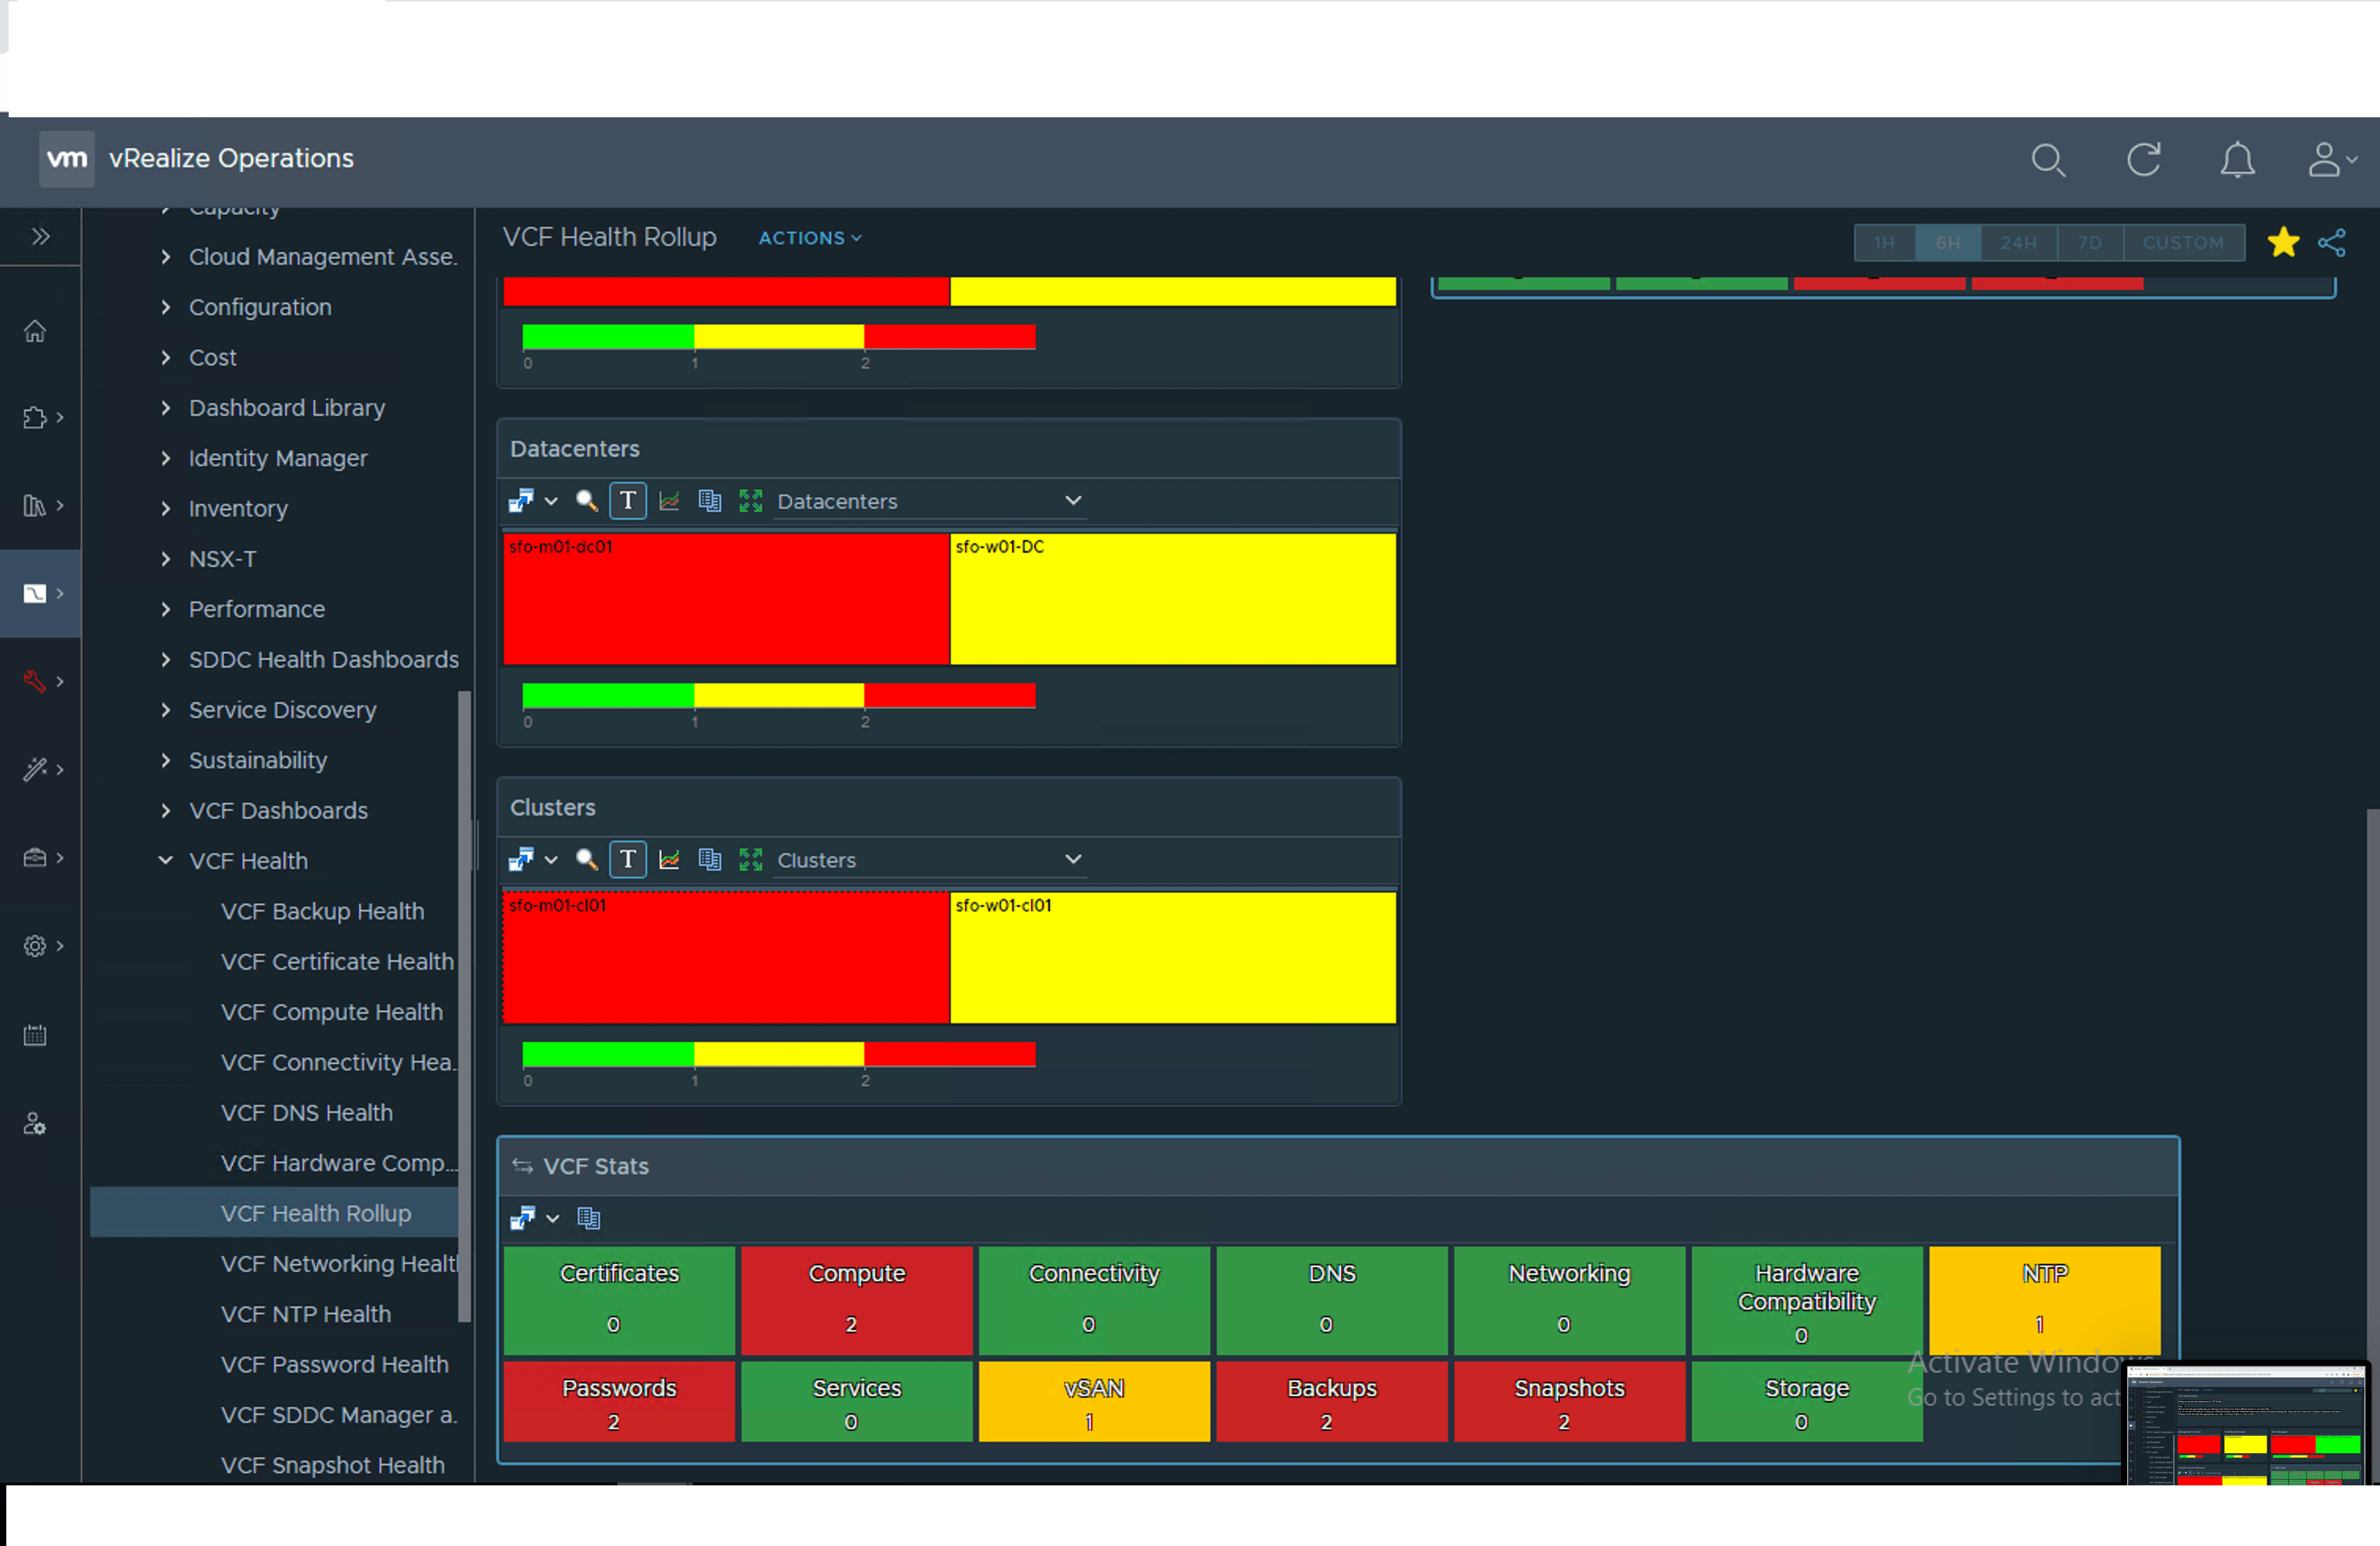
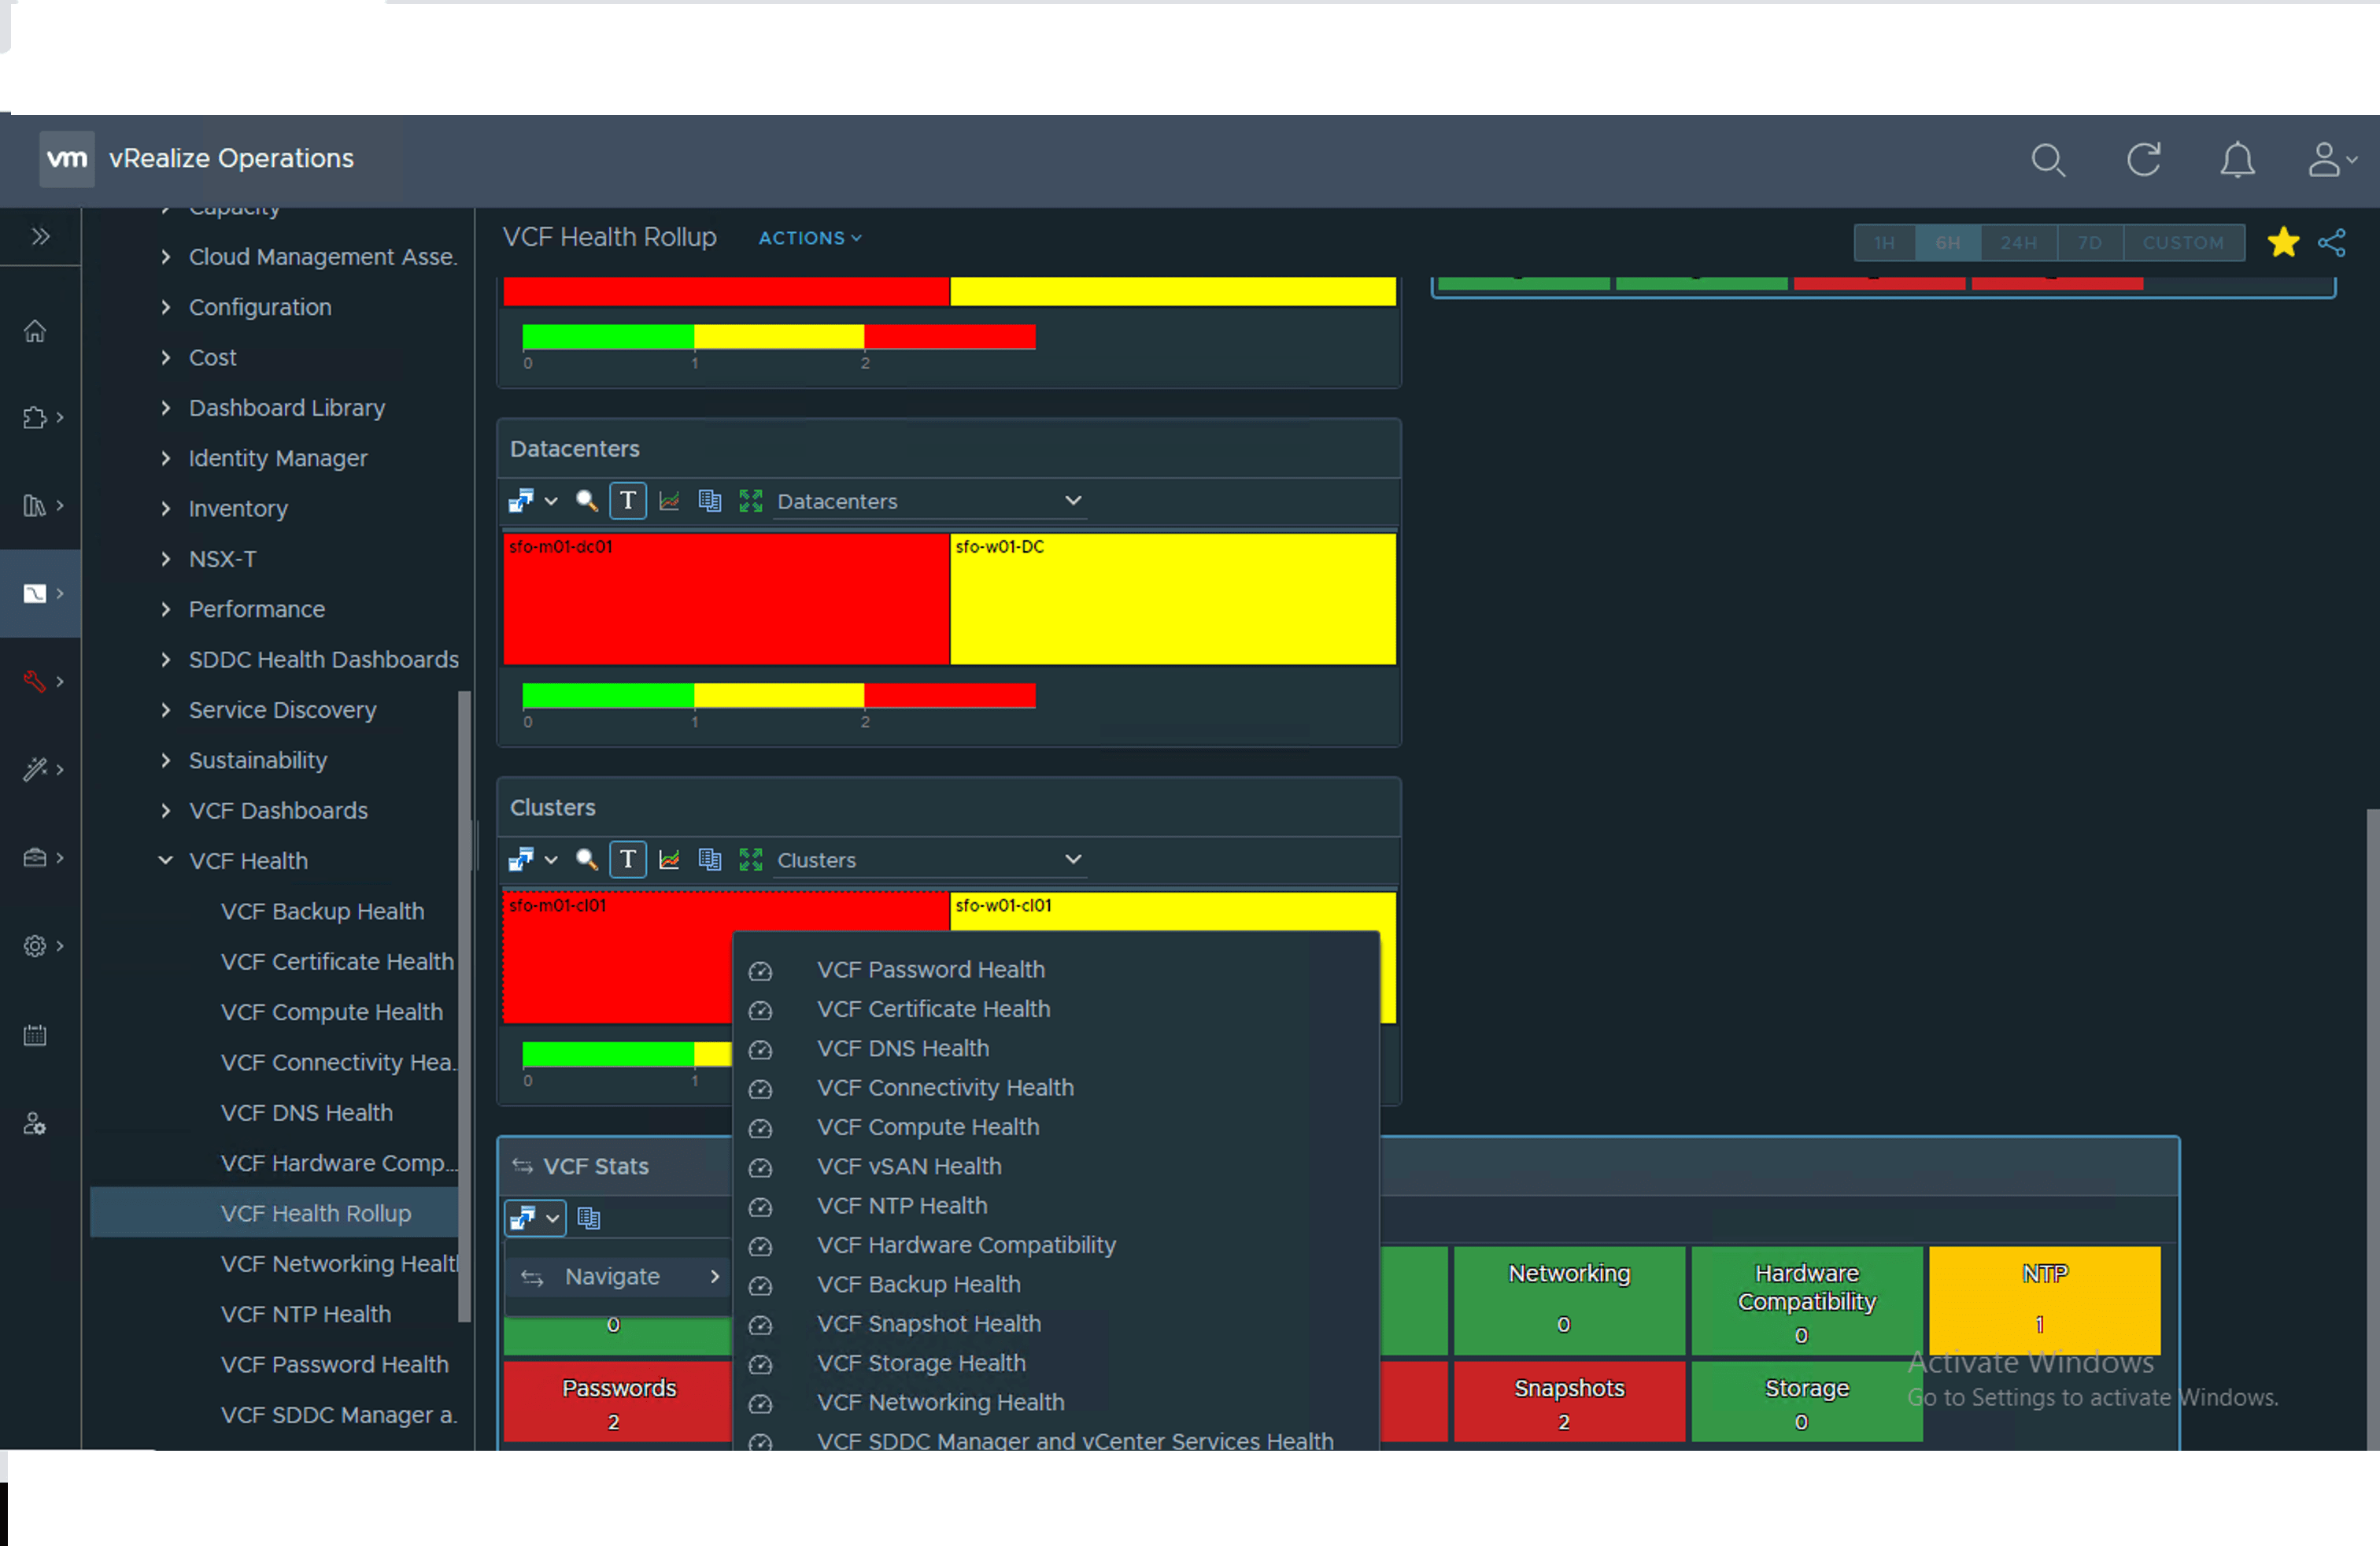
VCF Health Rollup
-
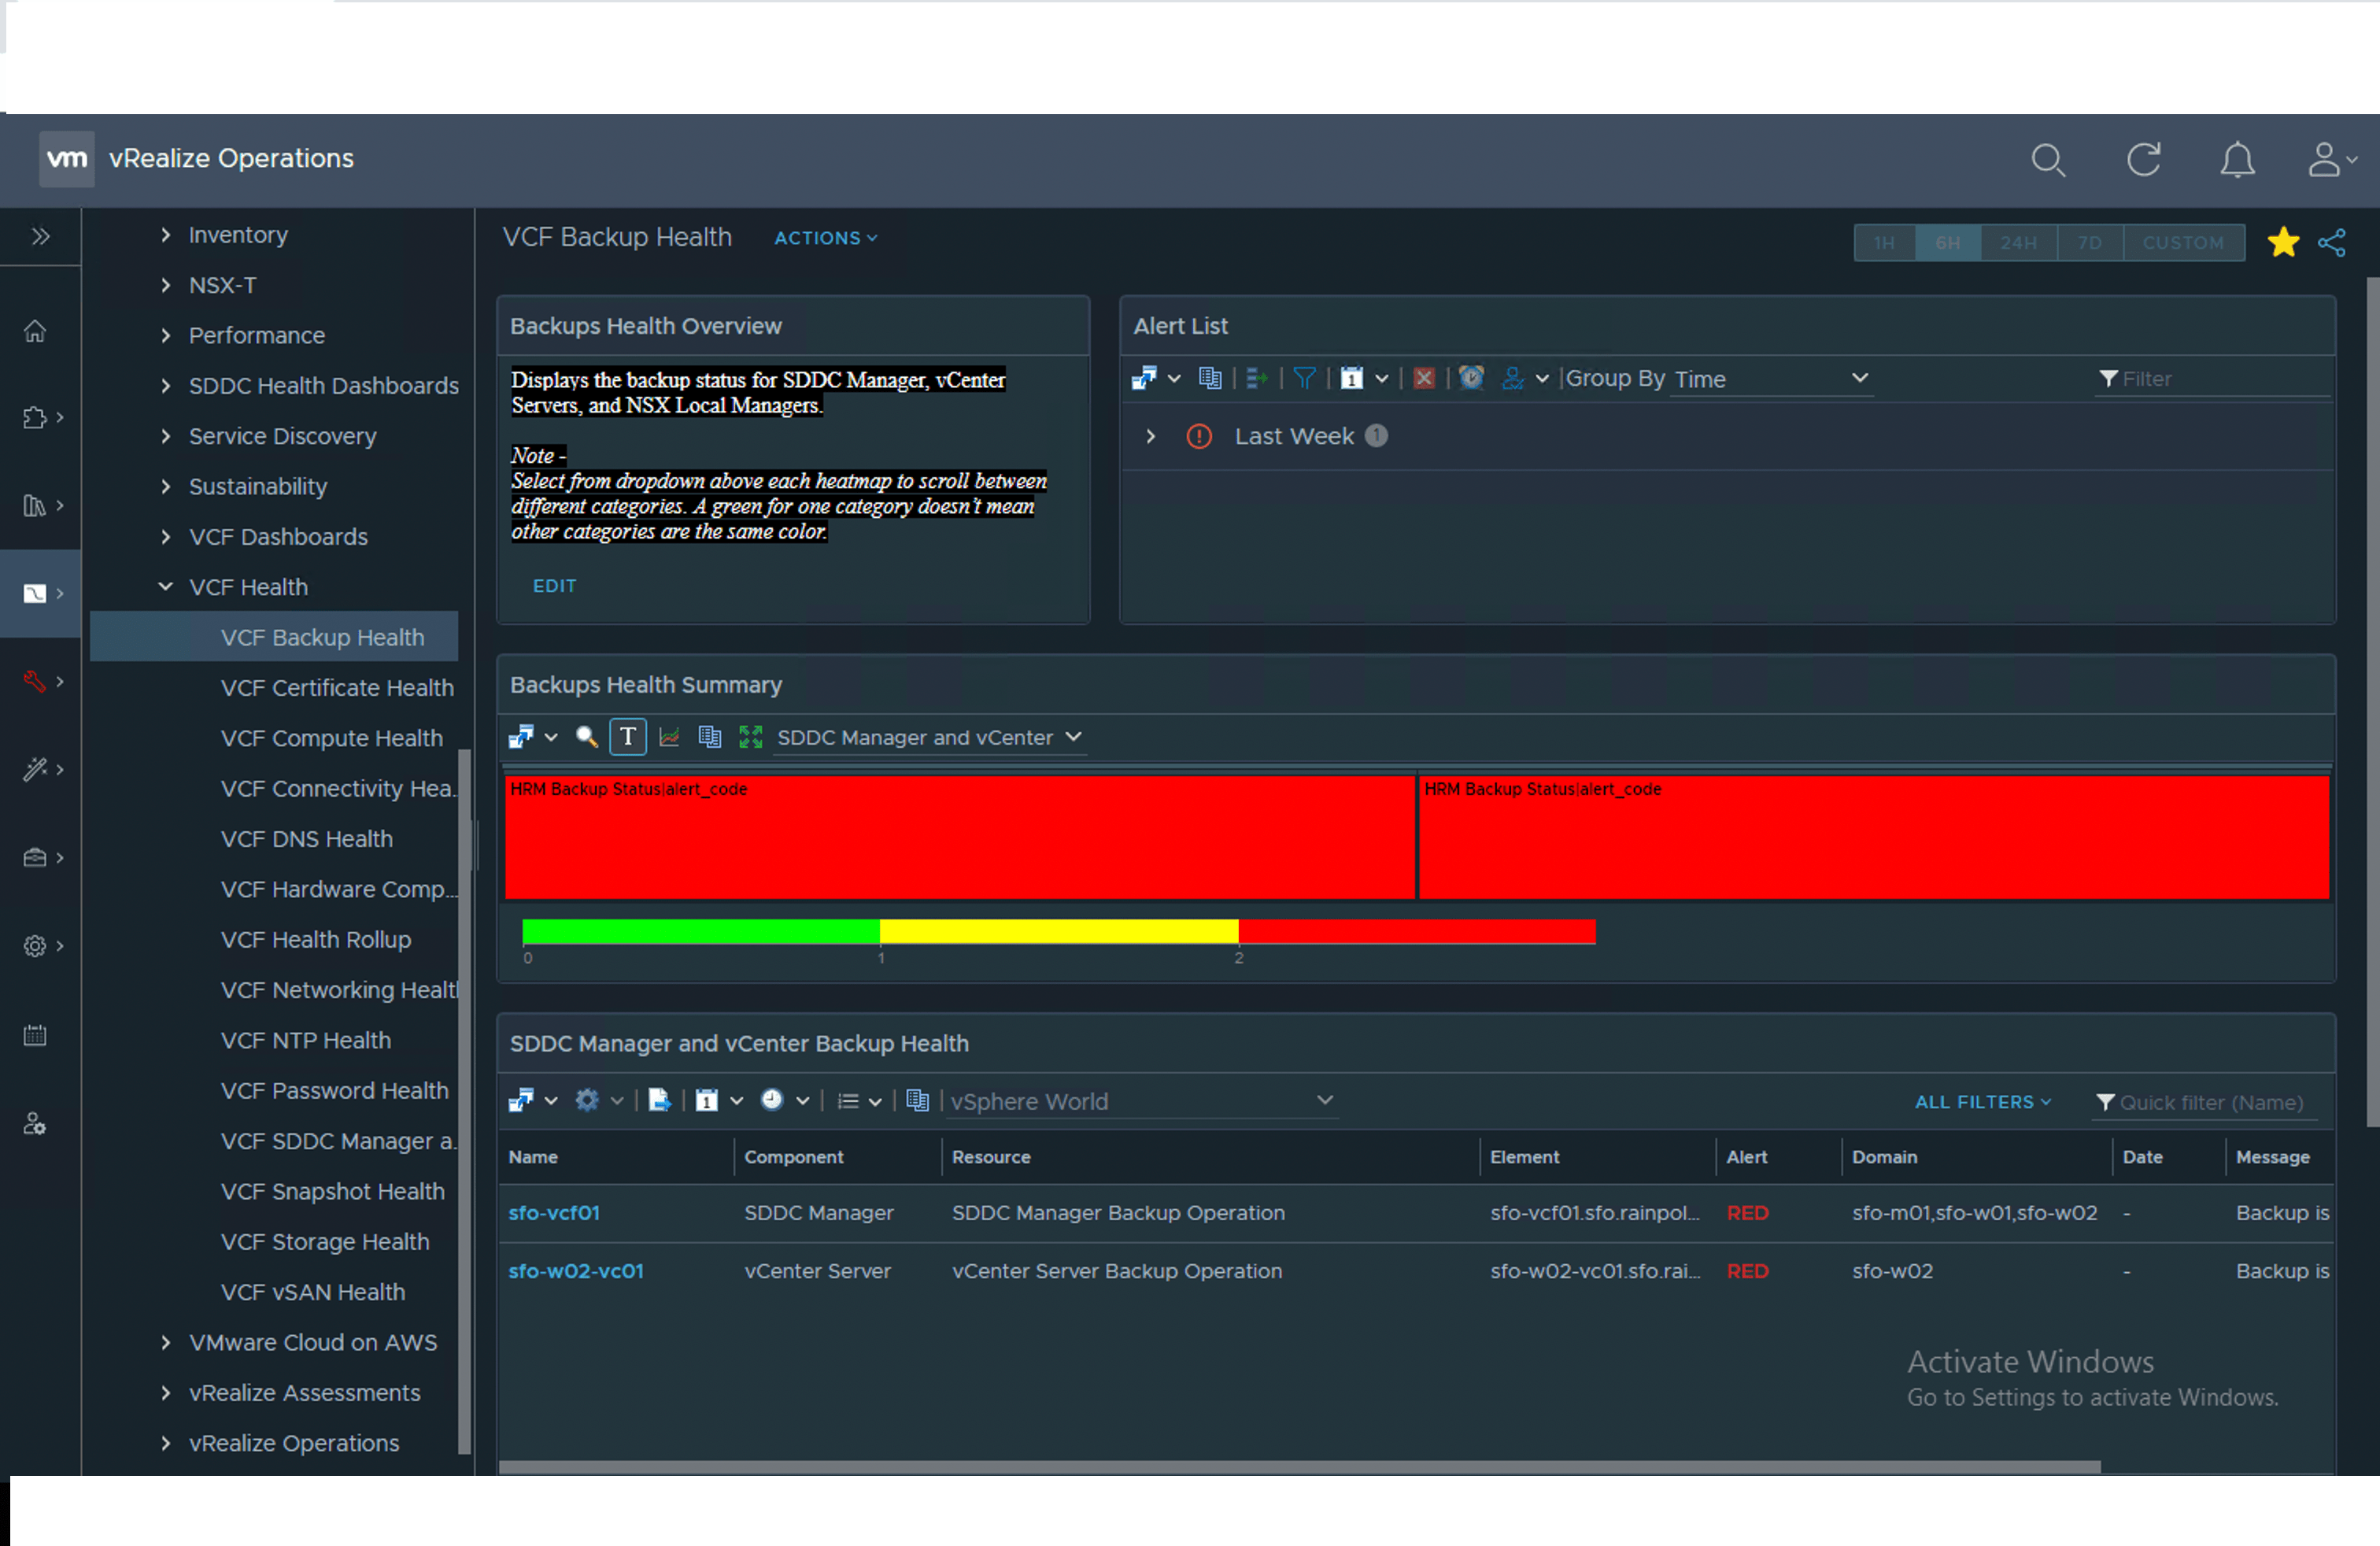
VCF Backup Health
-
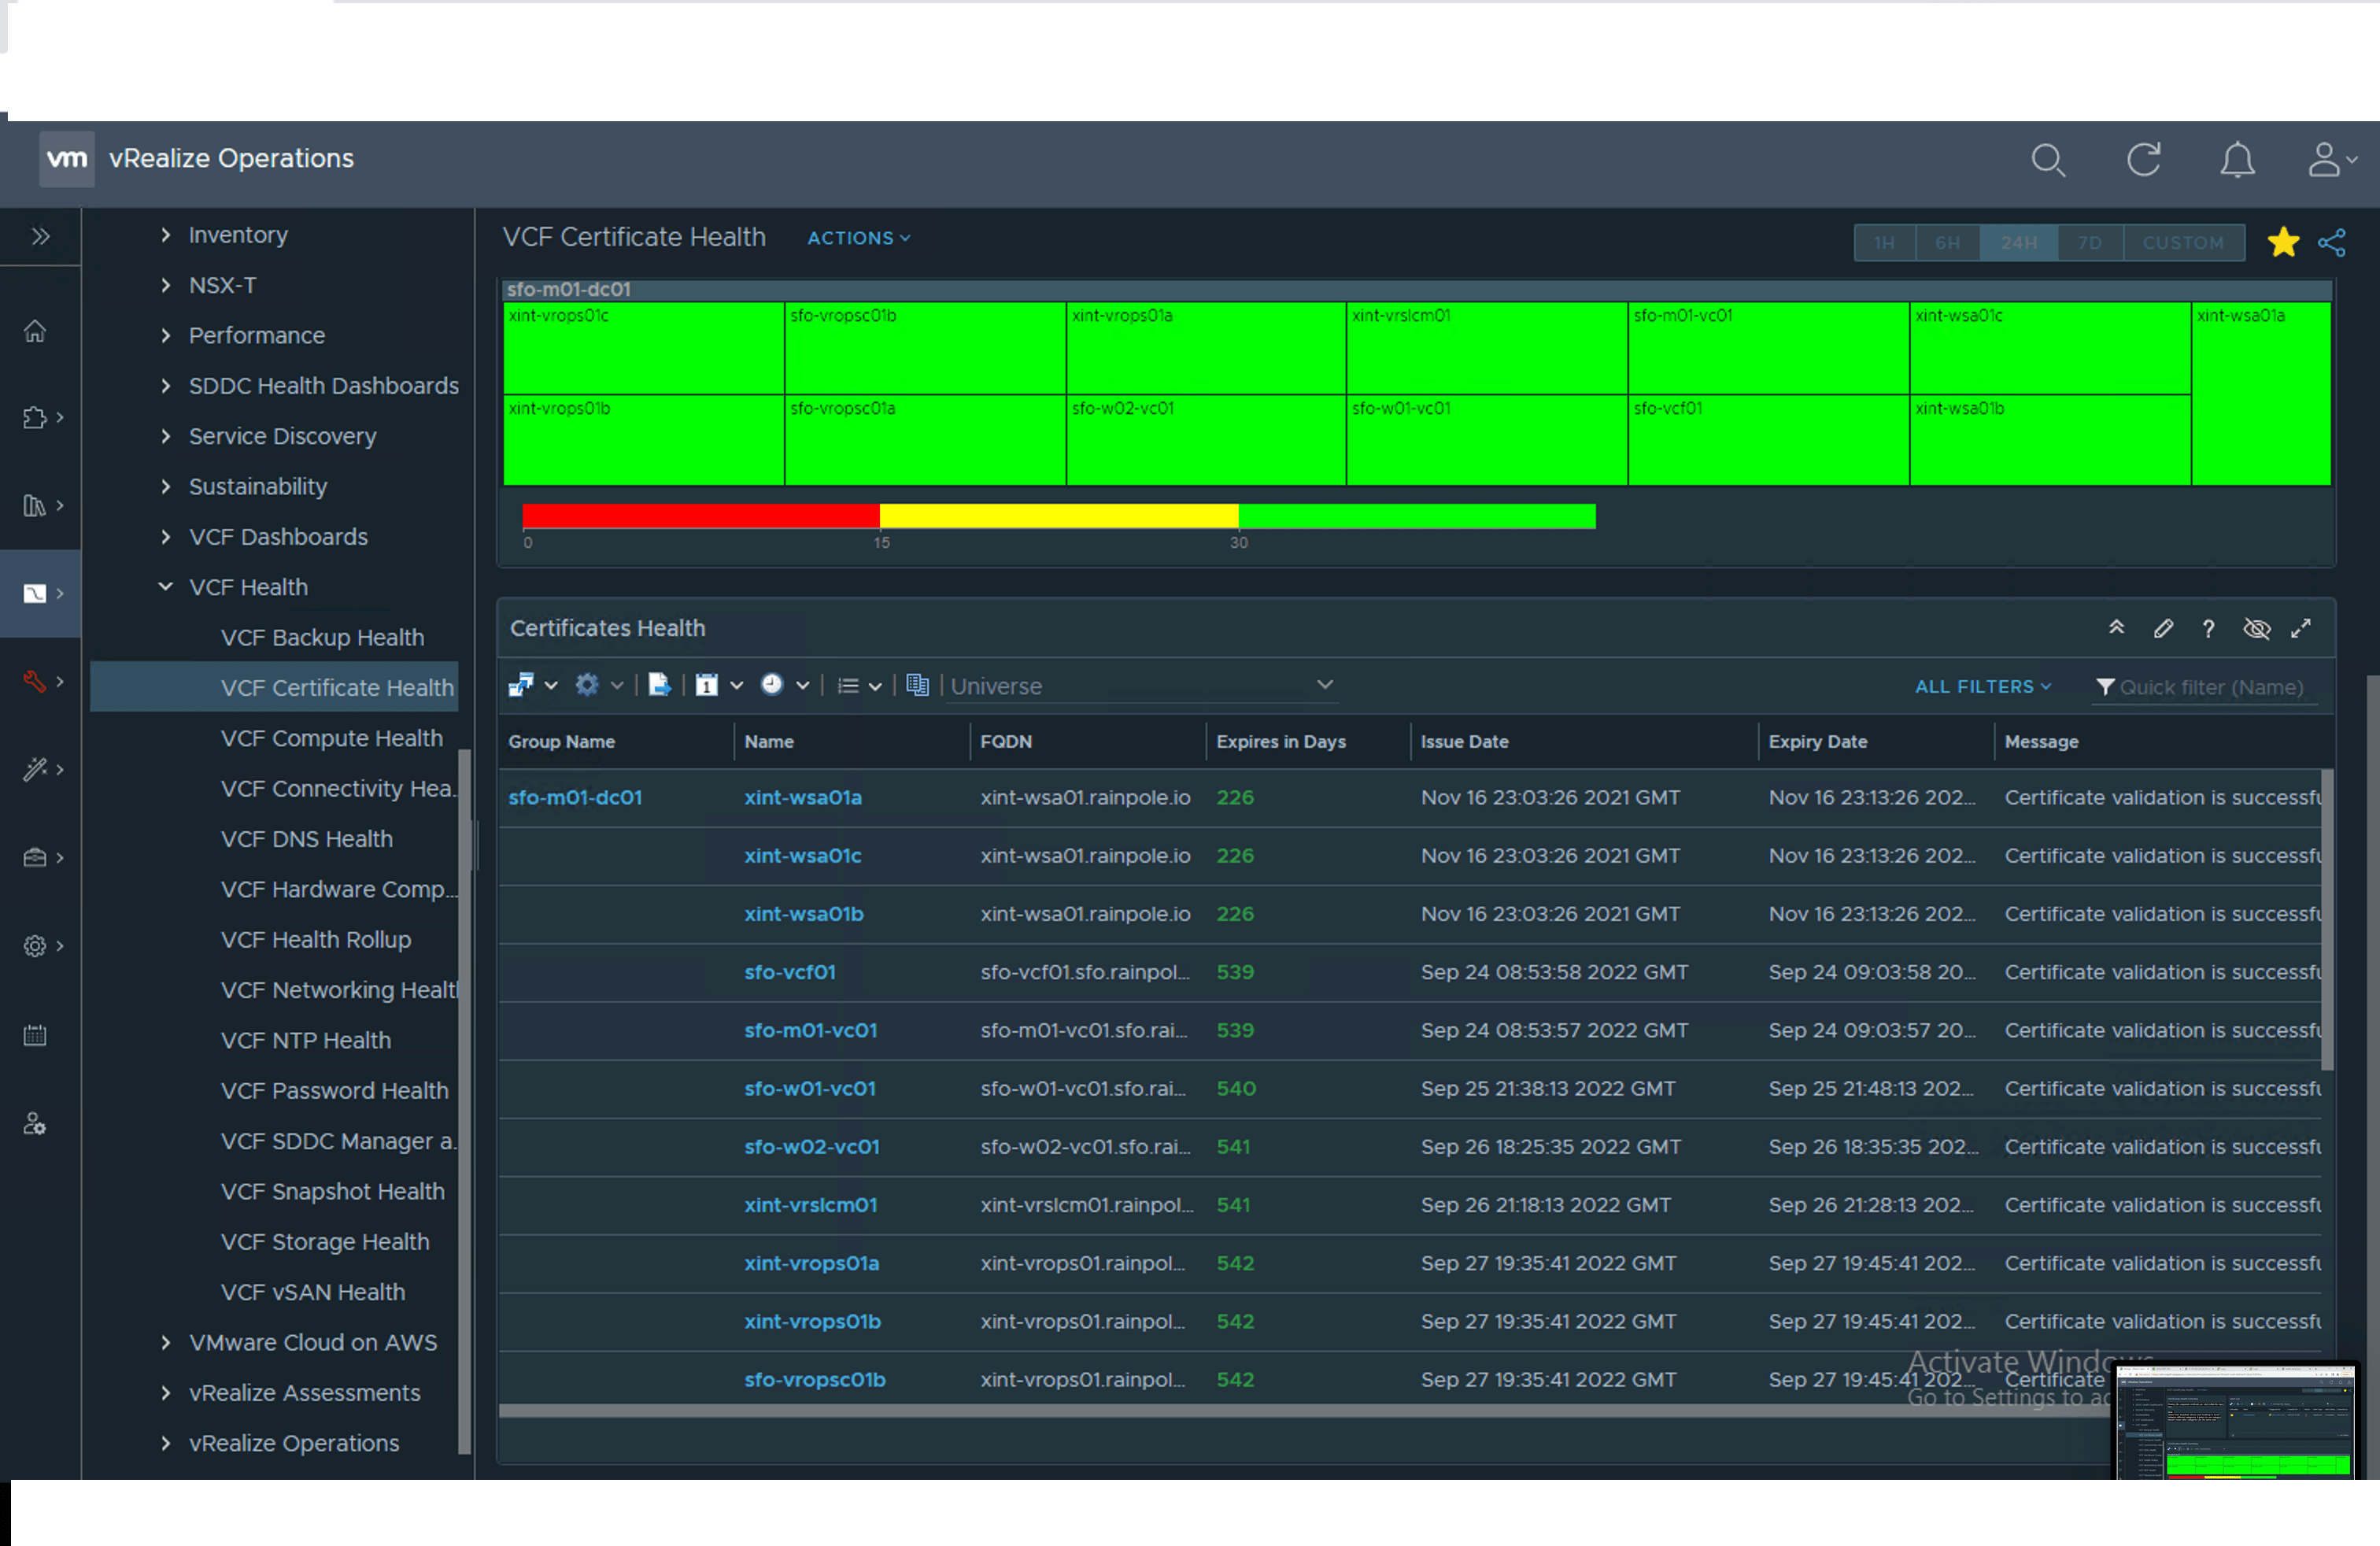
VCF Certificate Health

-
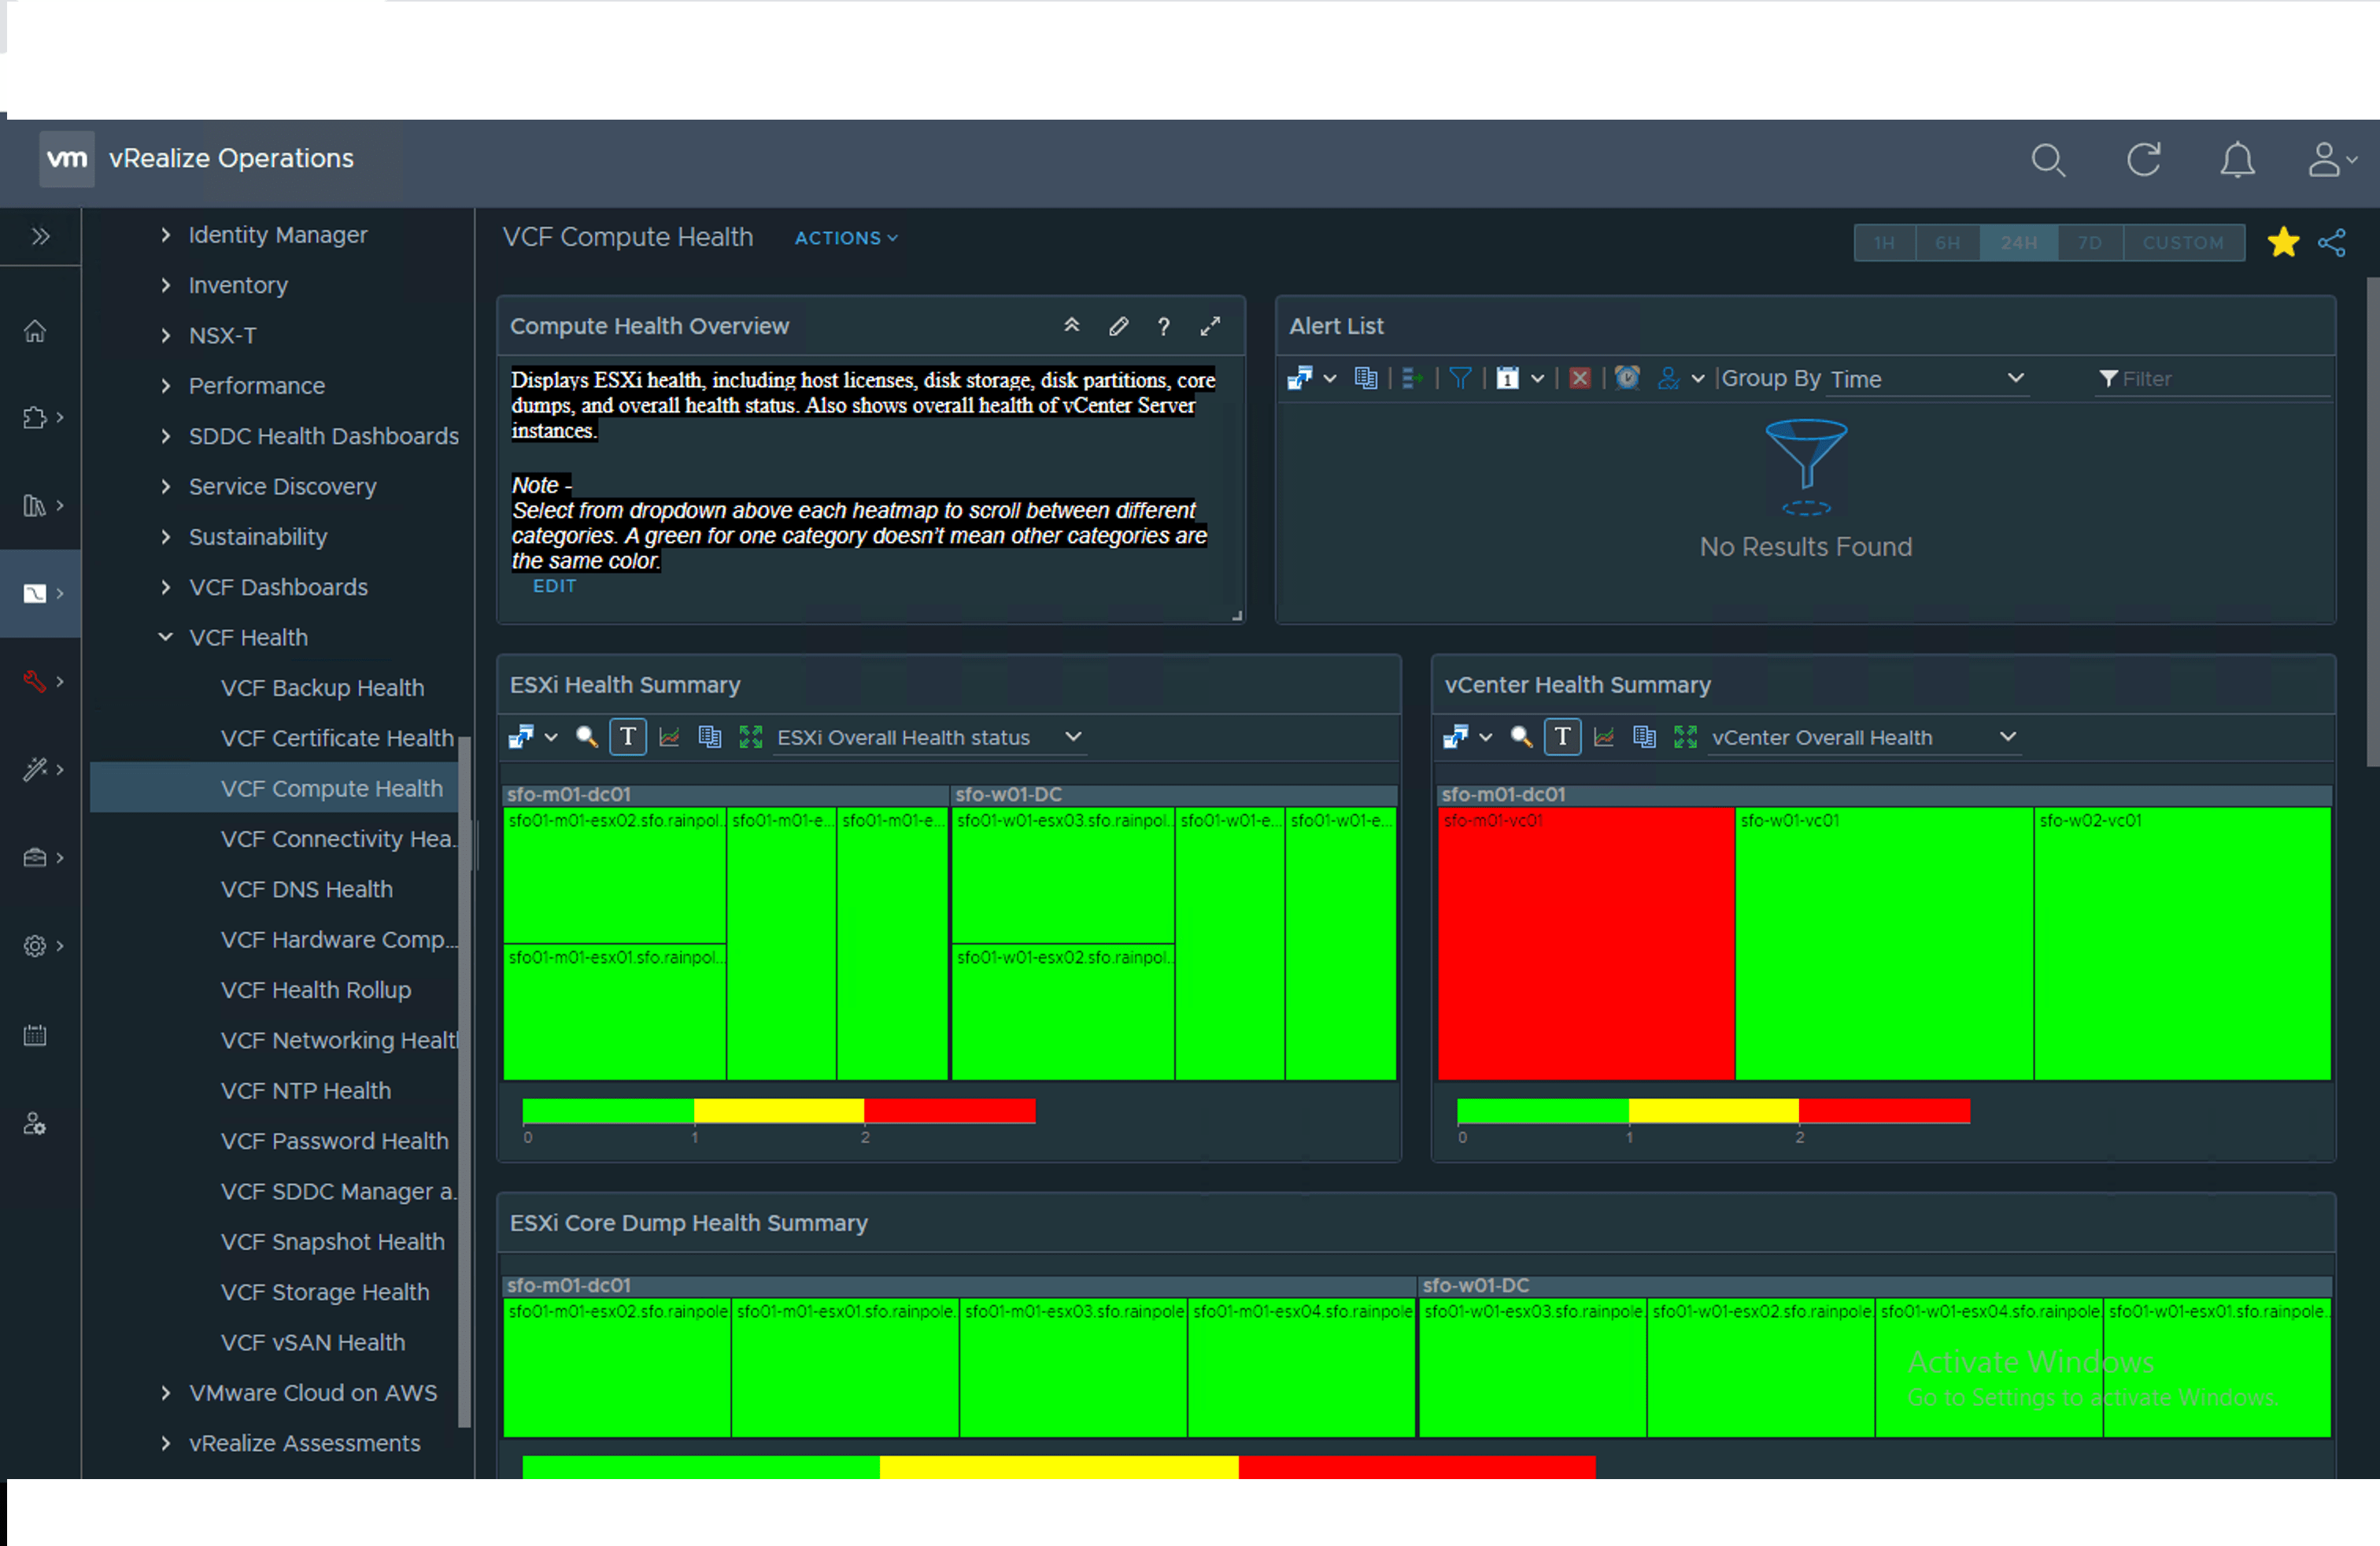
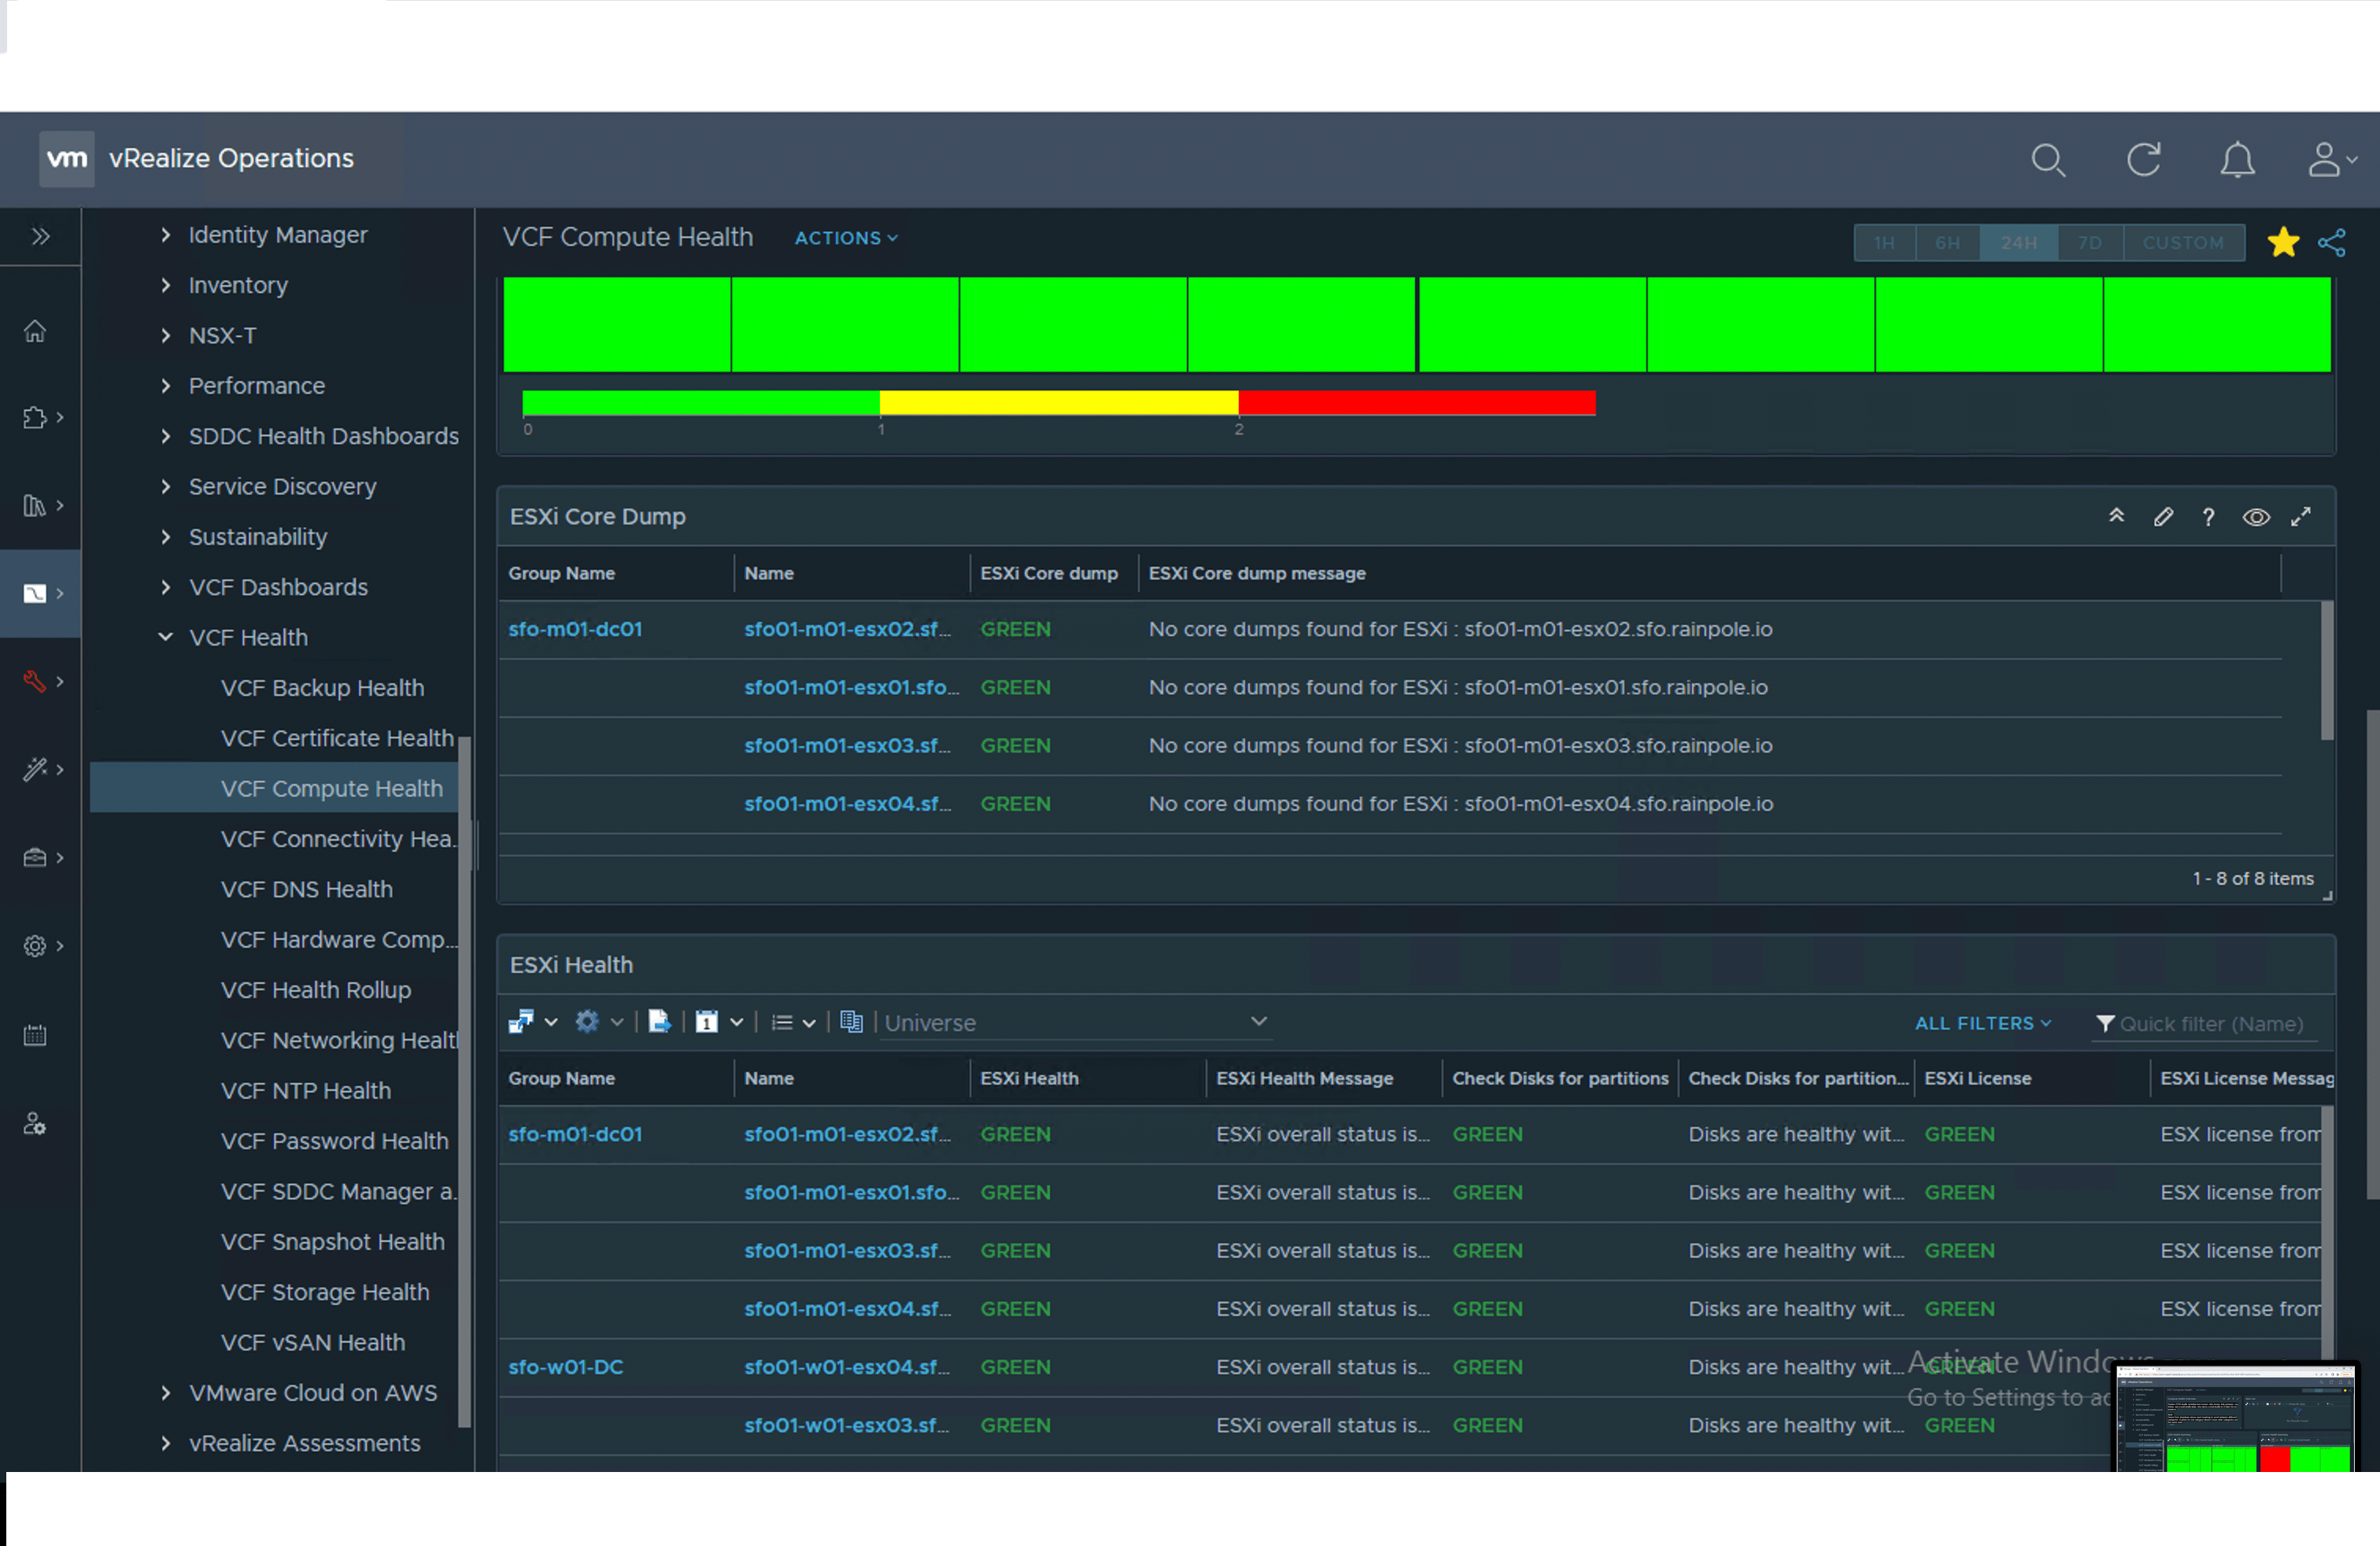
VCF Compute Health
-
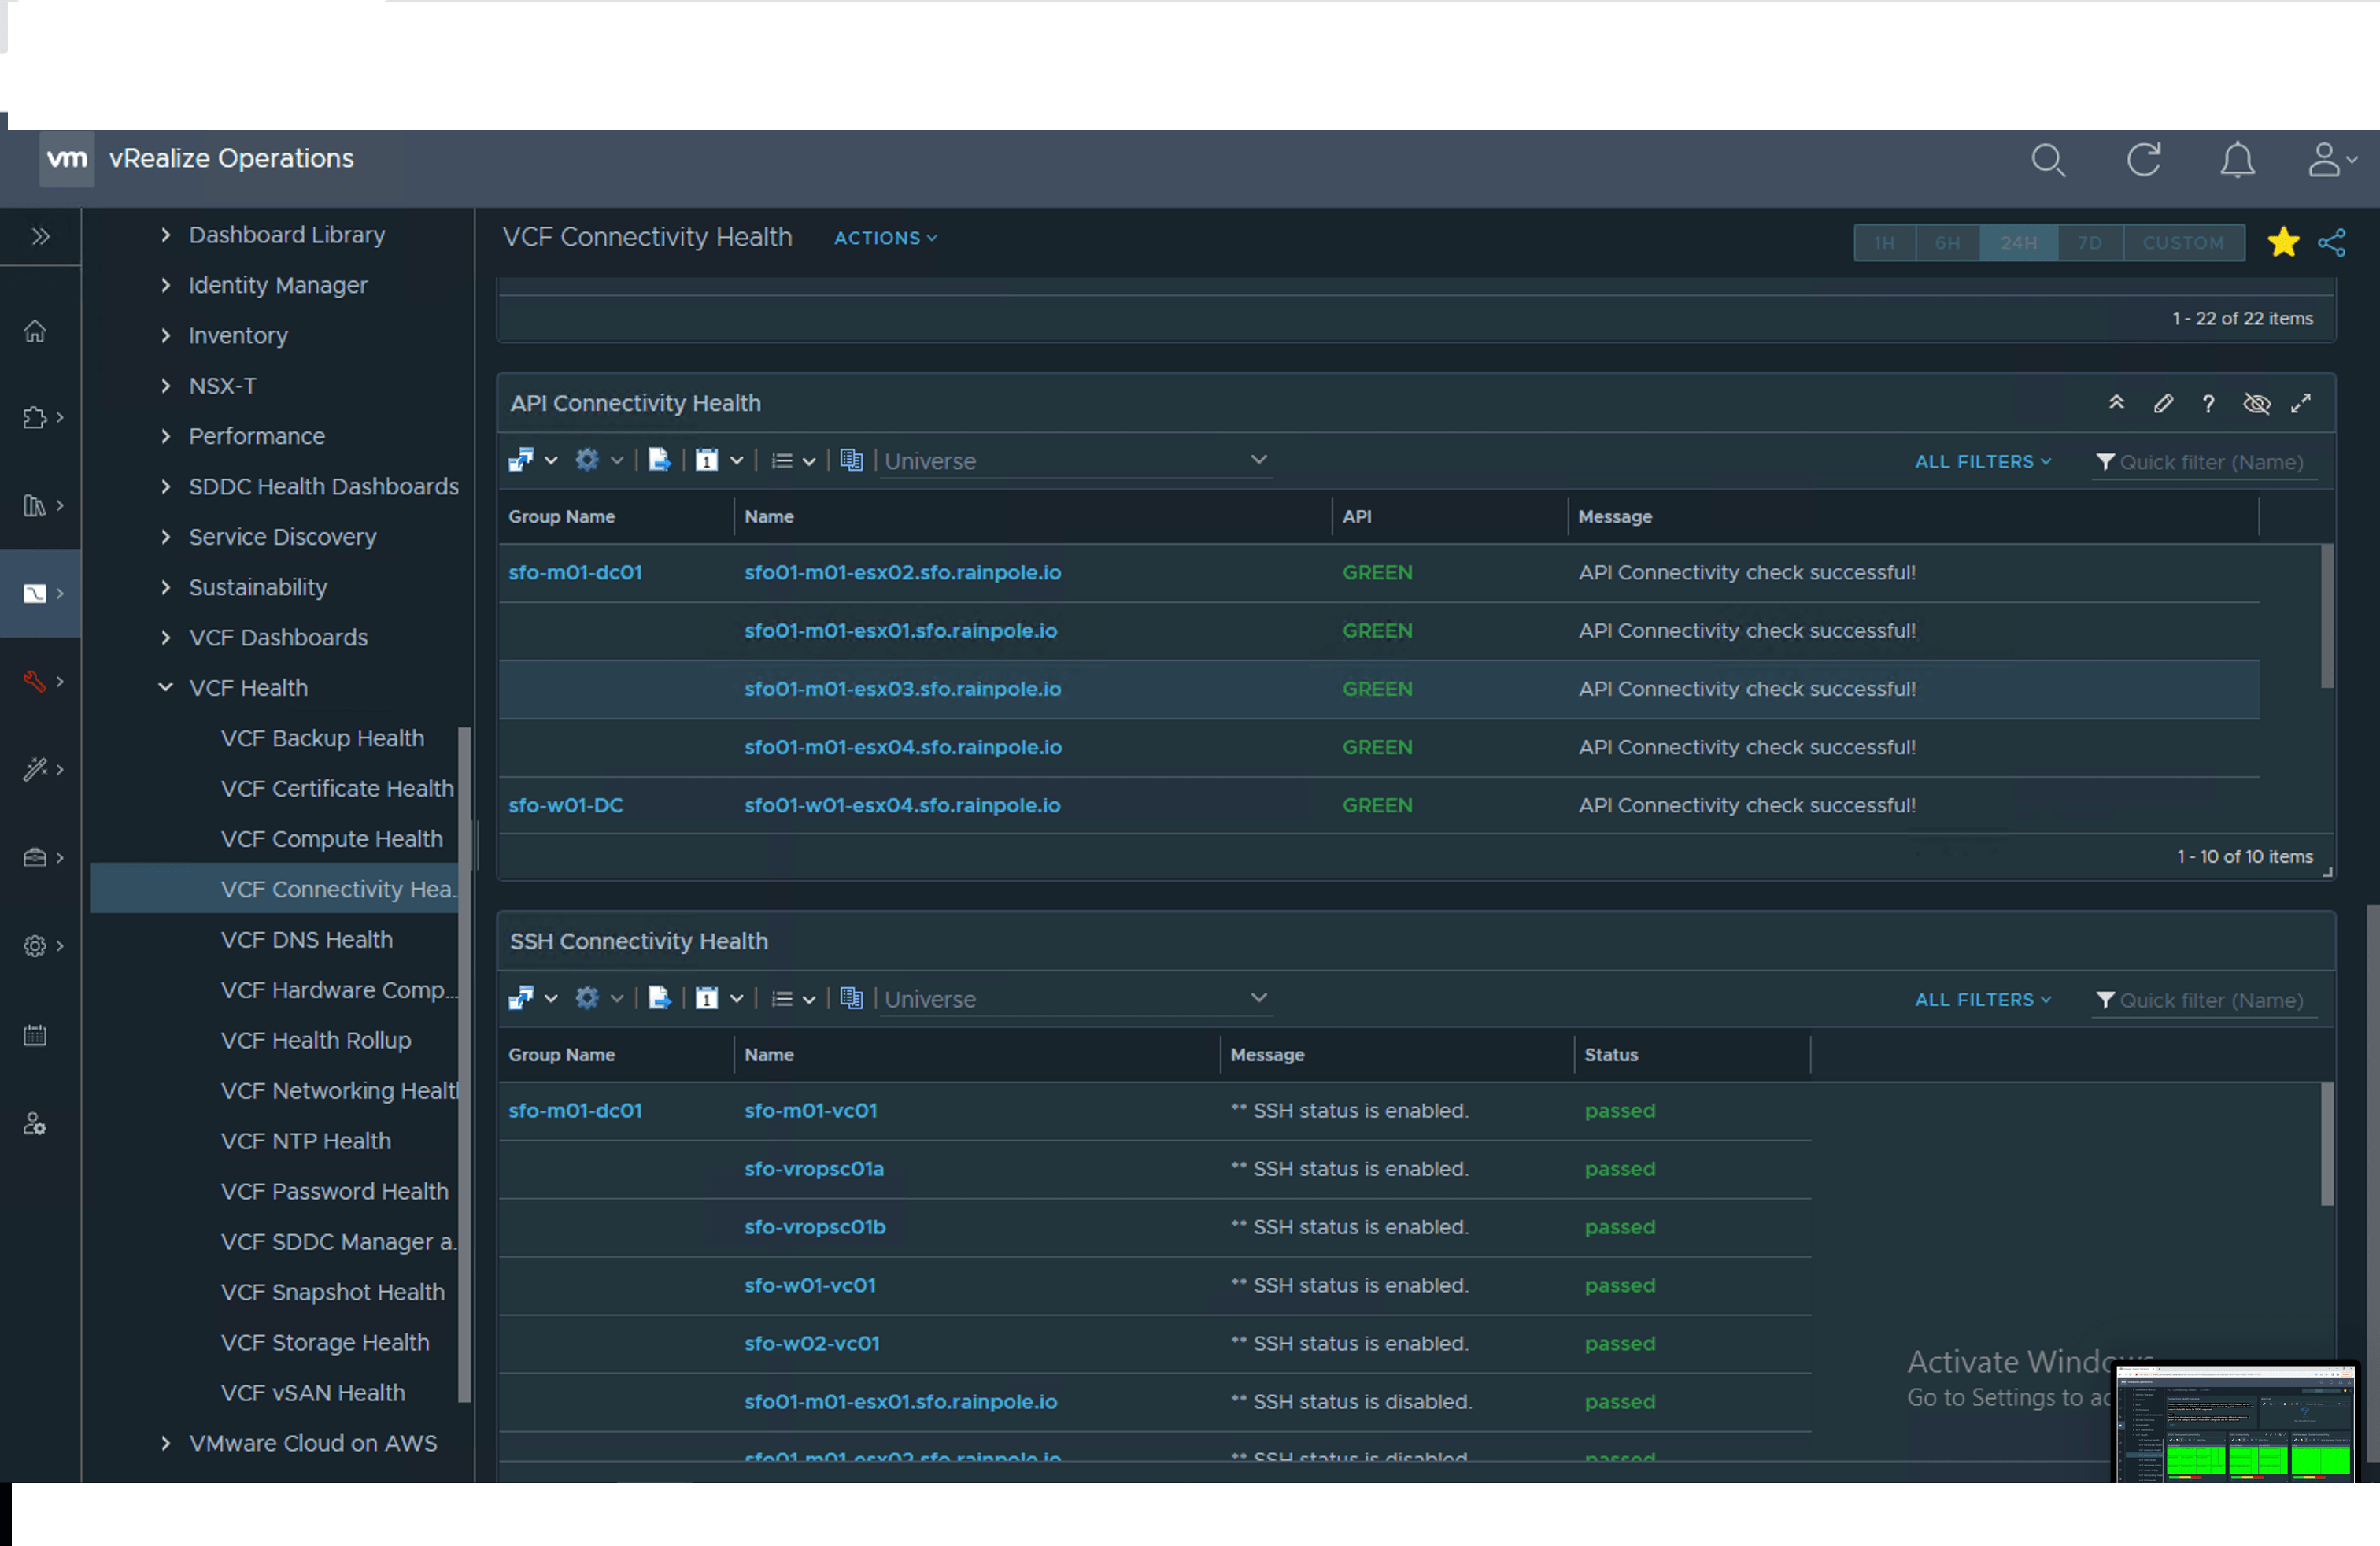
VCF Connectivity Health

-
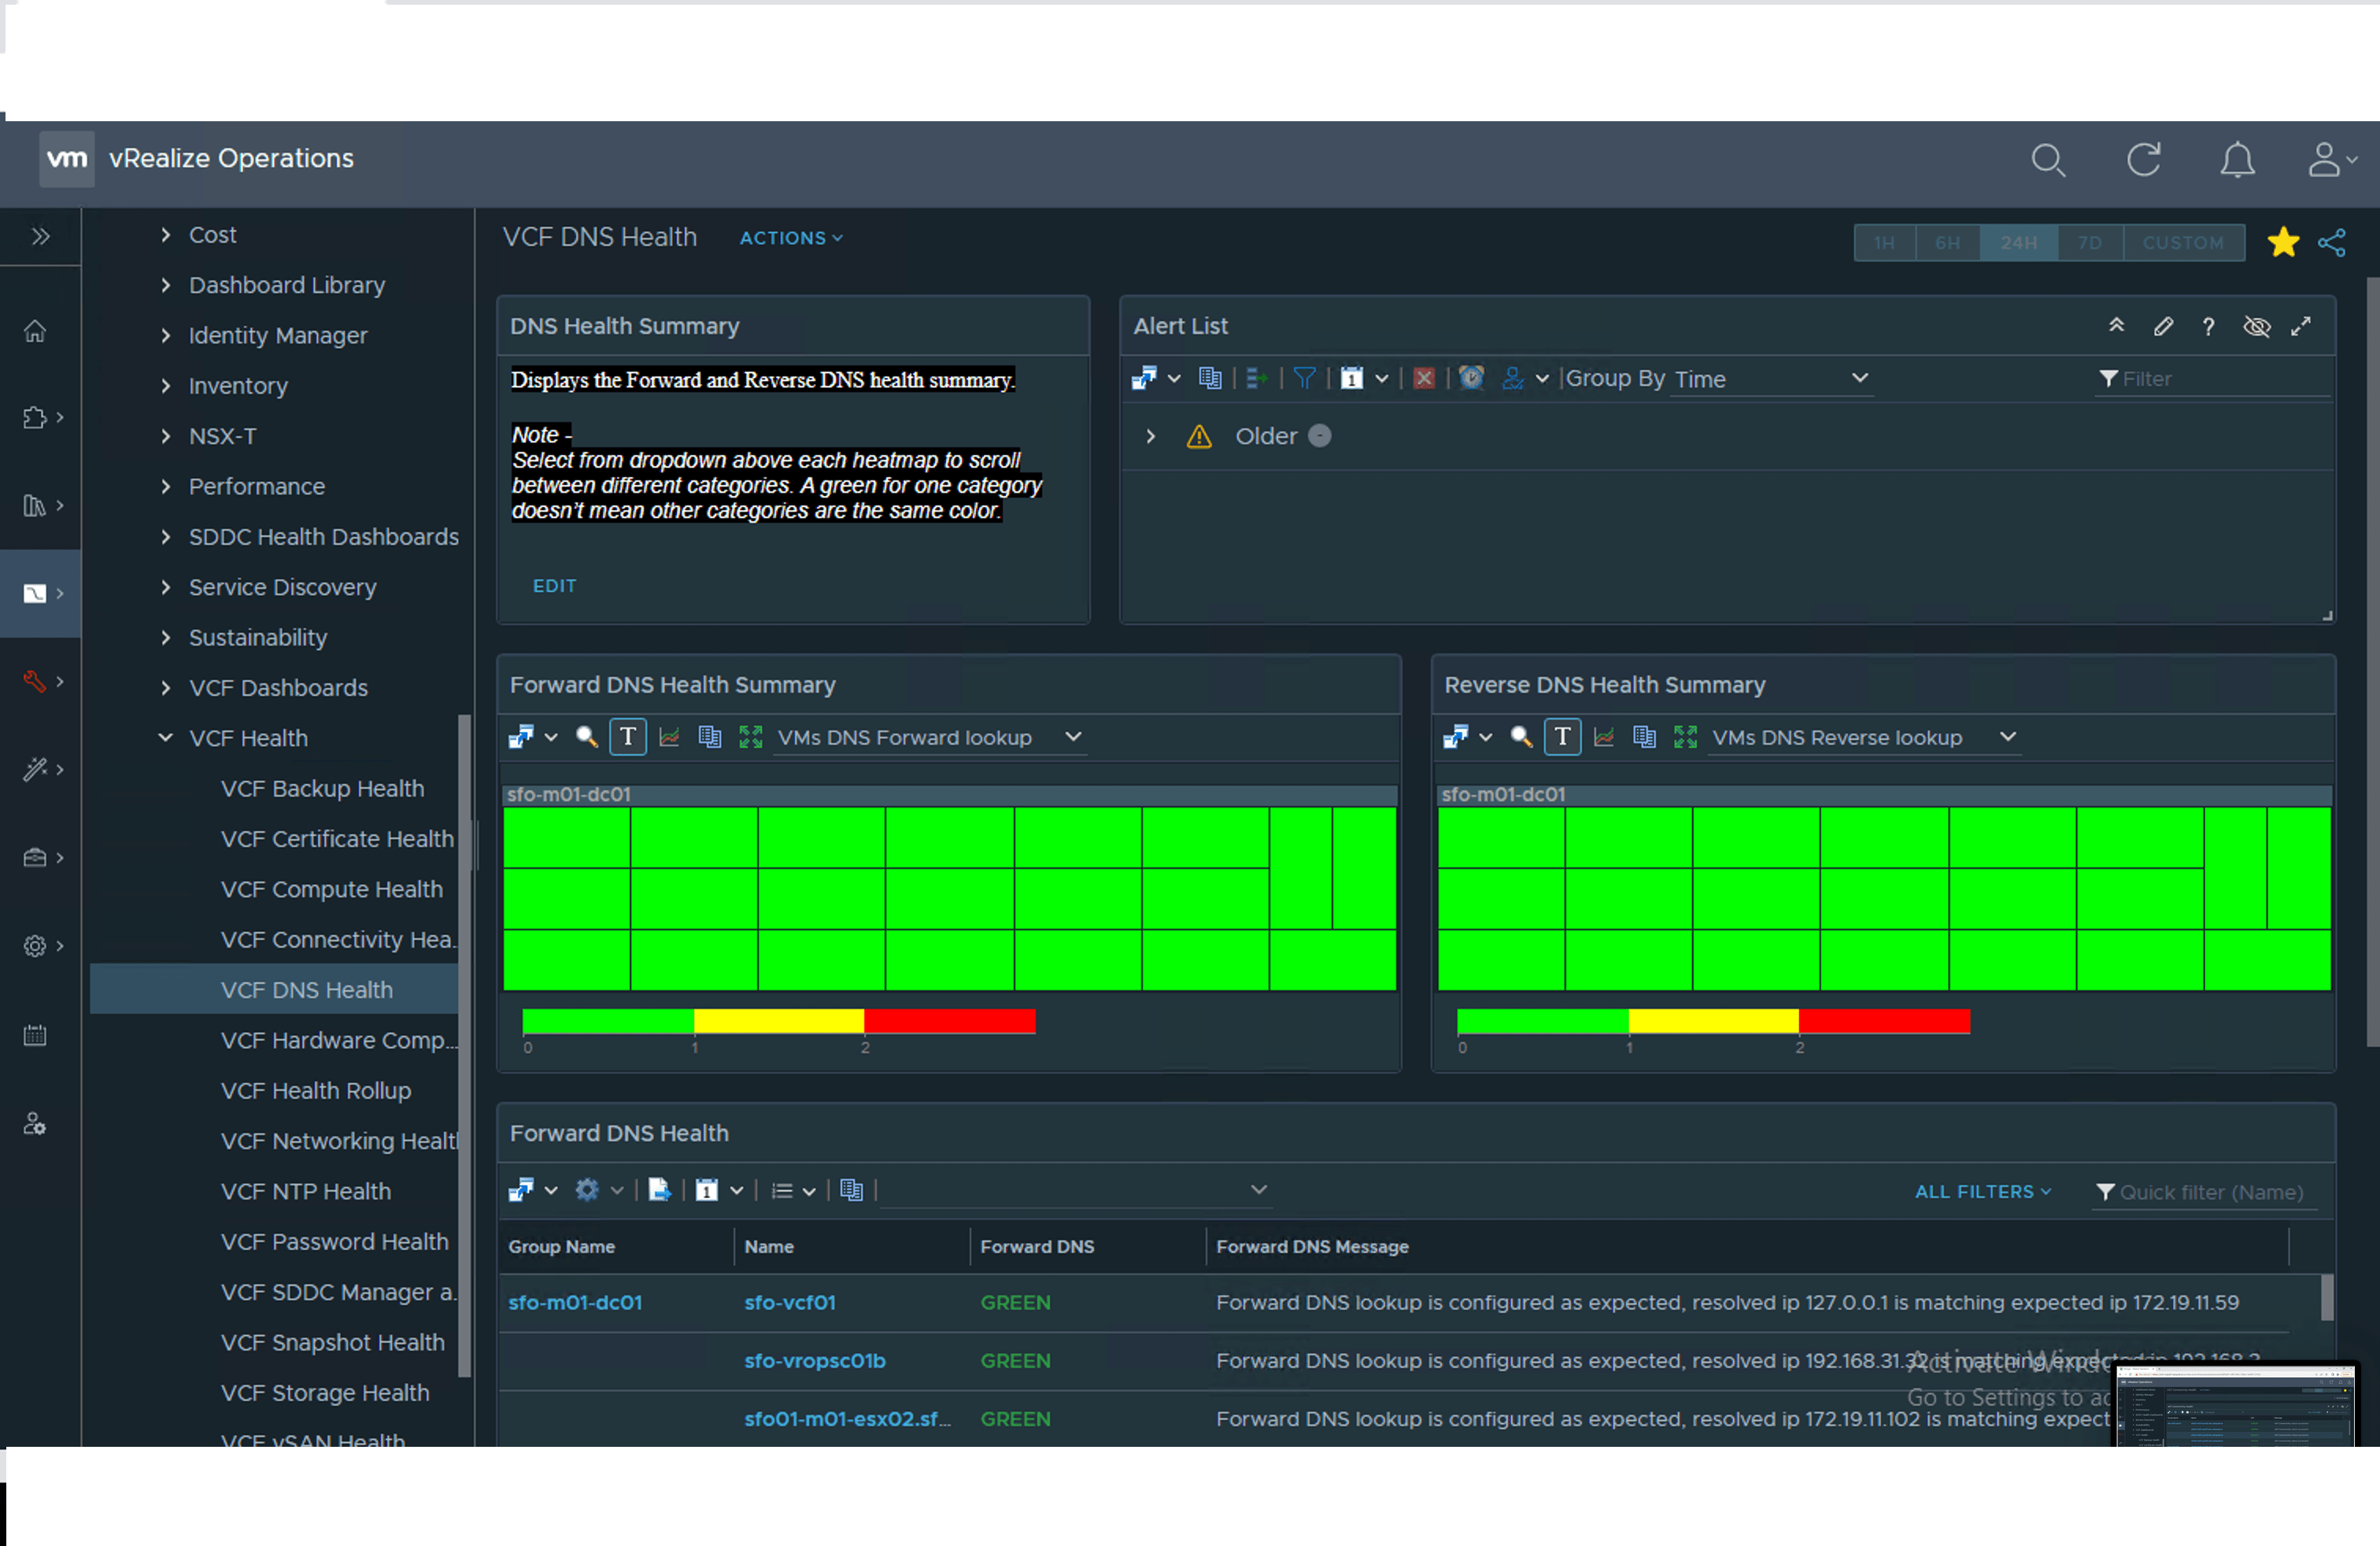
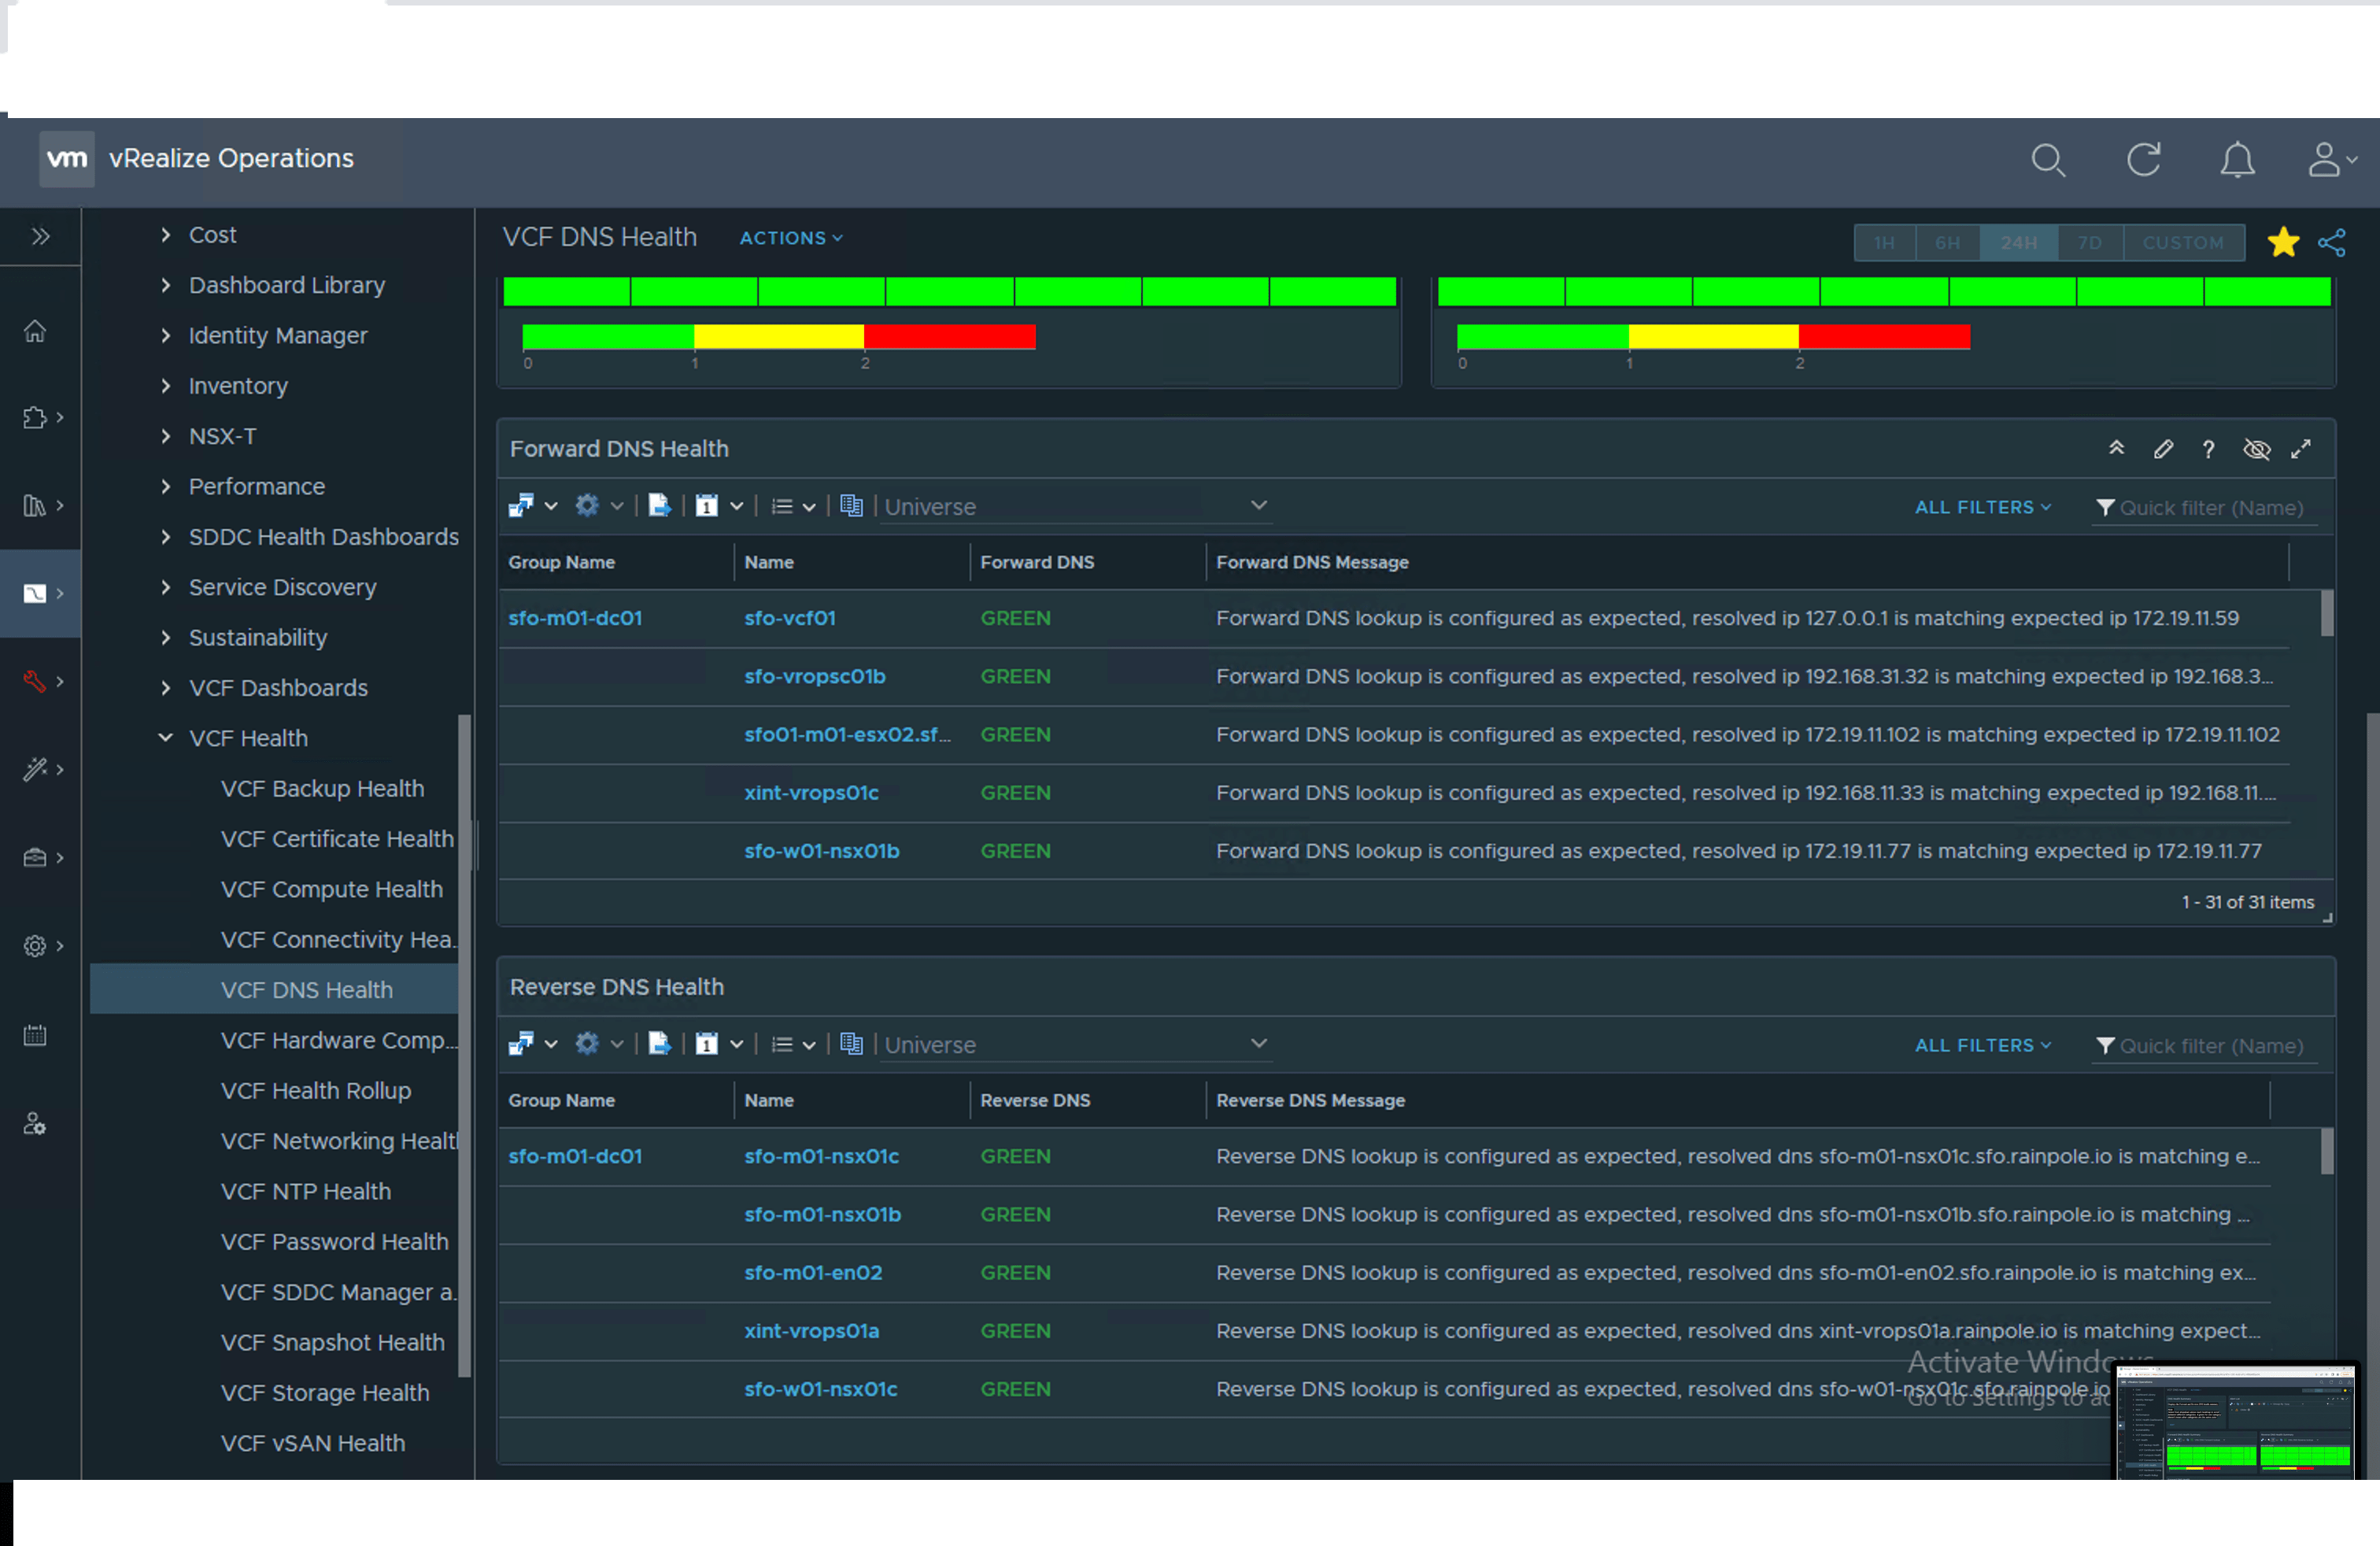
VCF DNS Health
-
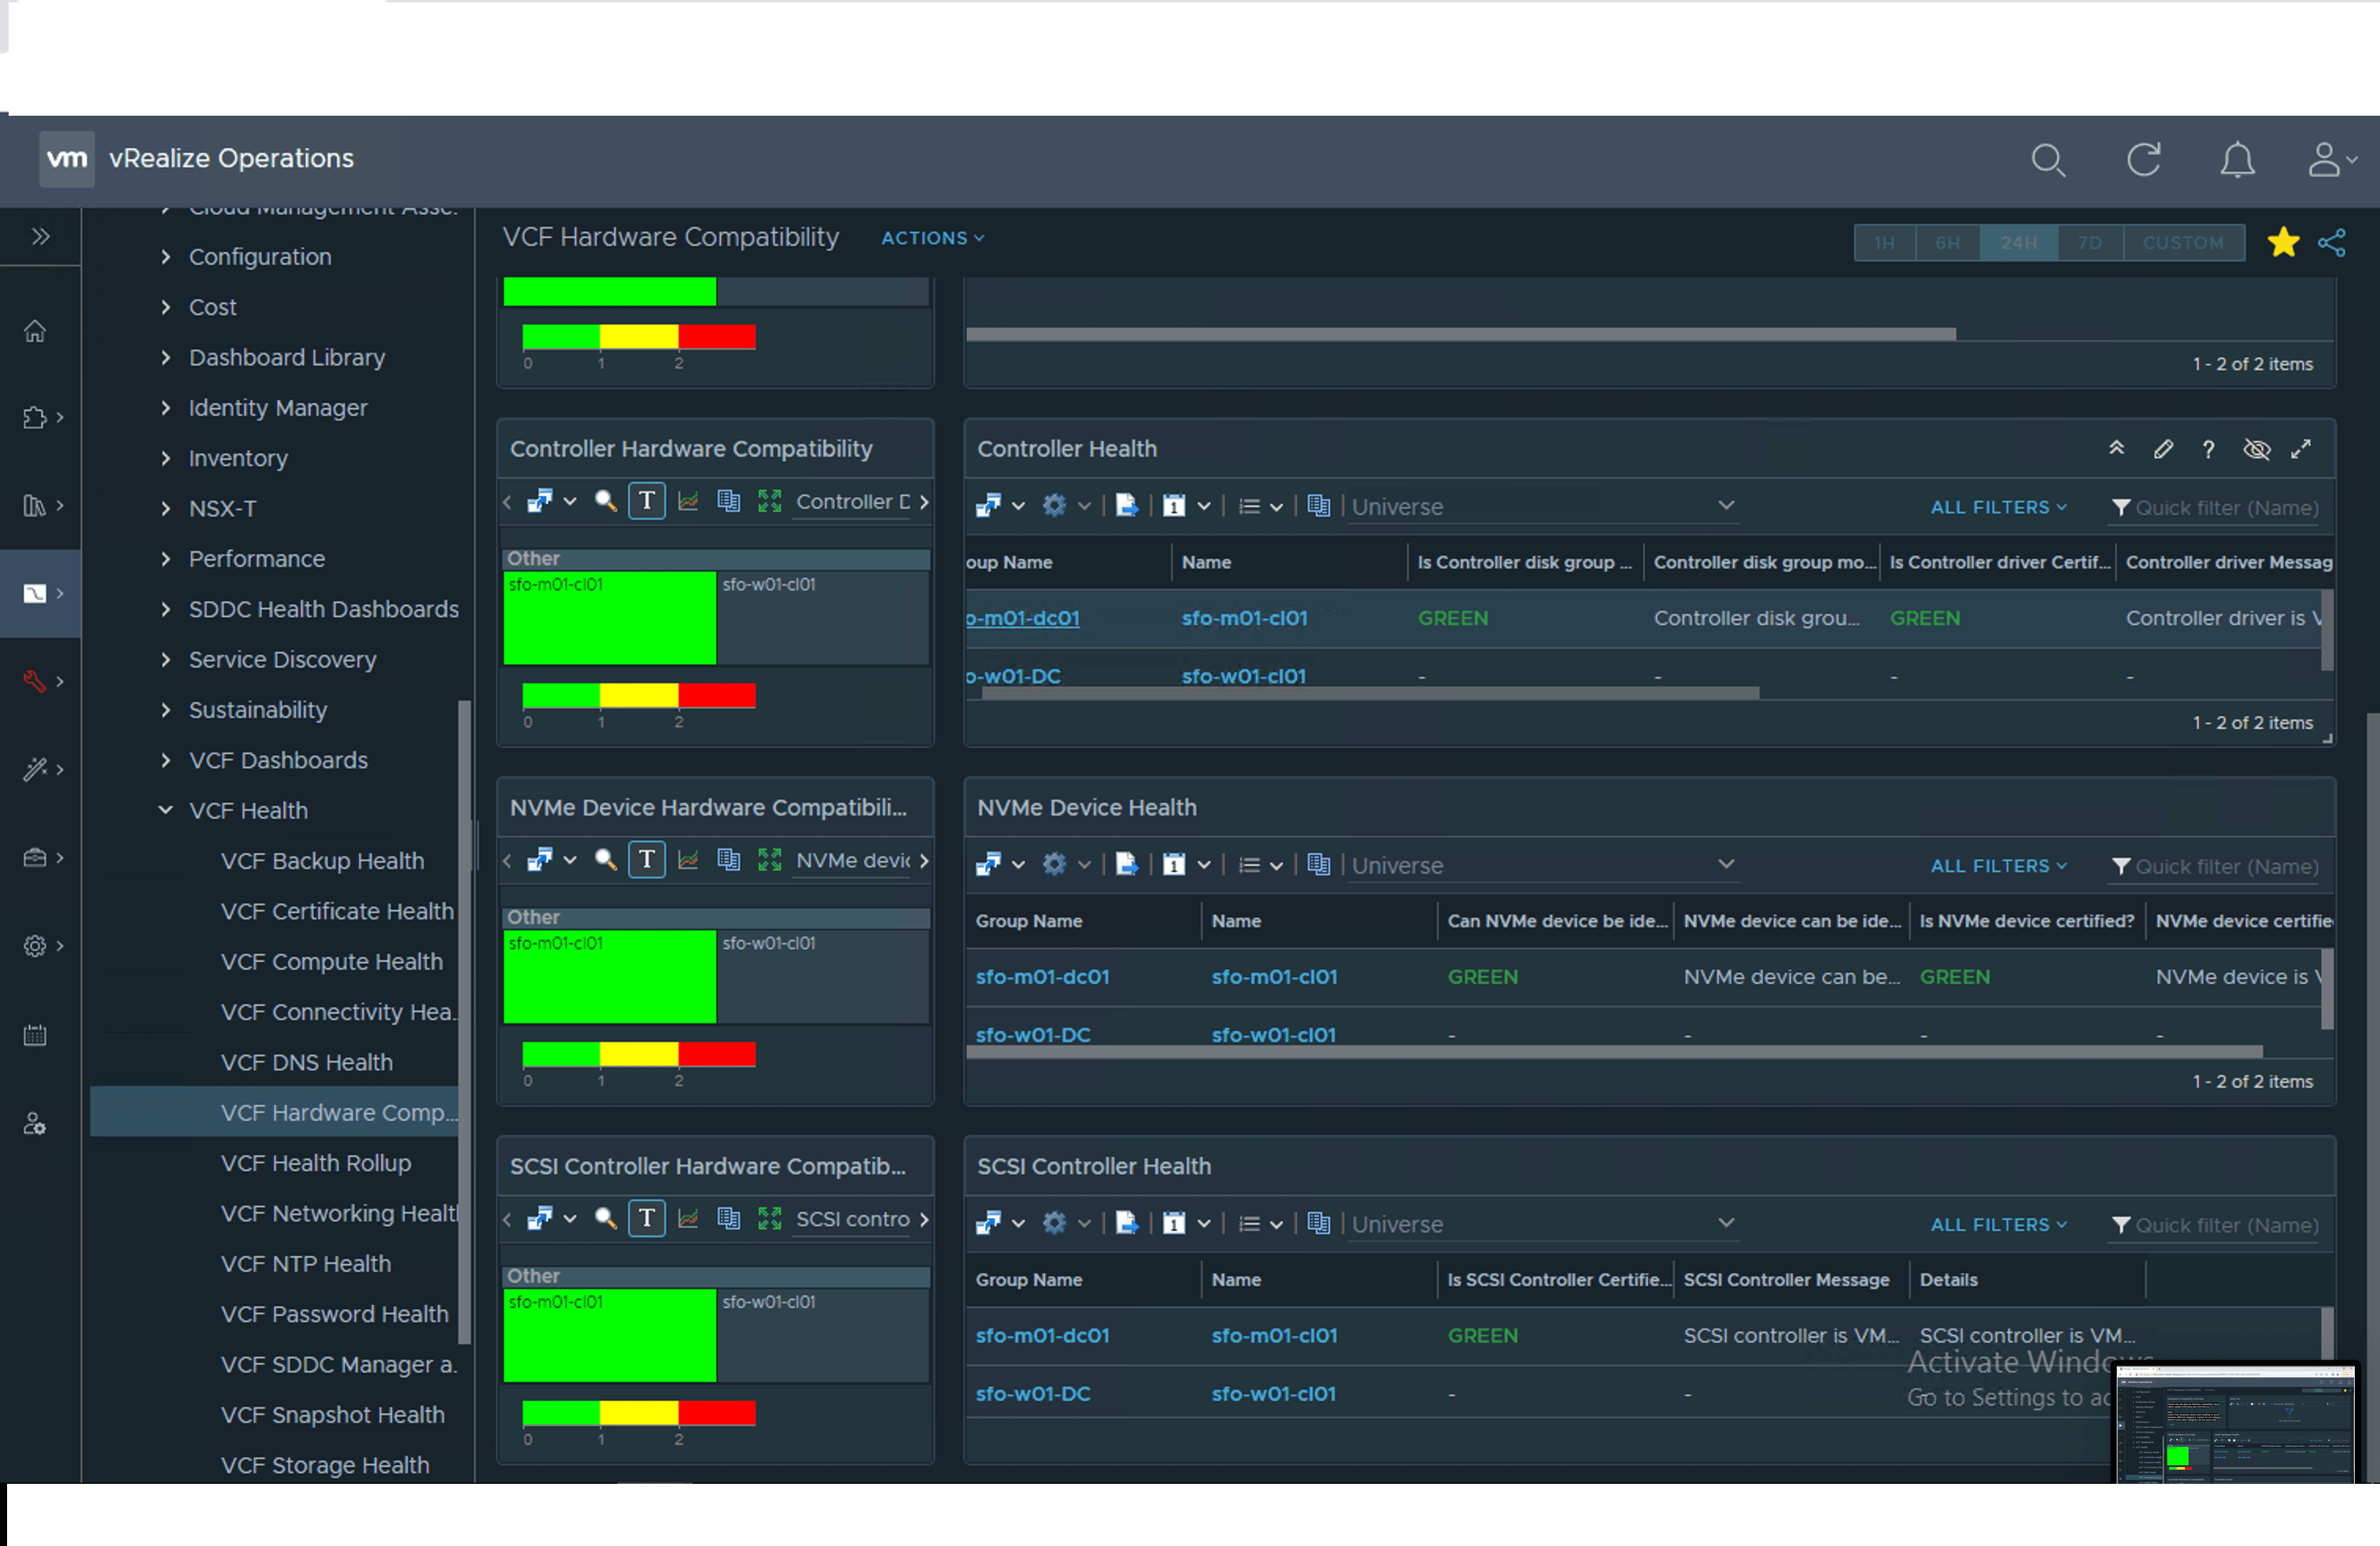
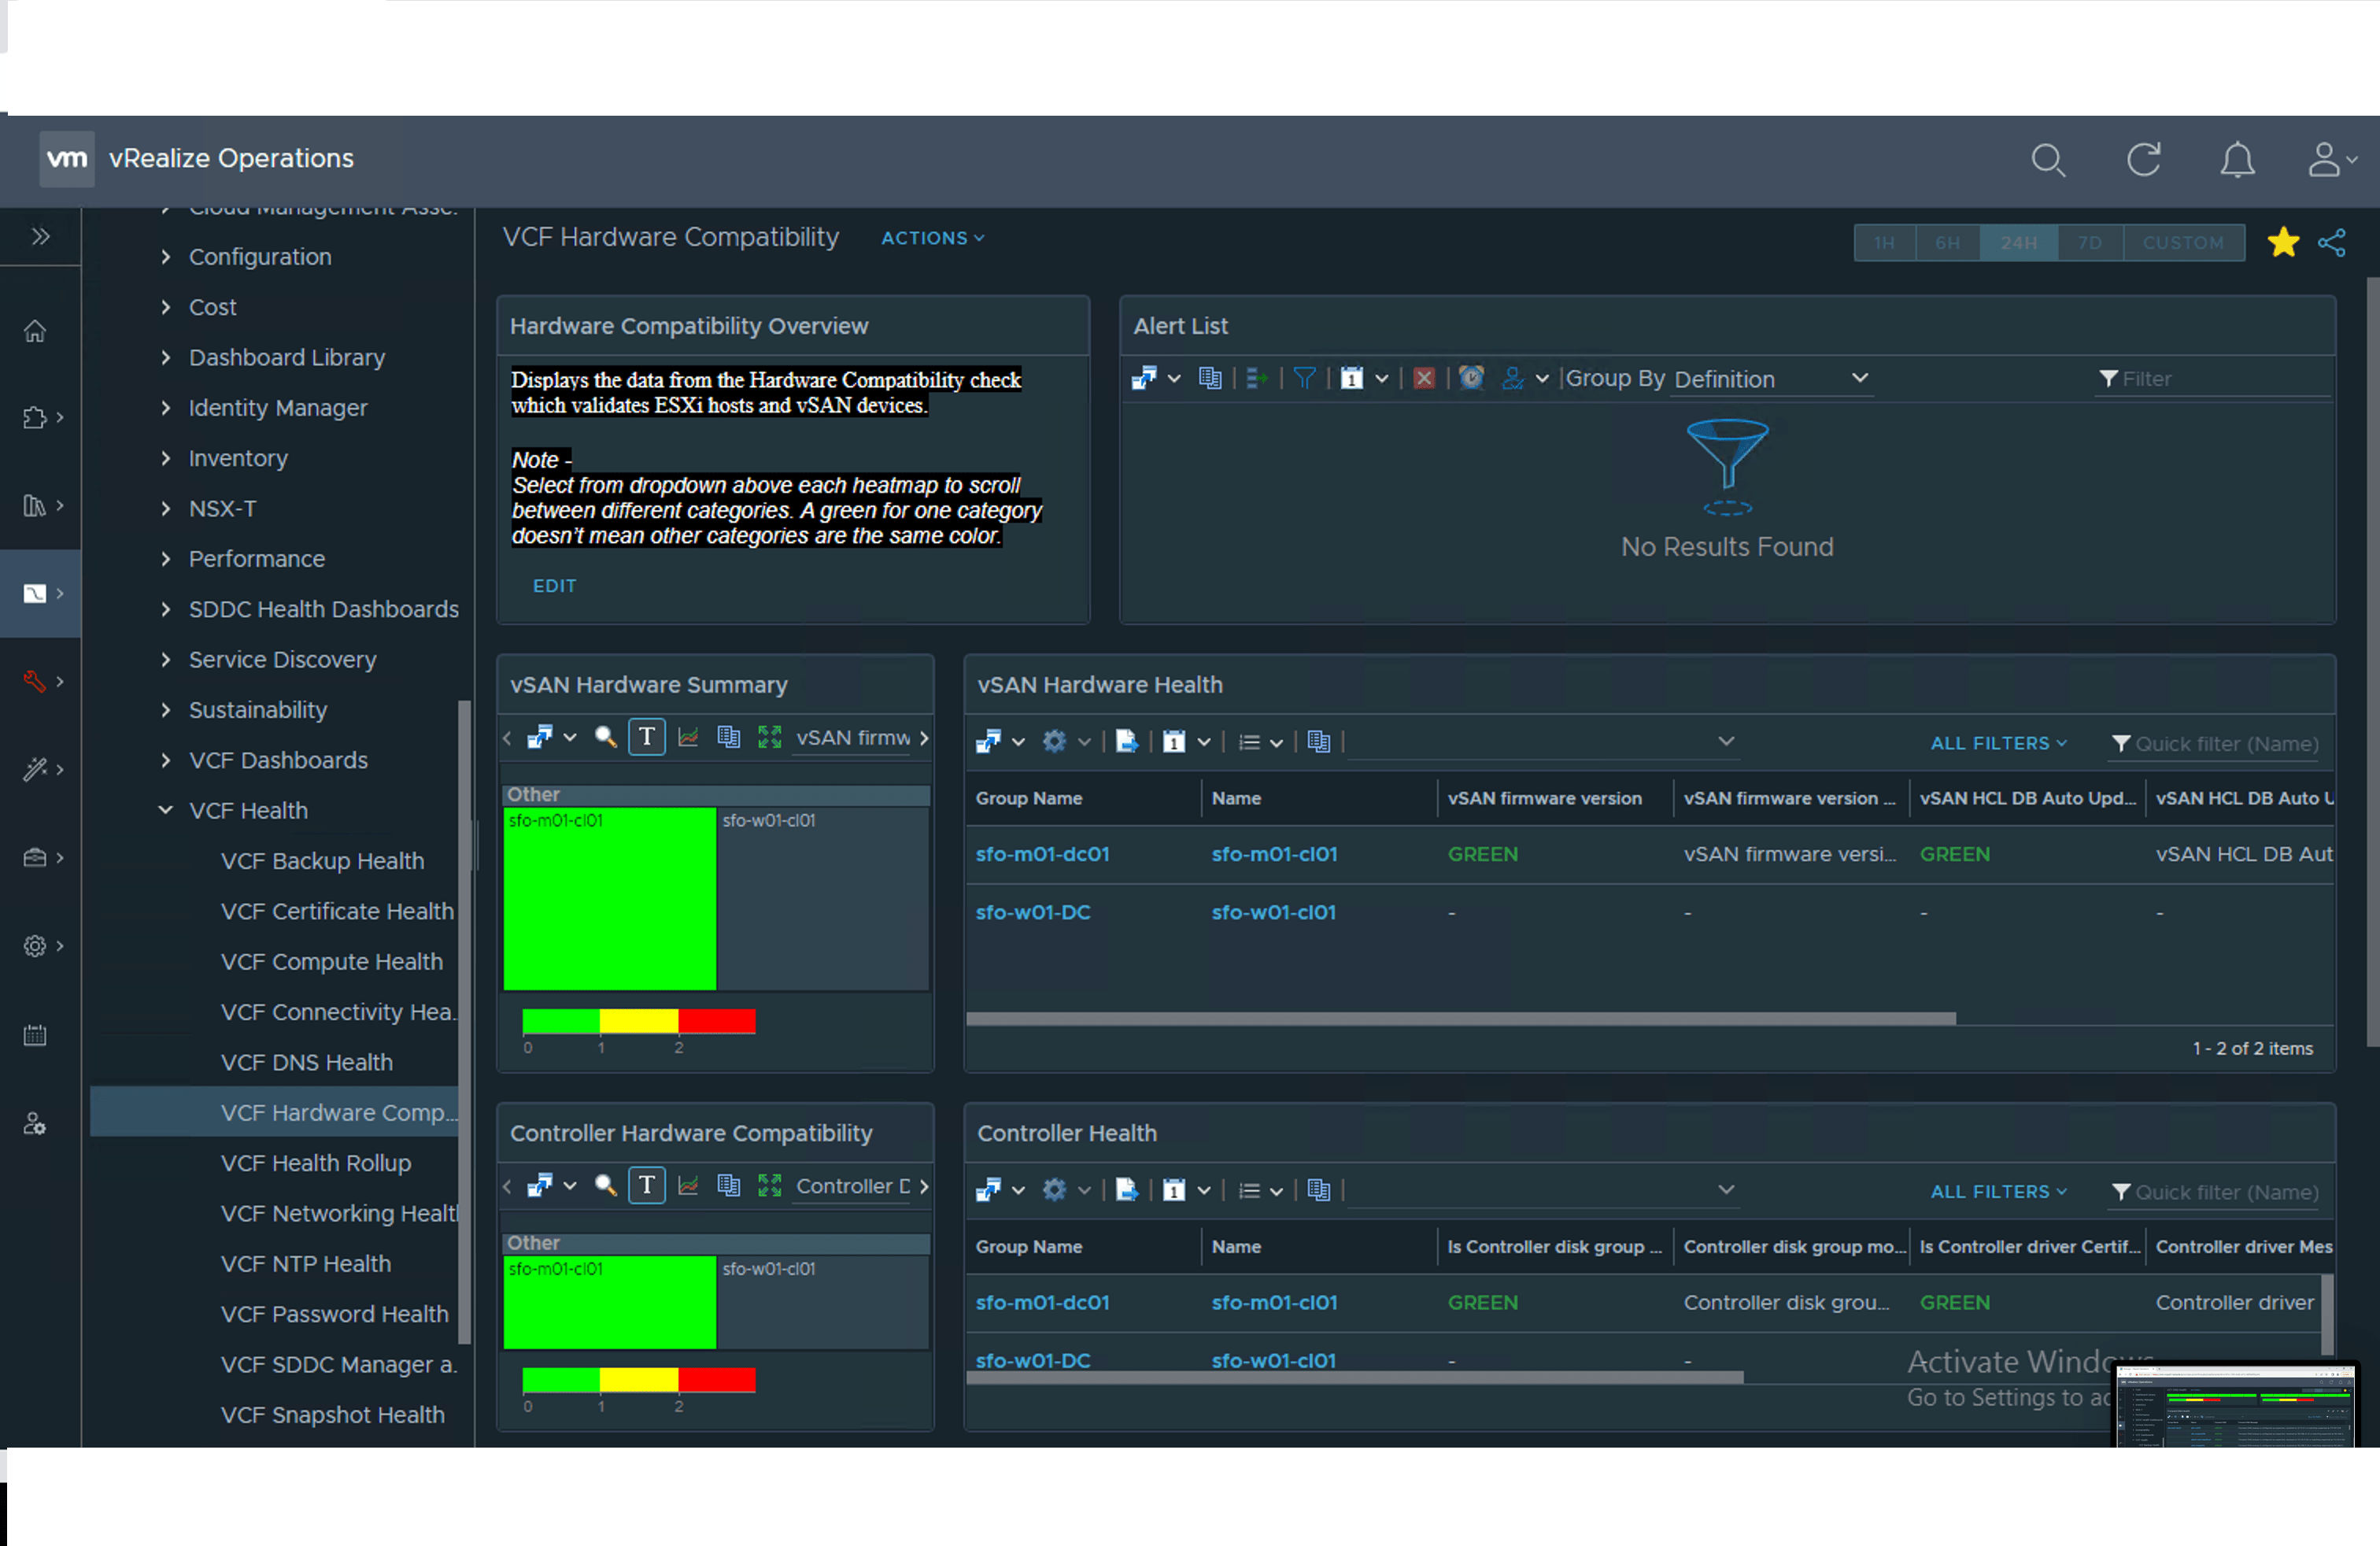
VCF Hardware Compatibility
-
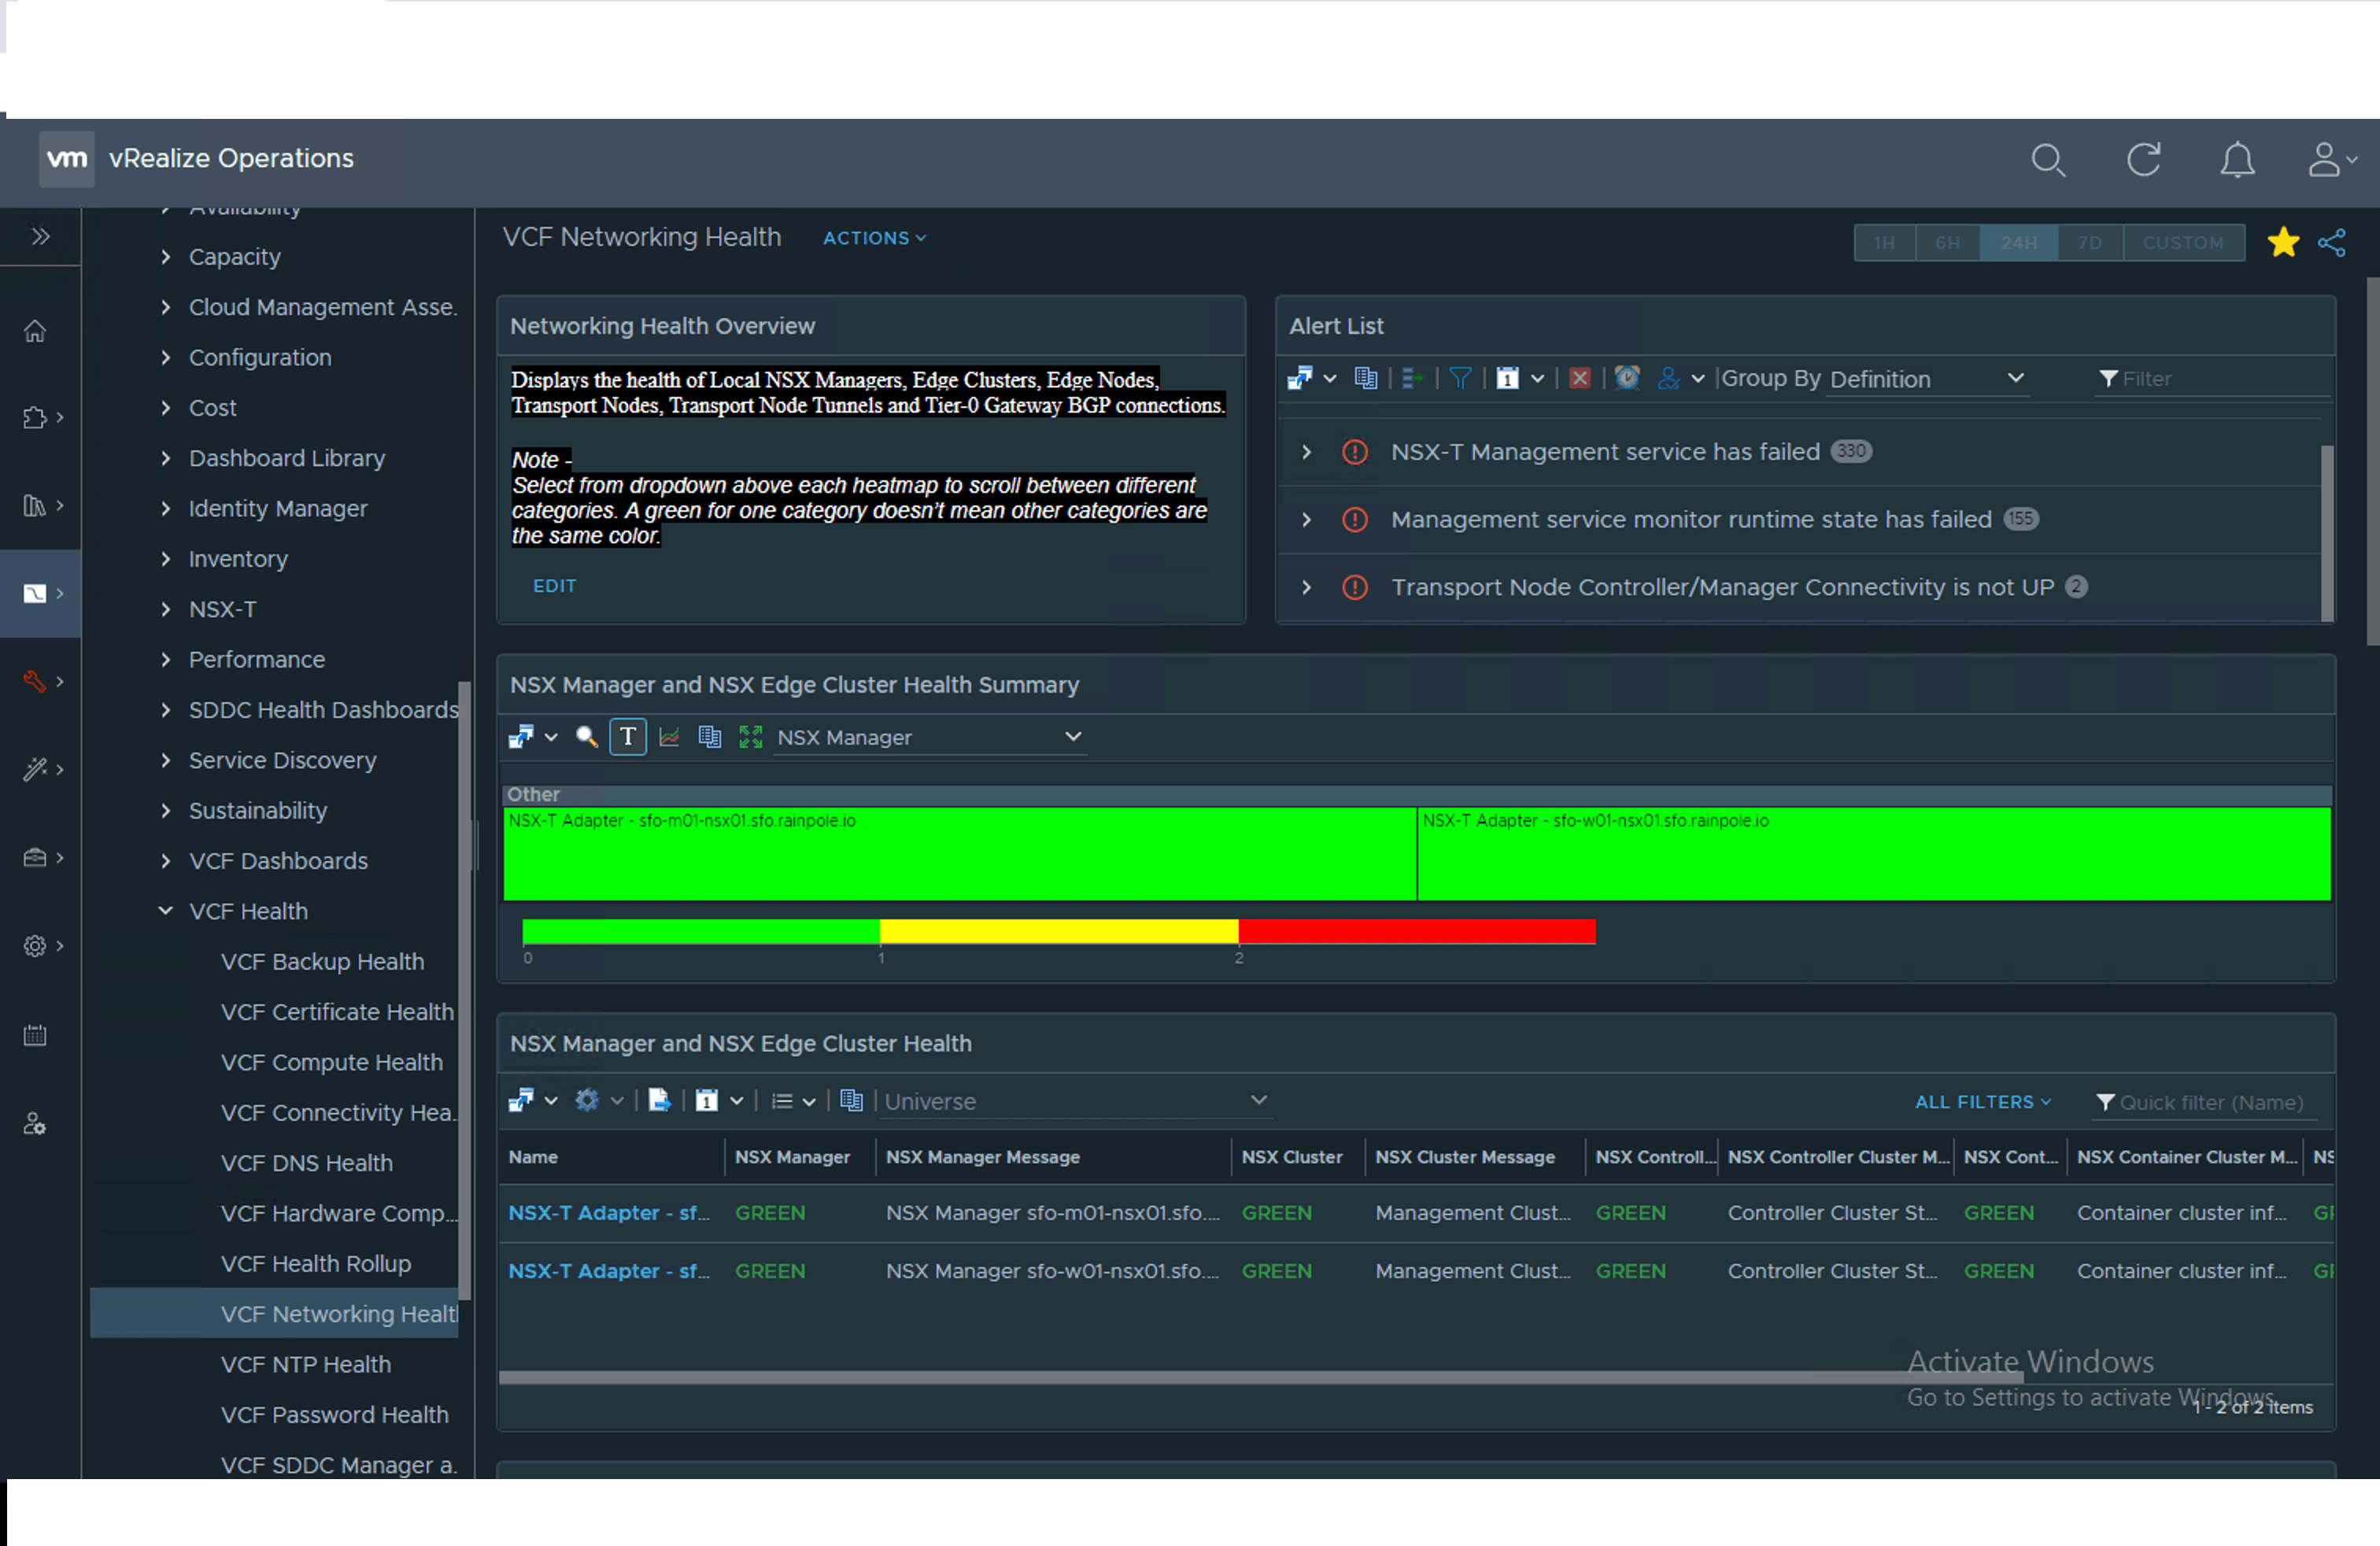
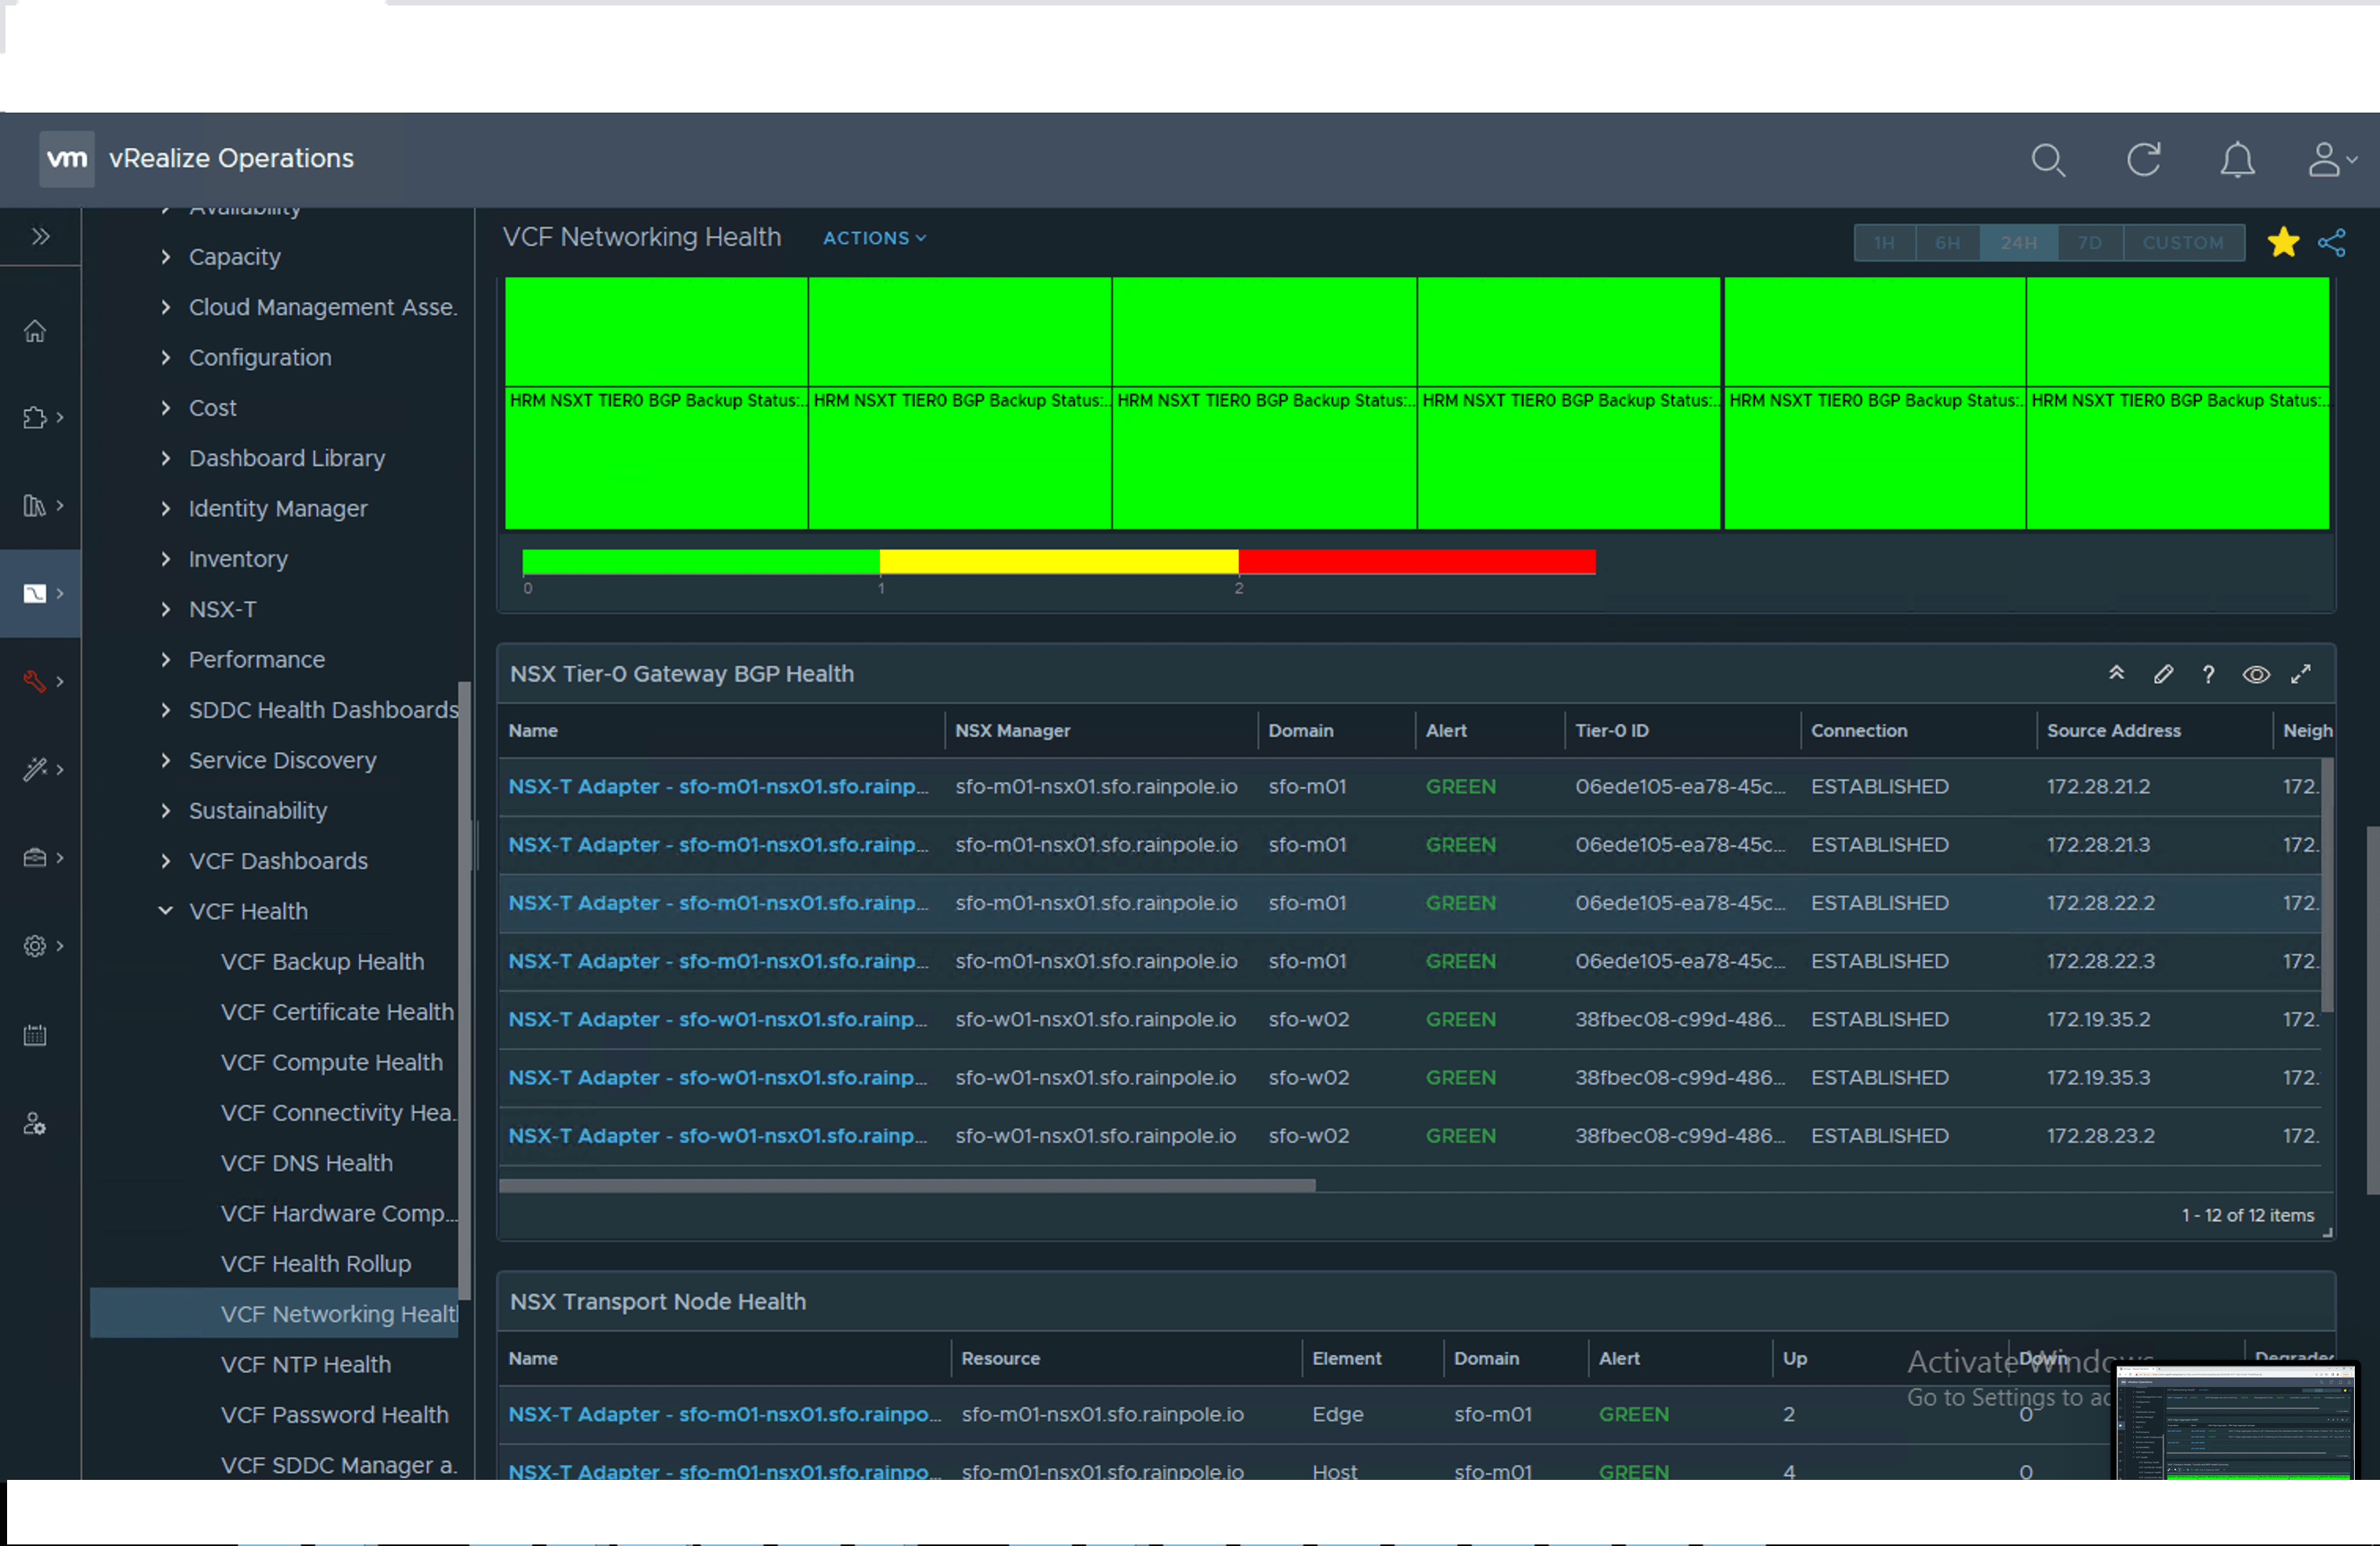
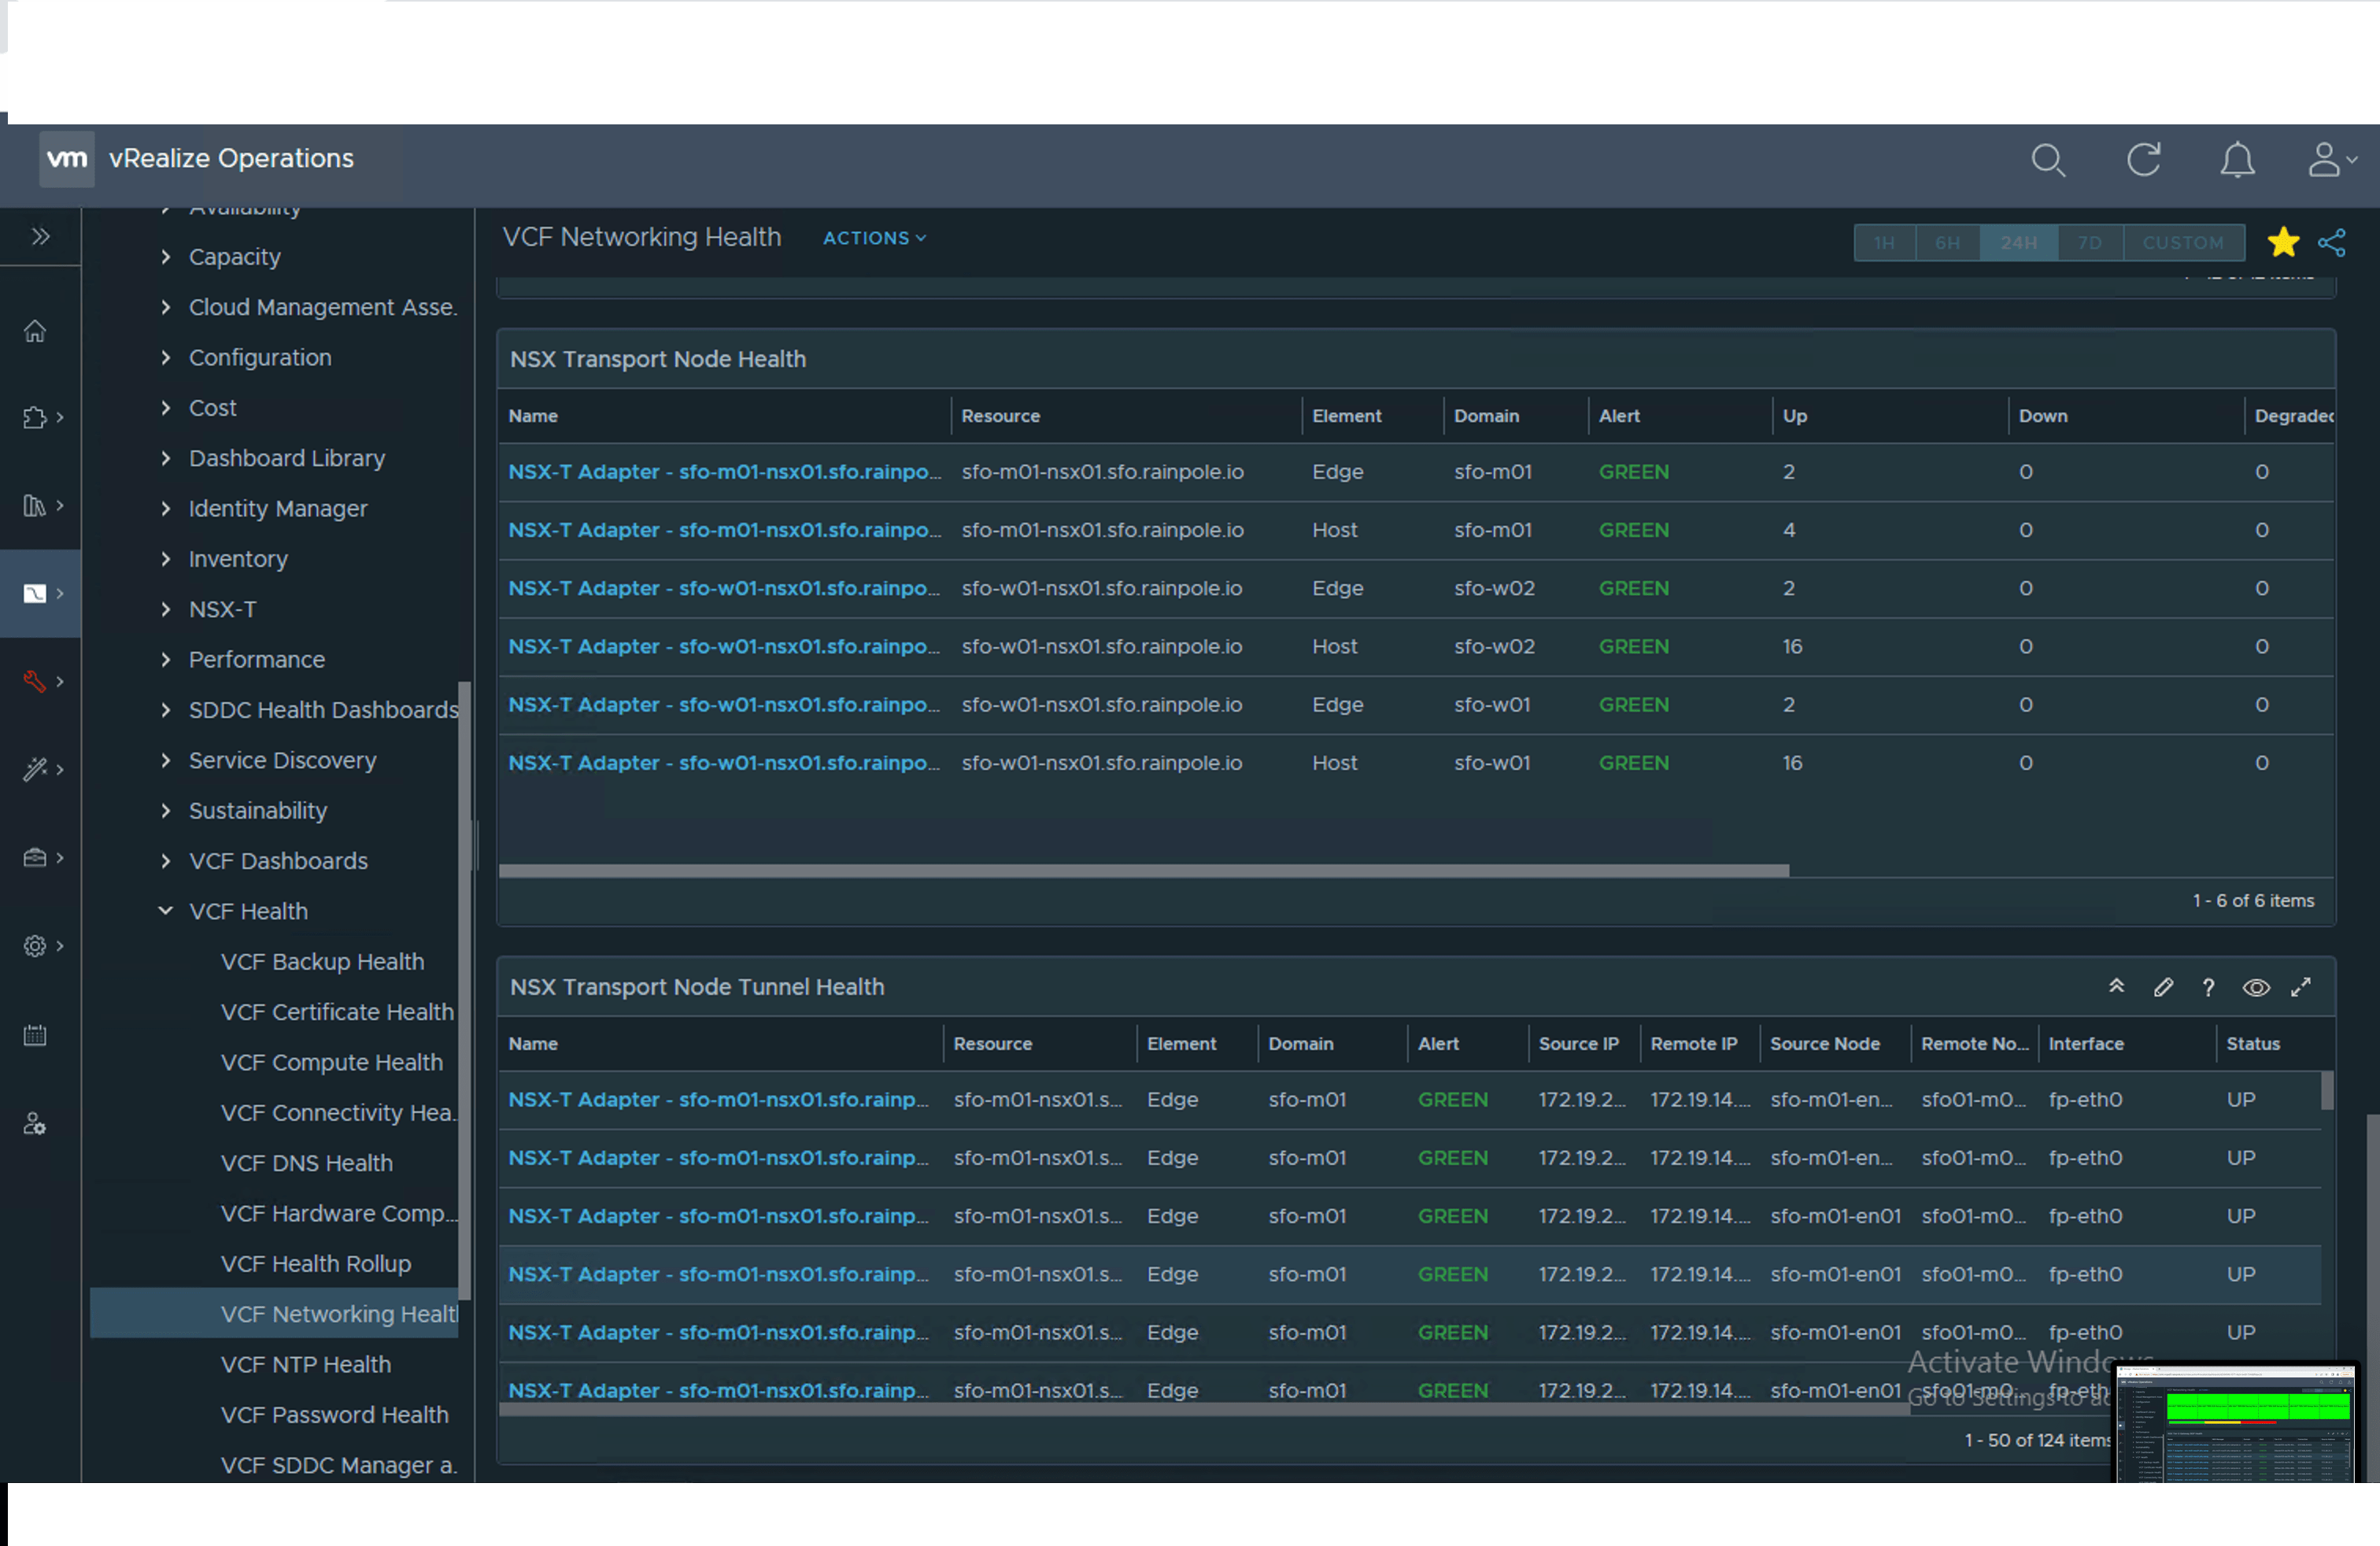
VCF Networking Health
-
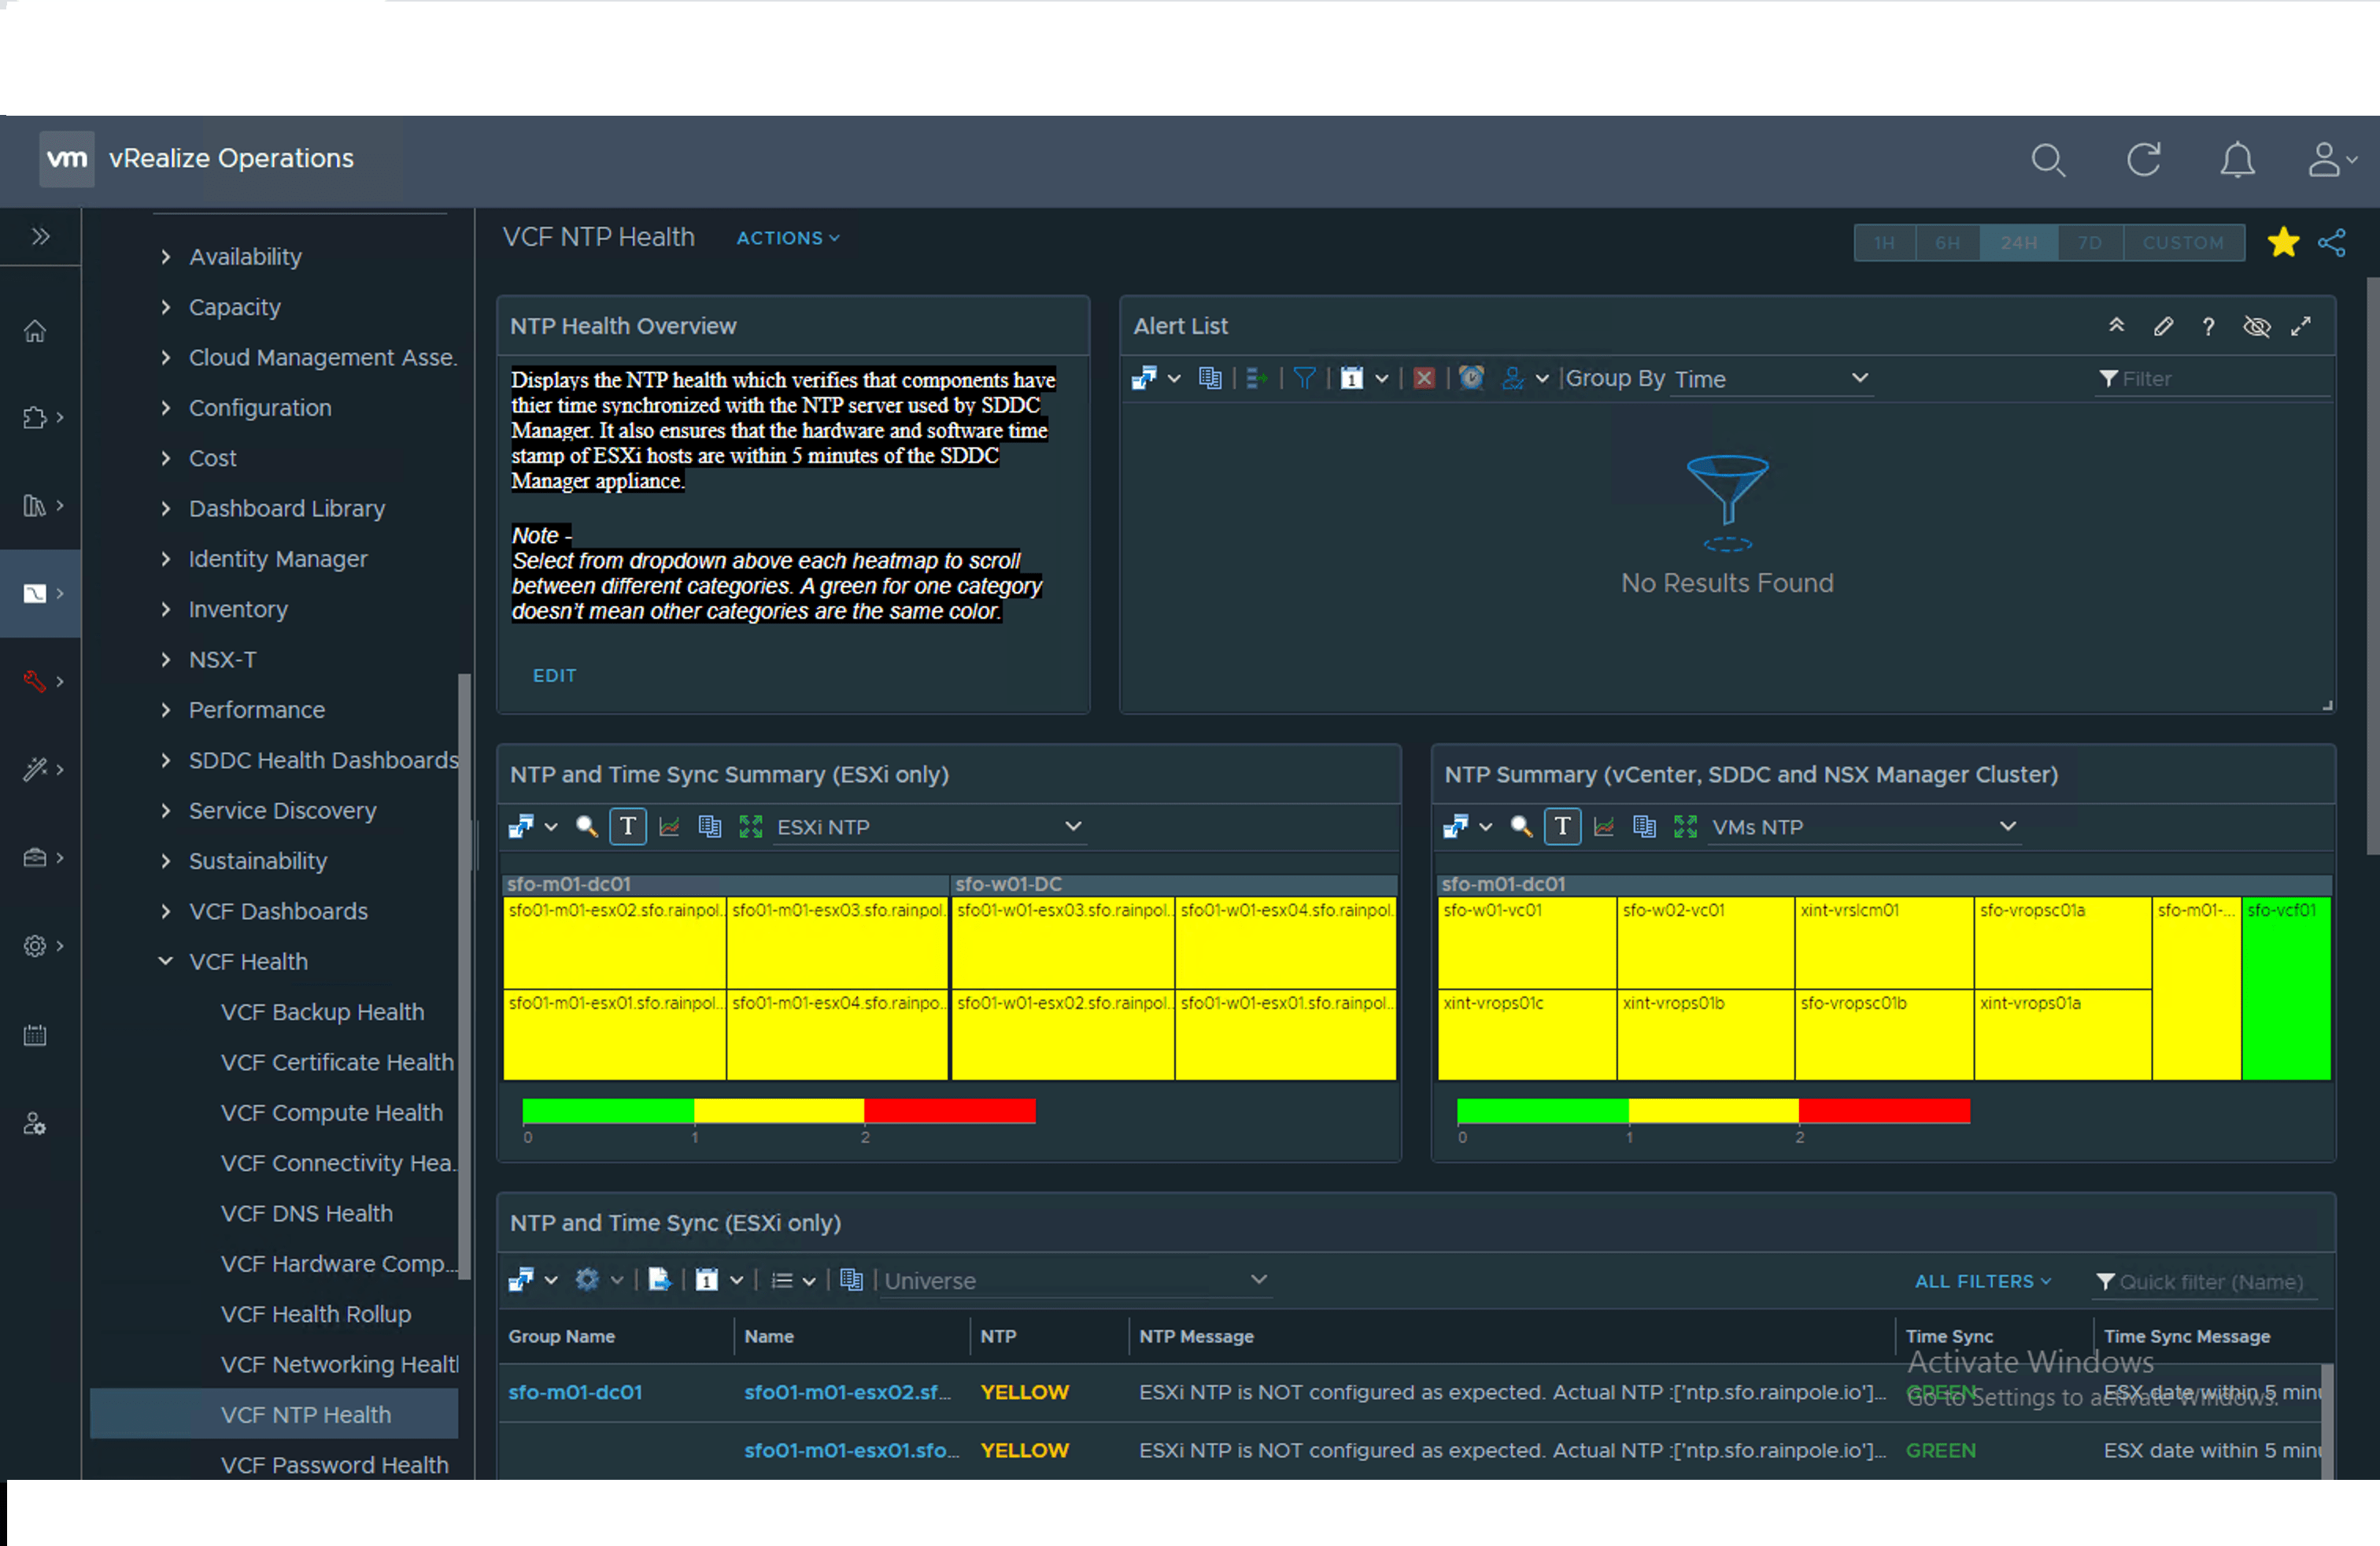
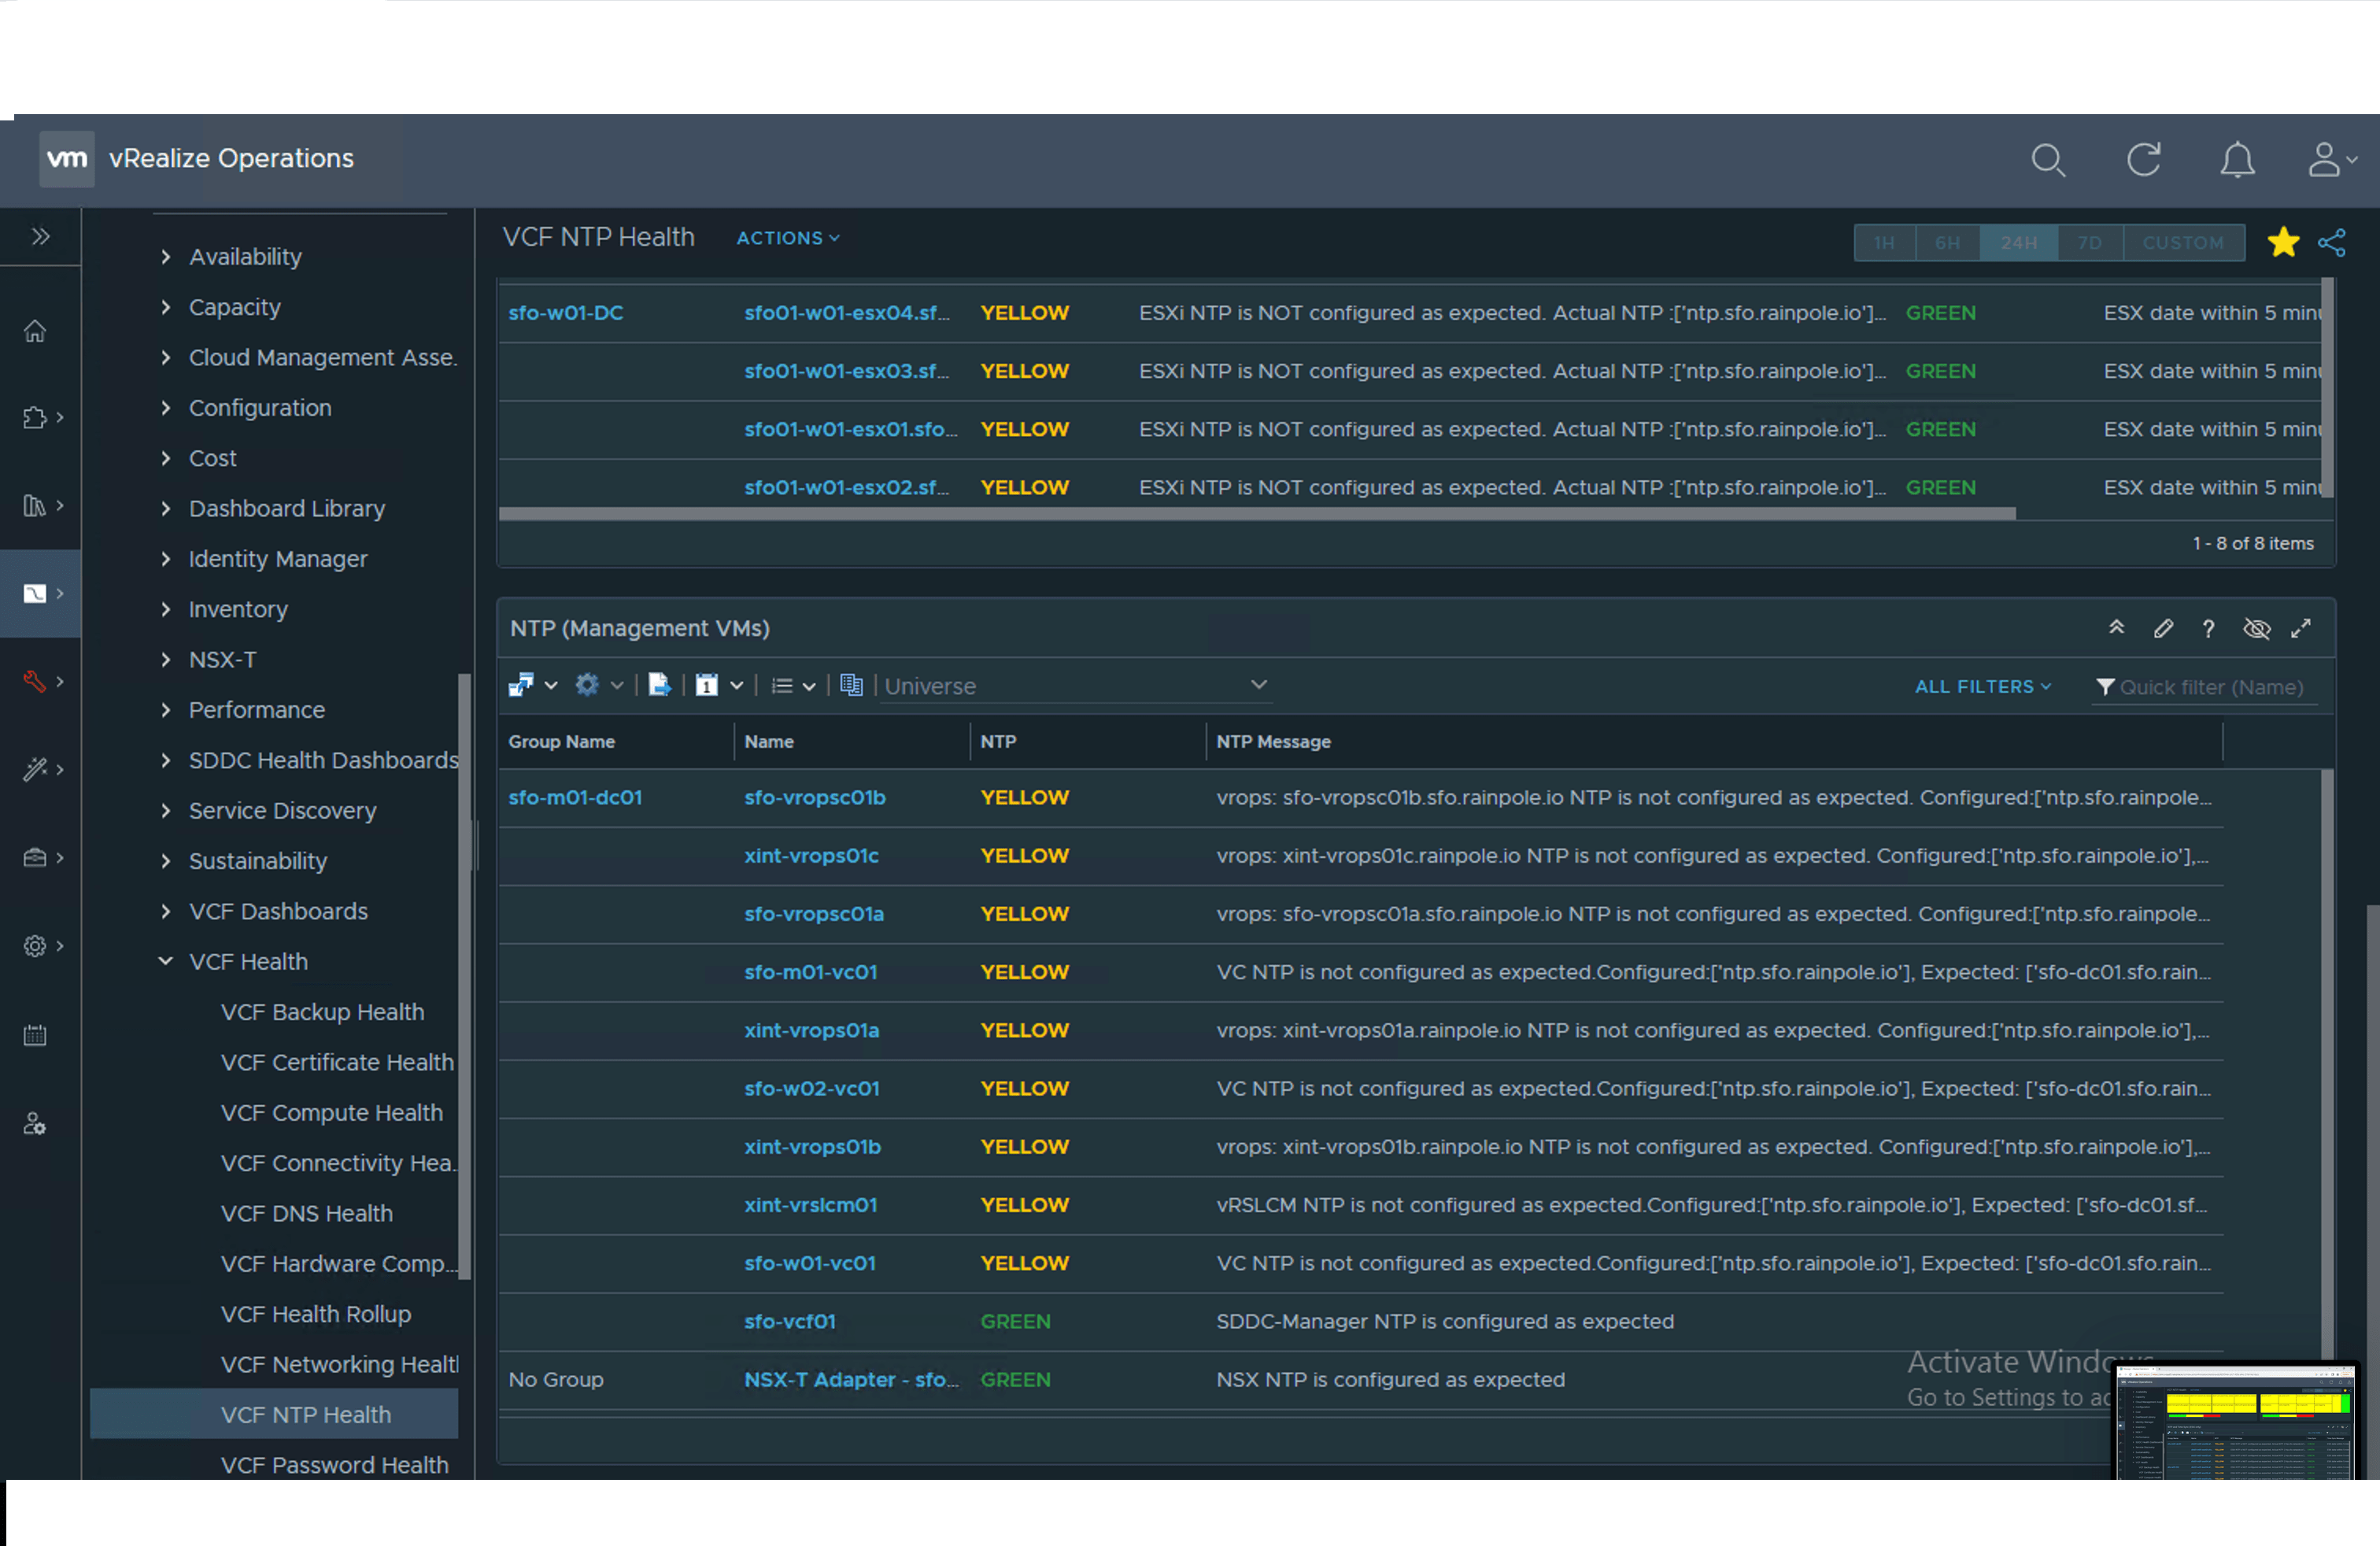
VCF NTP Health
-
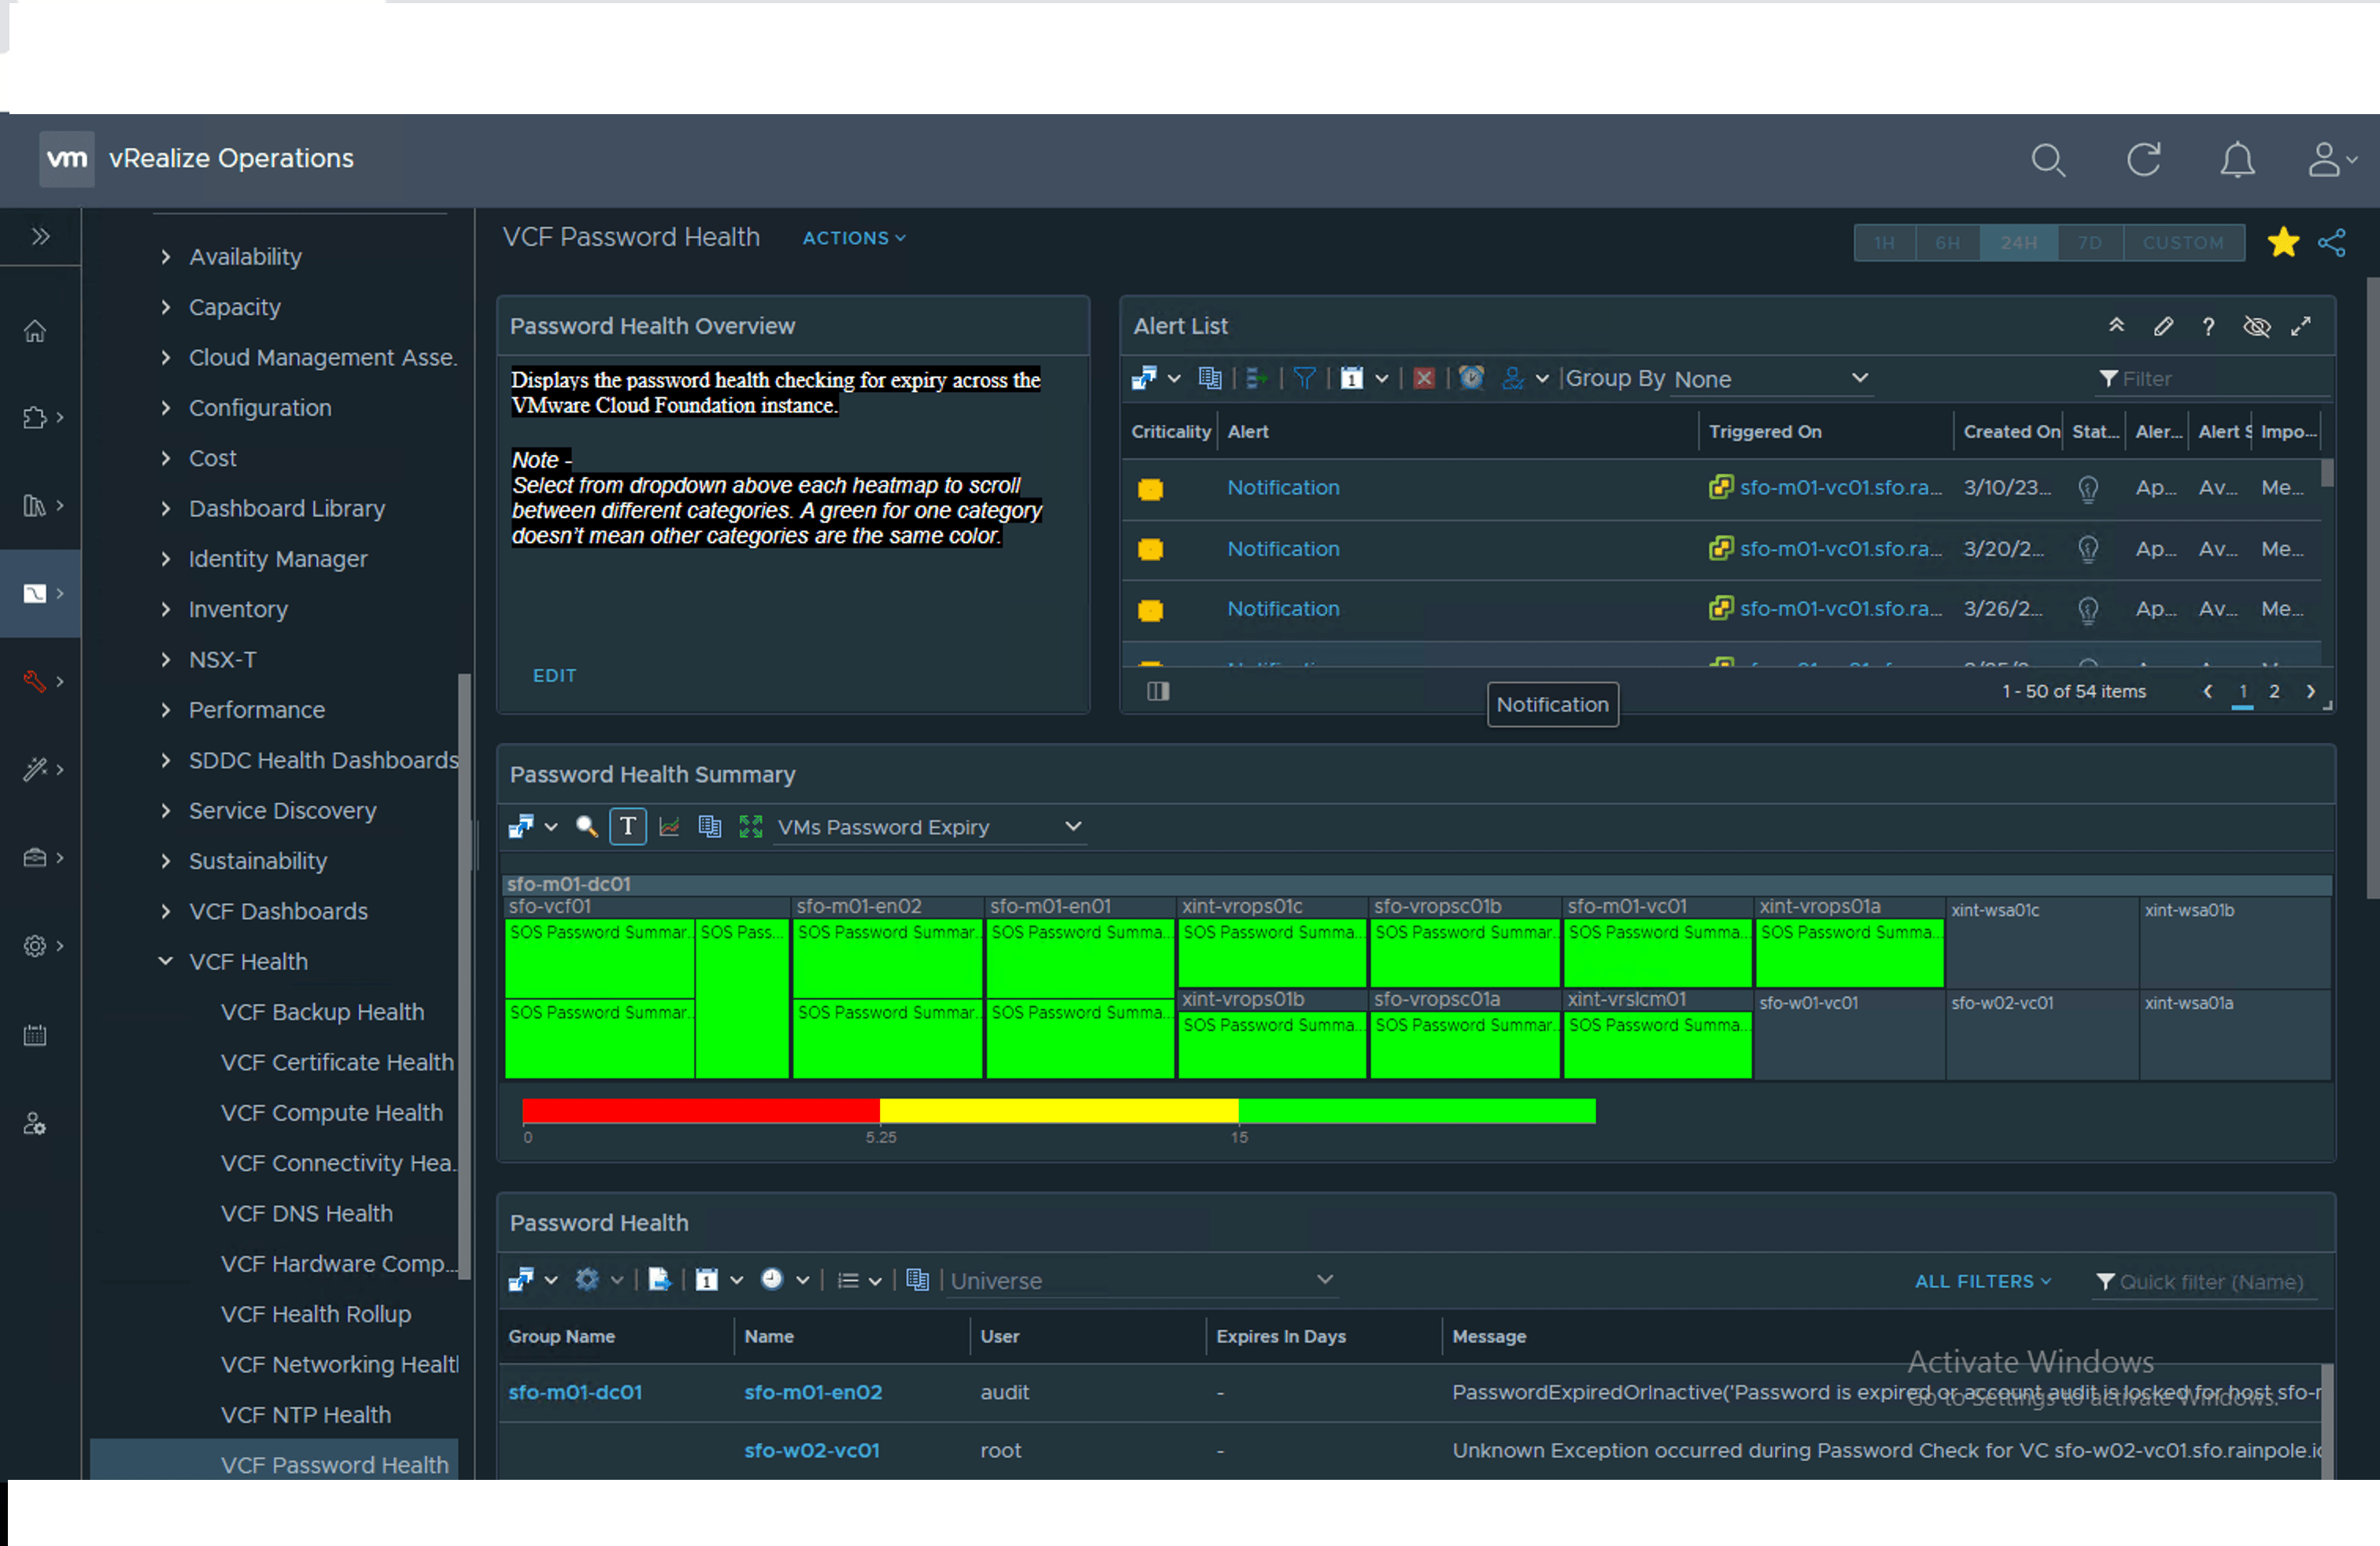
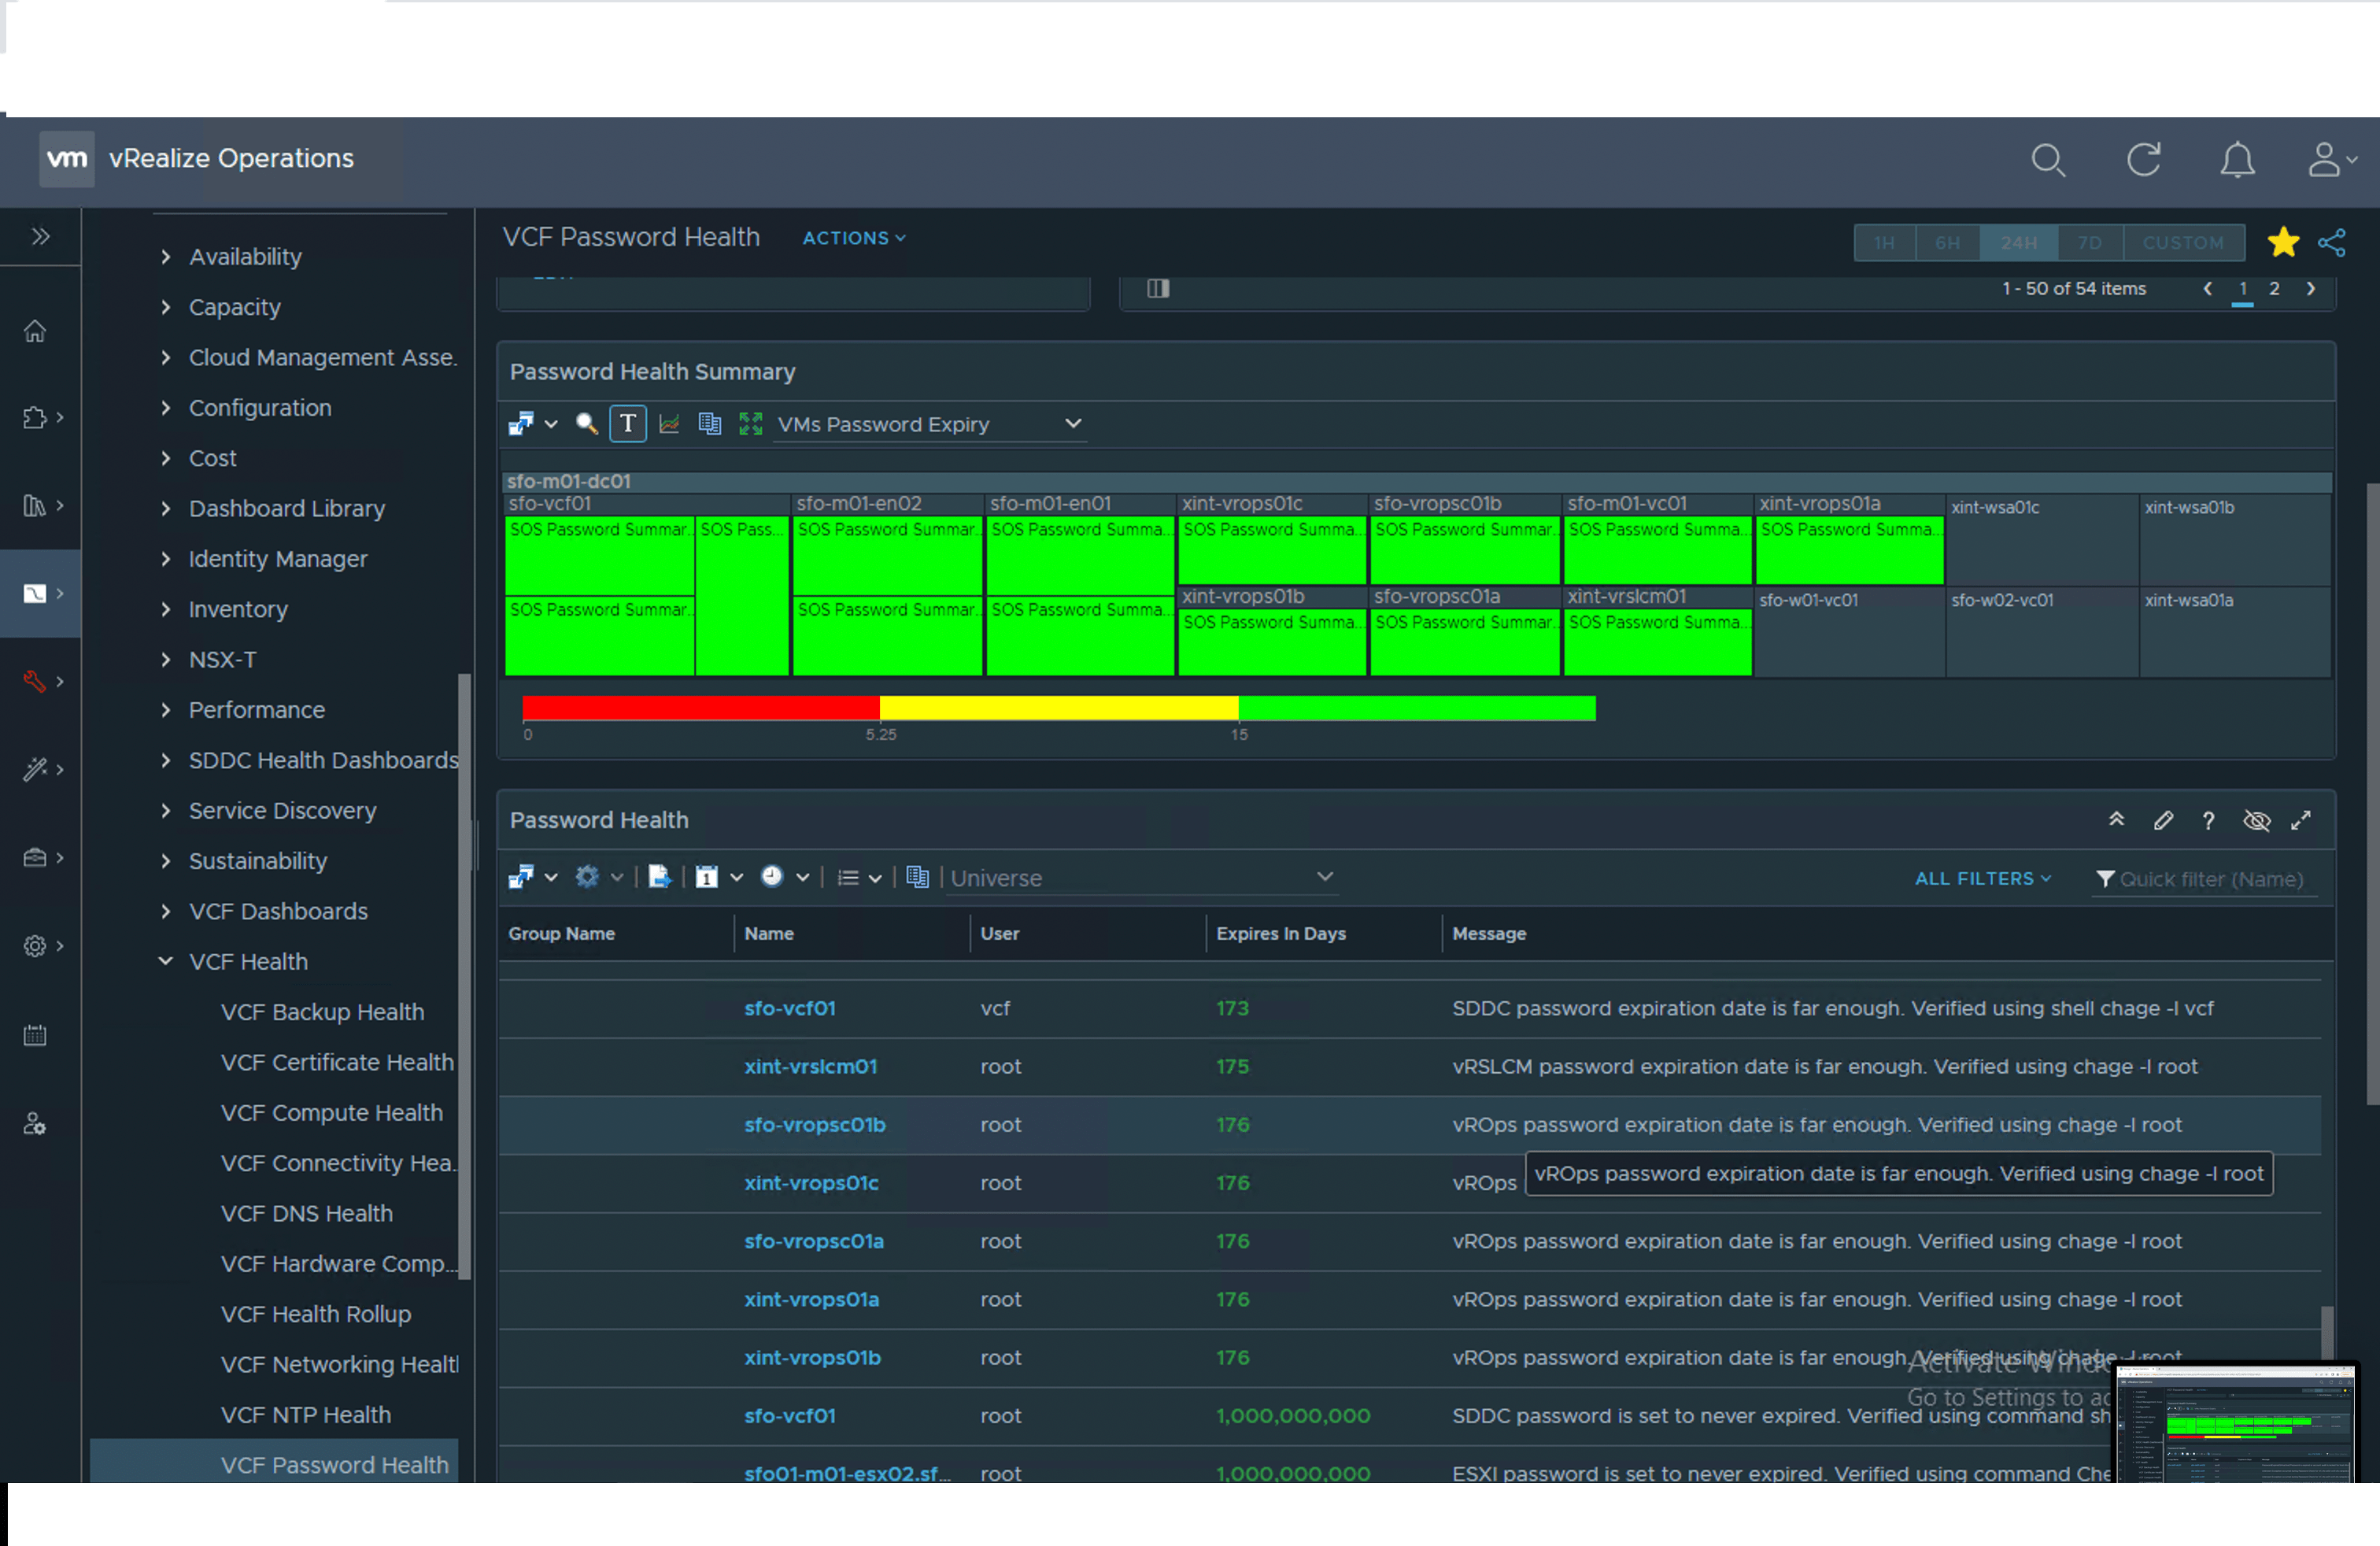
VCF Password Health
-
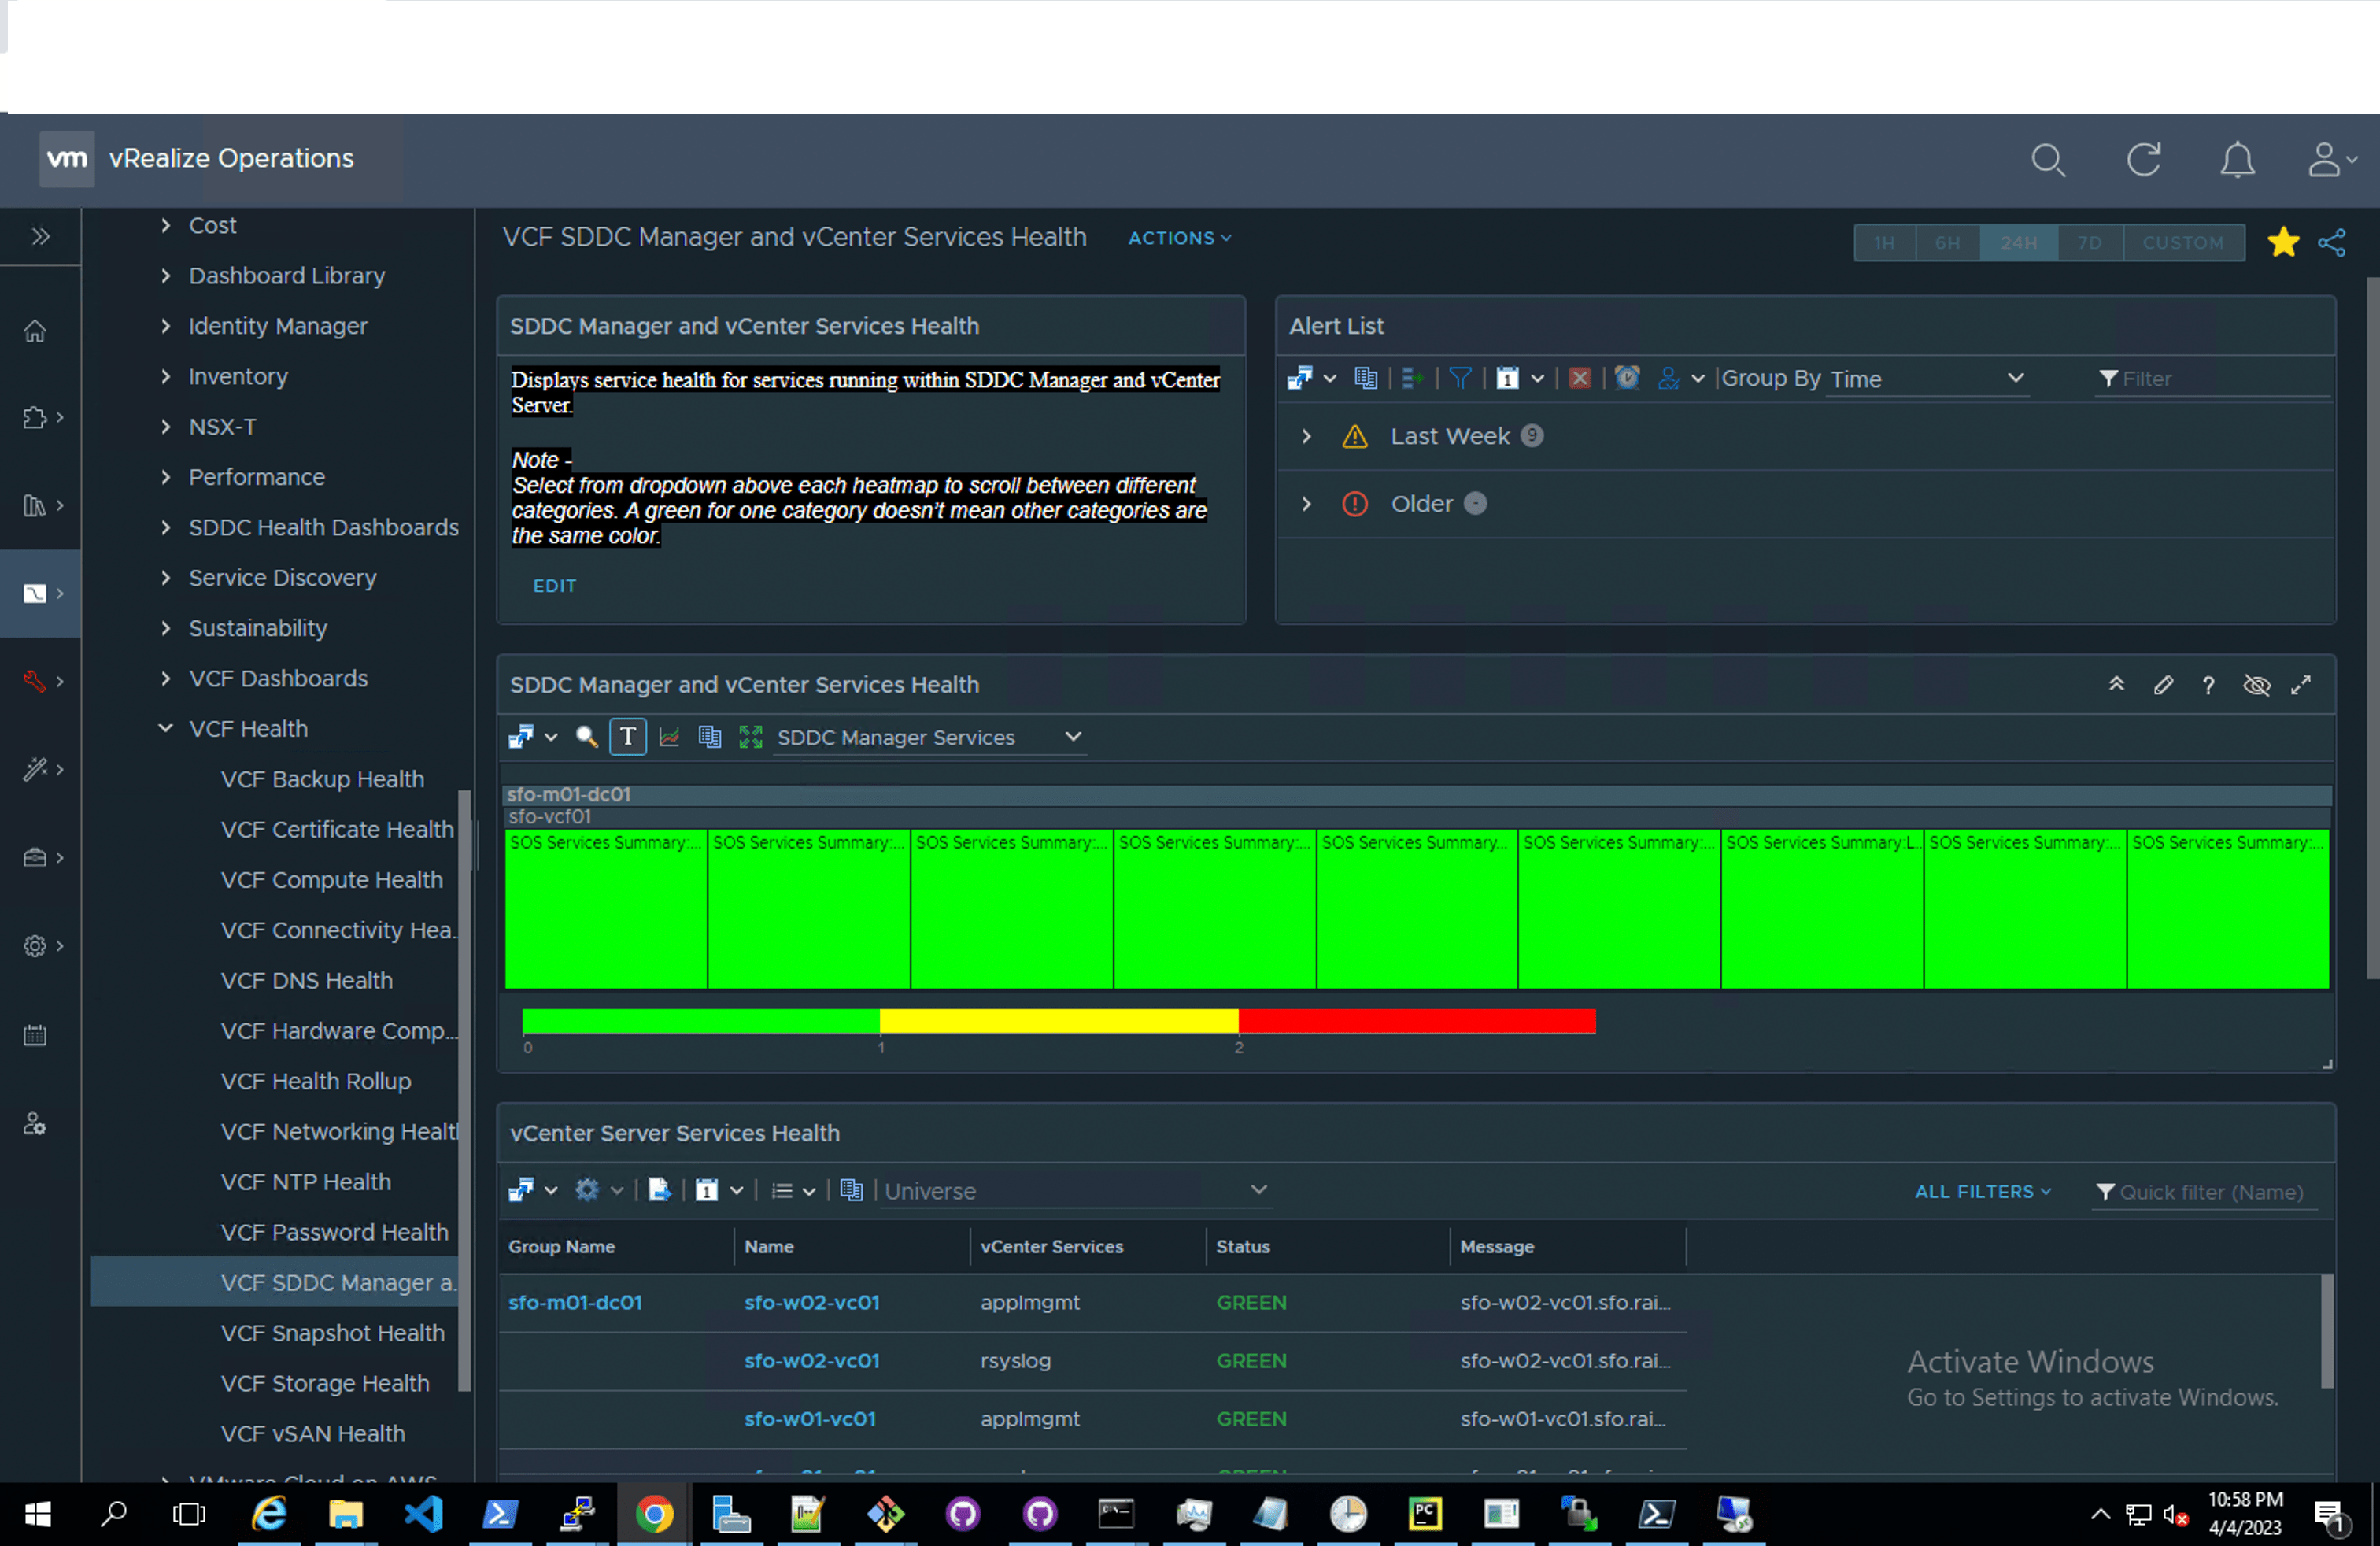
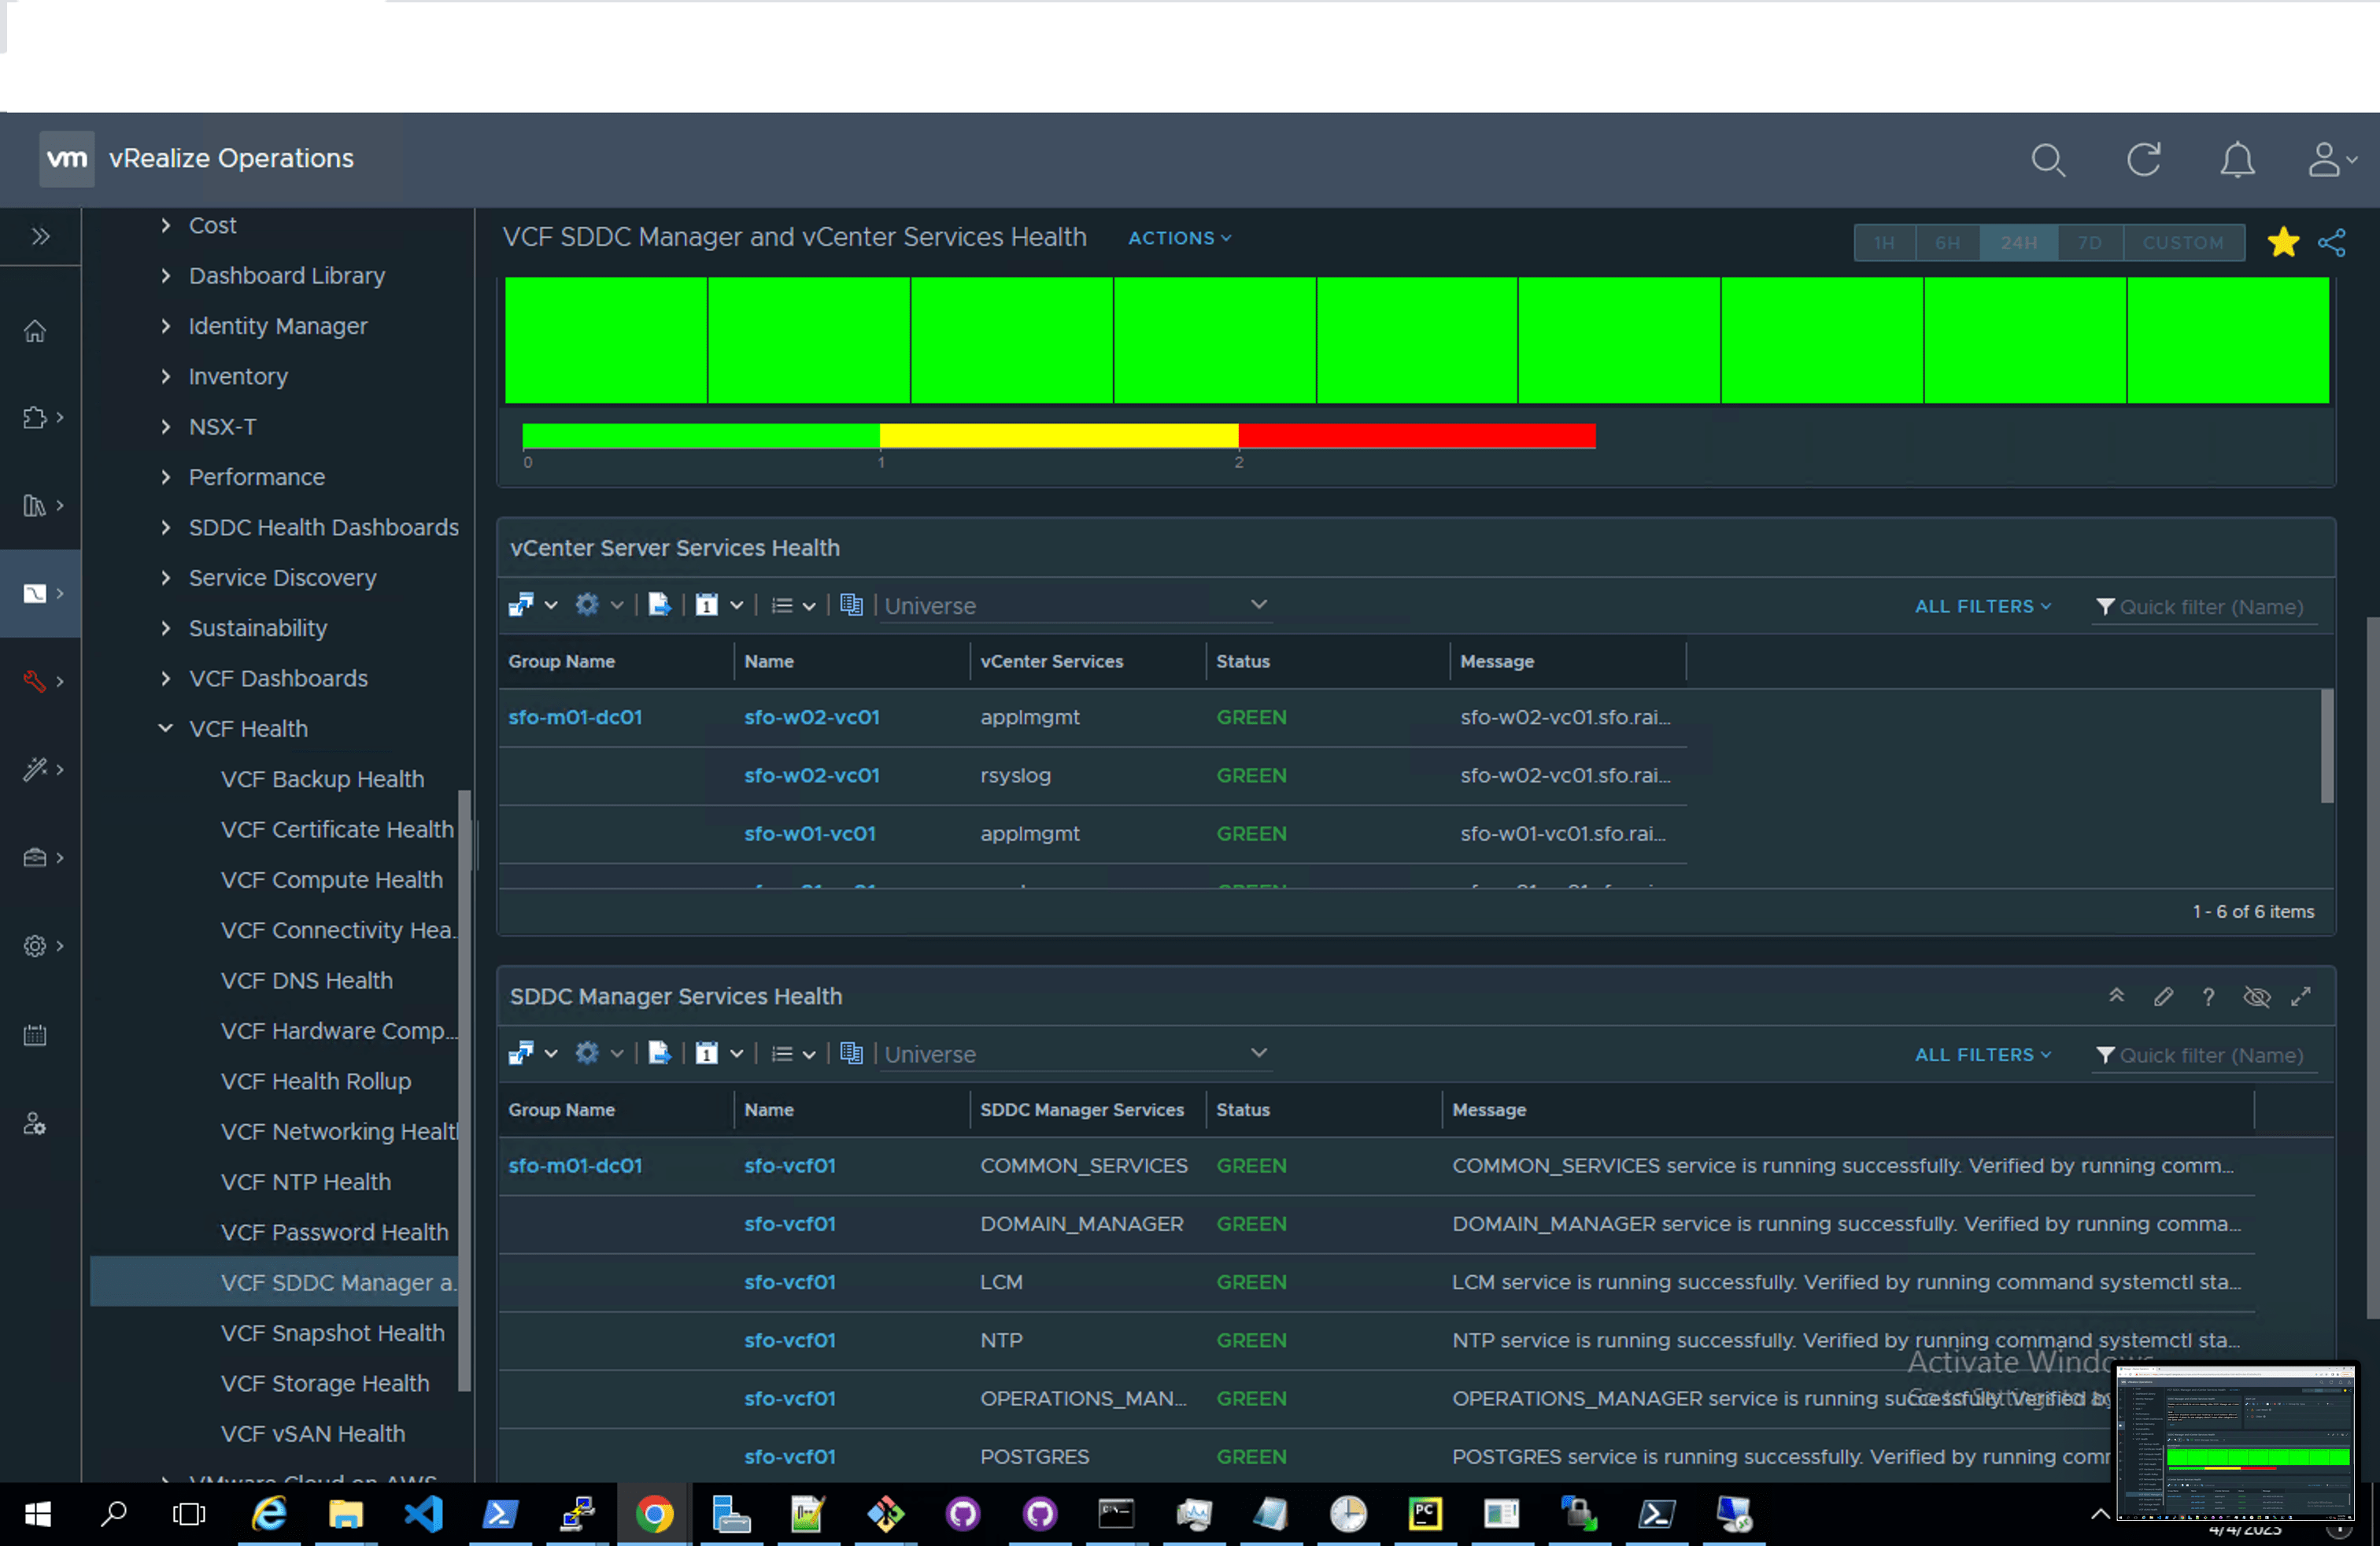
VCF SDDC Manager and vCenter Services Health
-
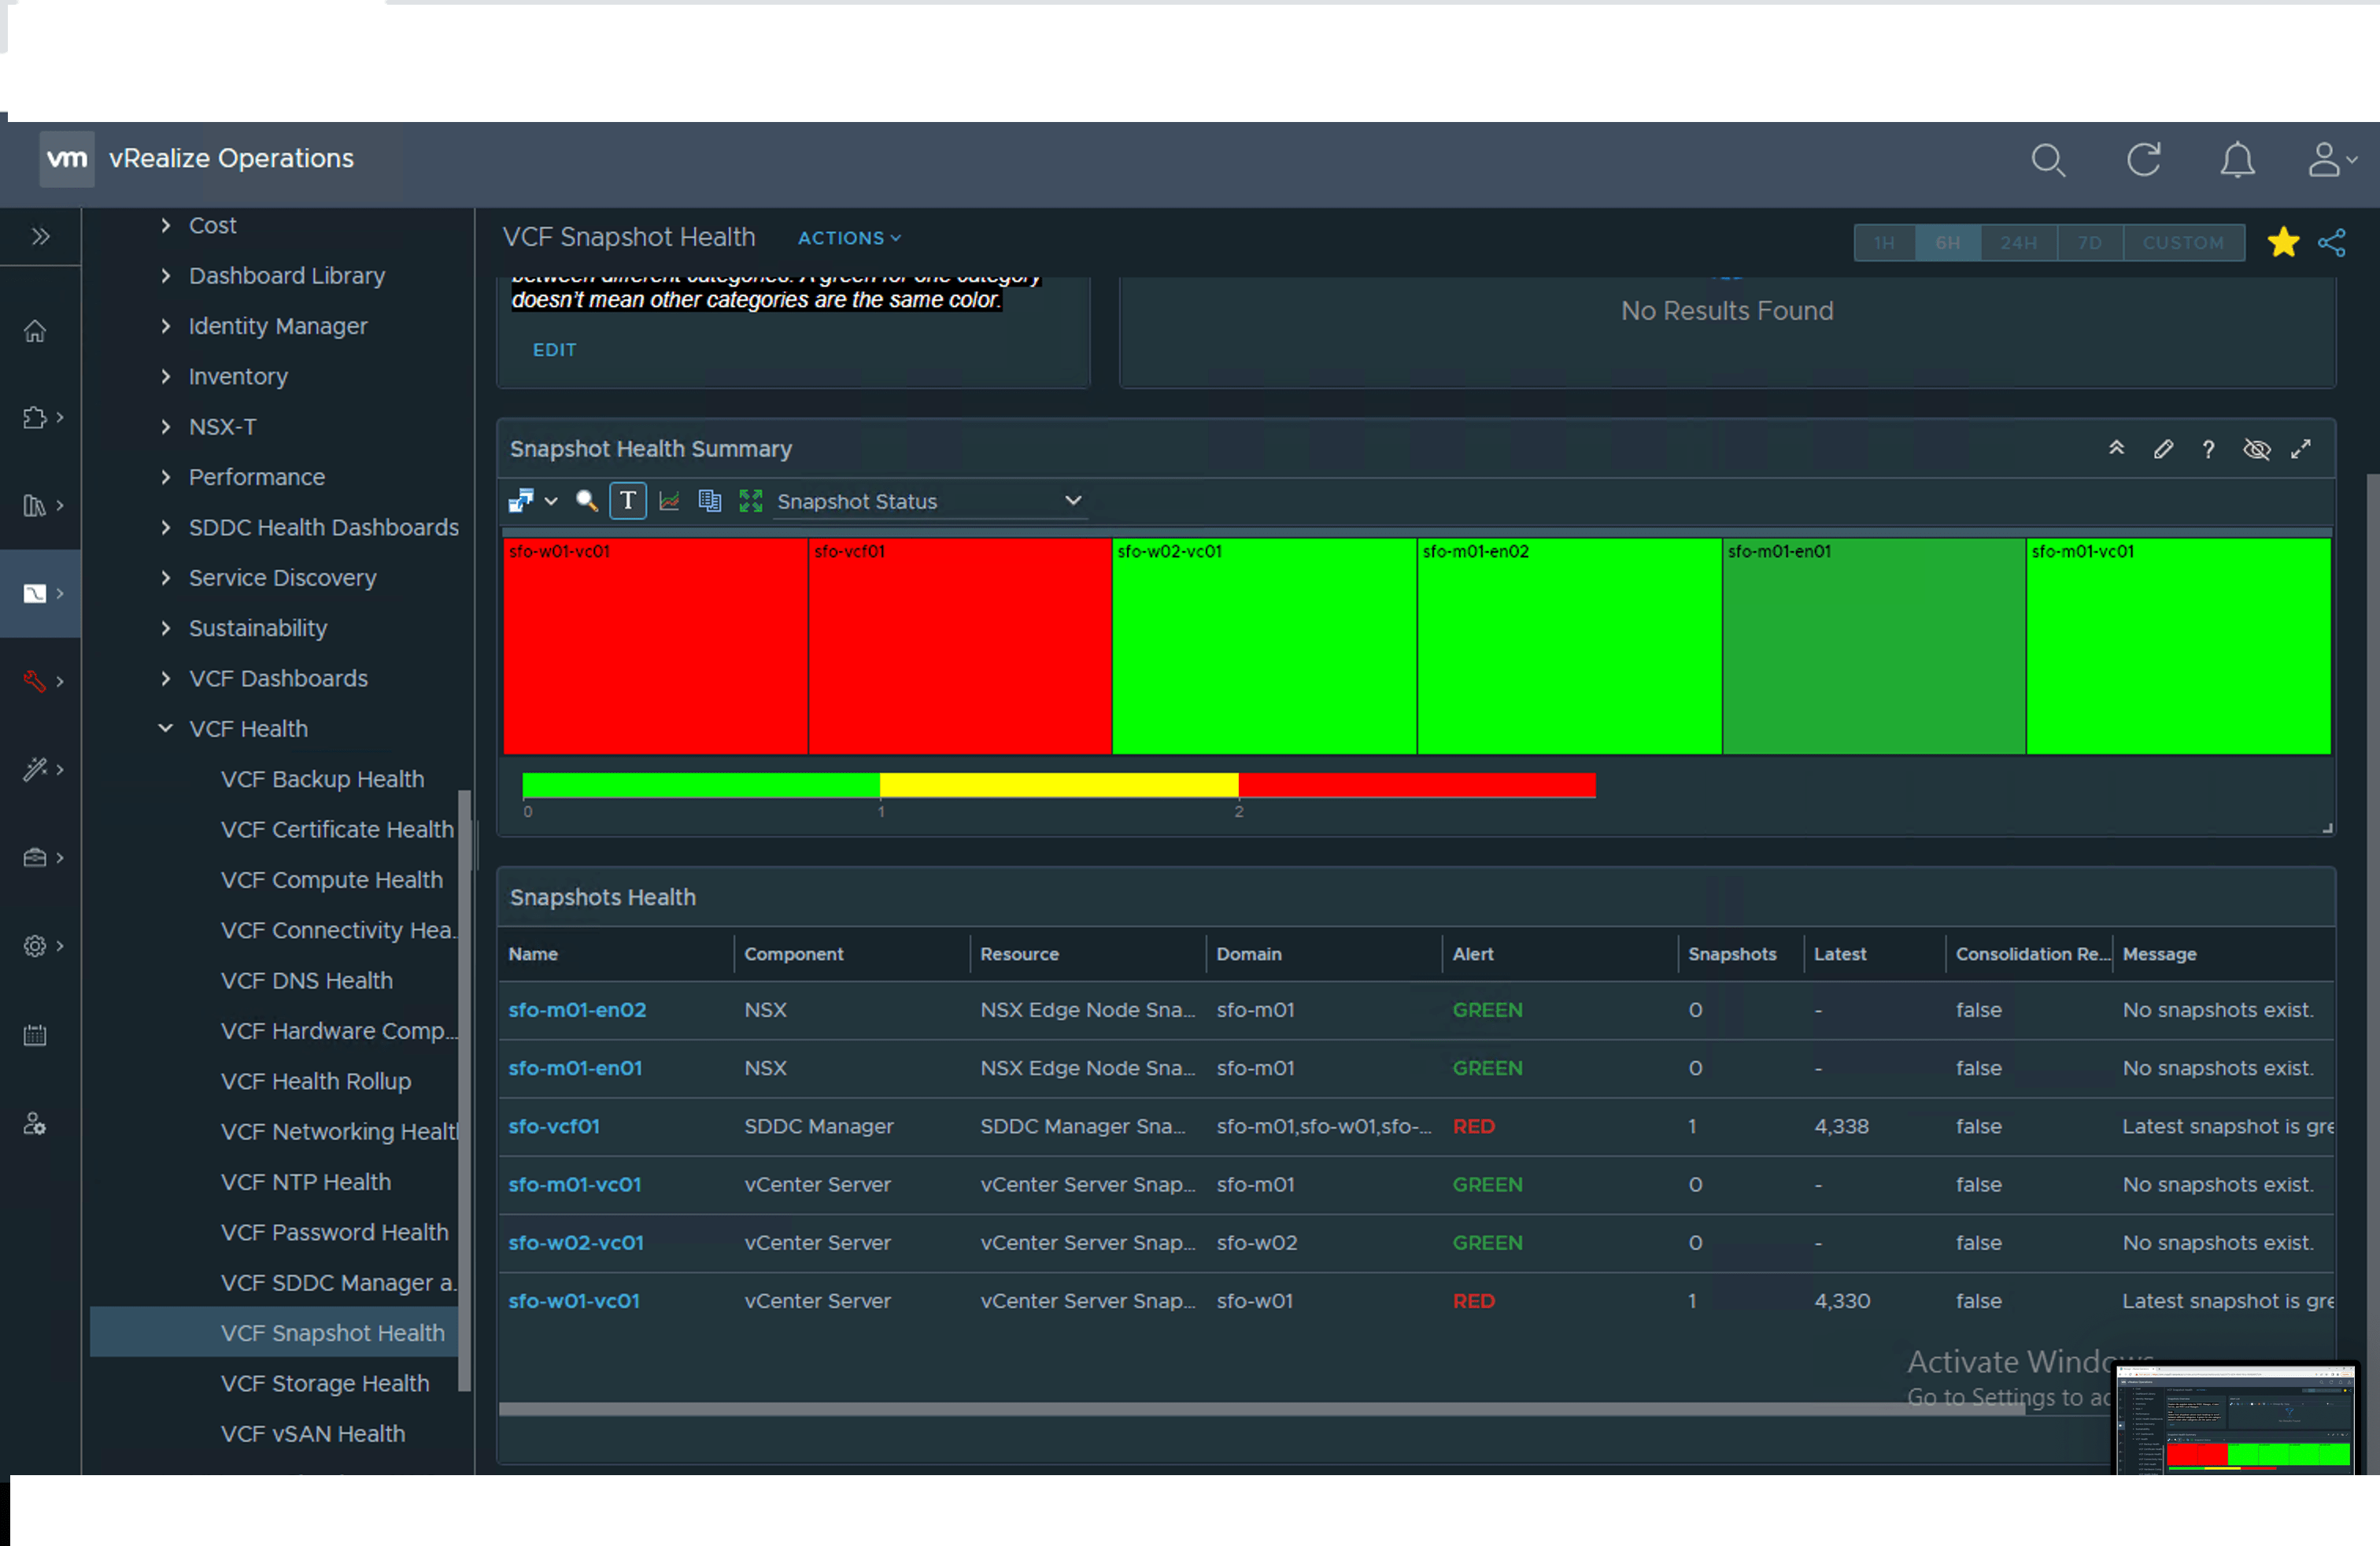
VCF Snapshot Health

-
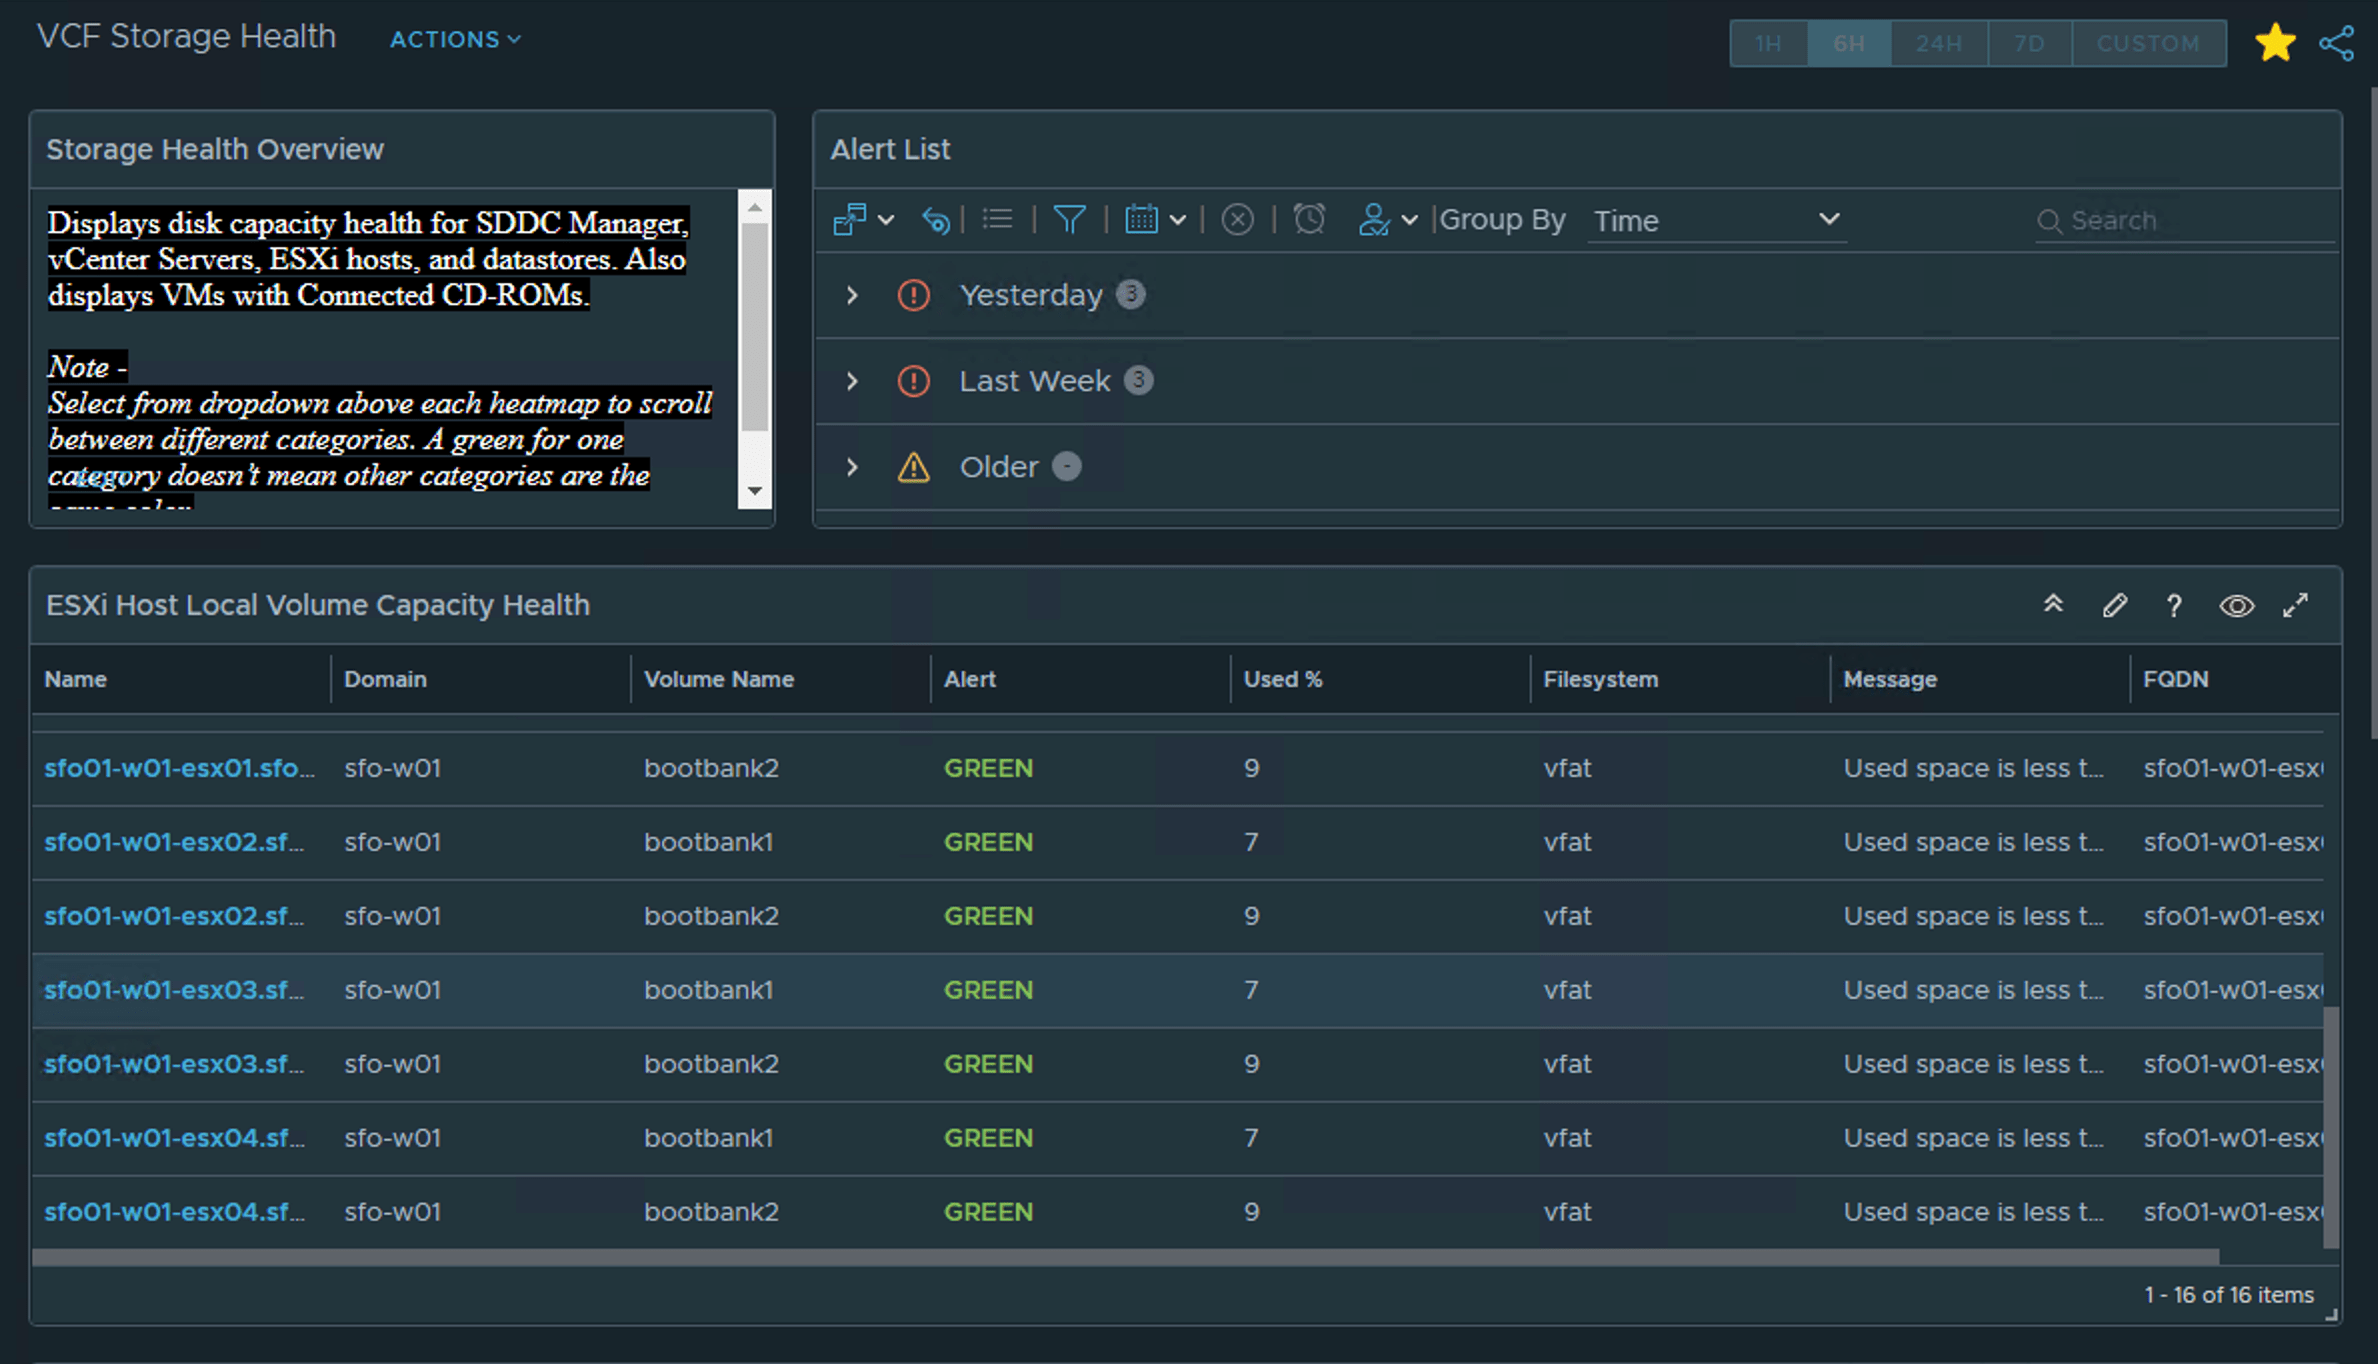
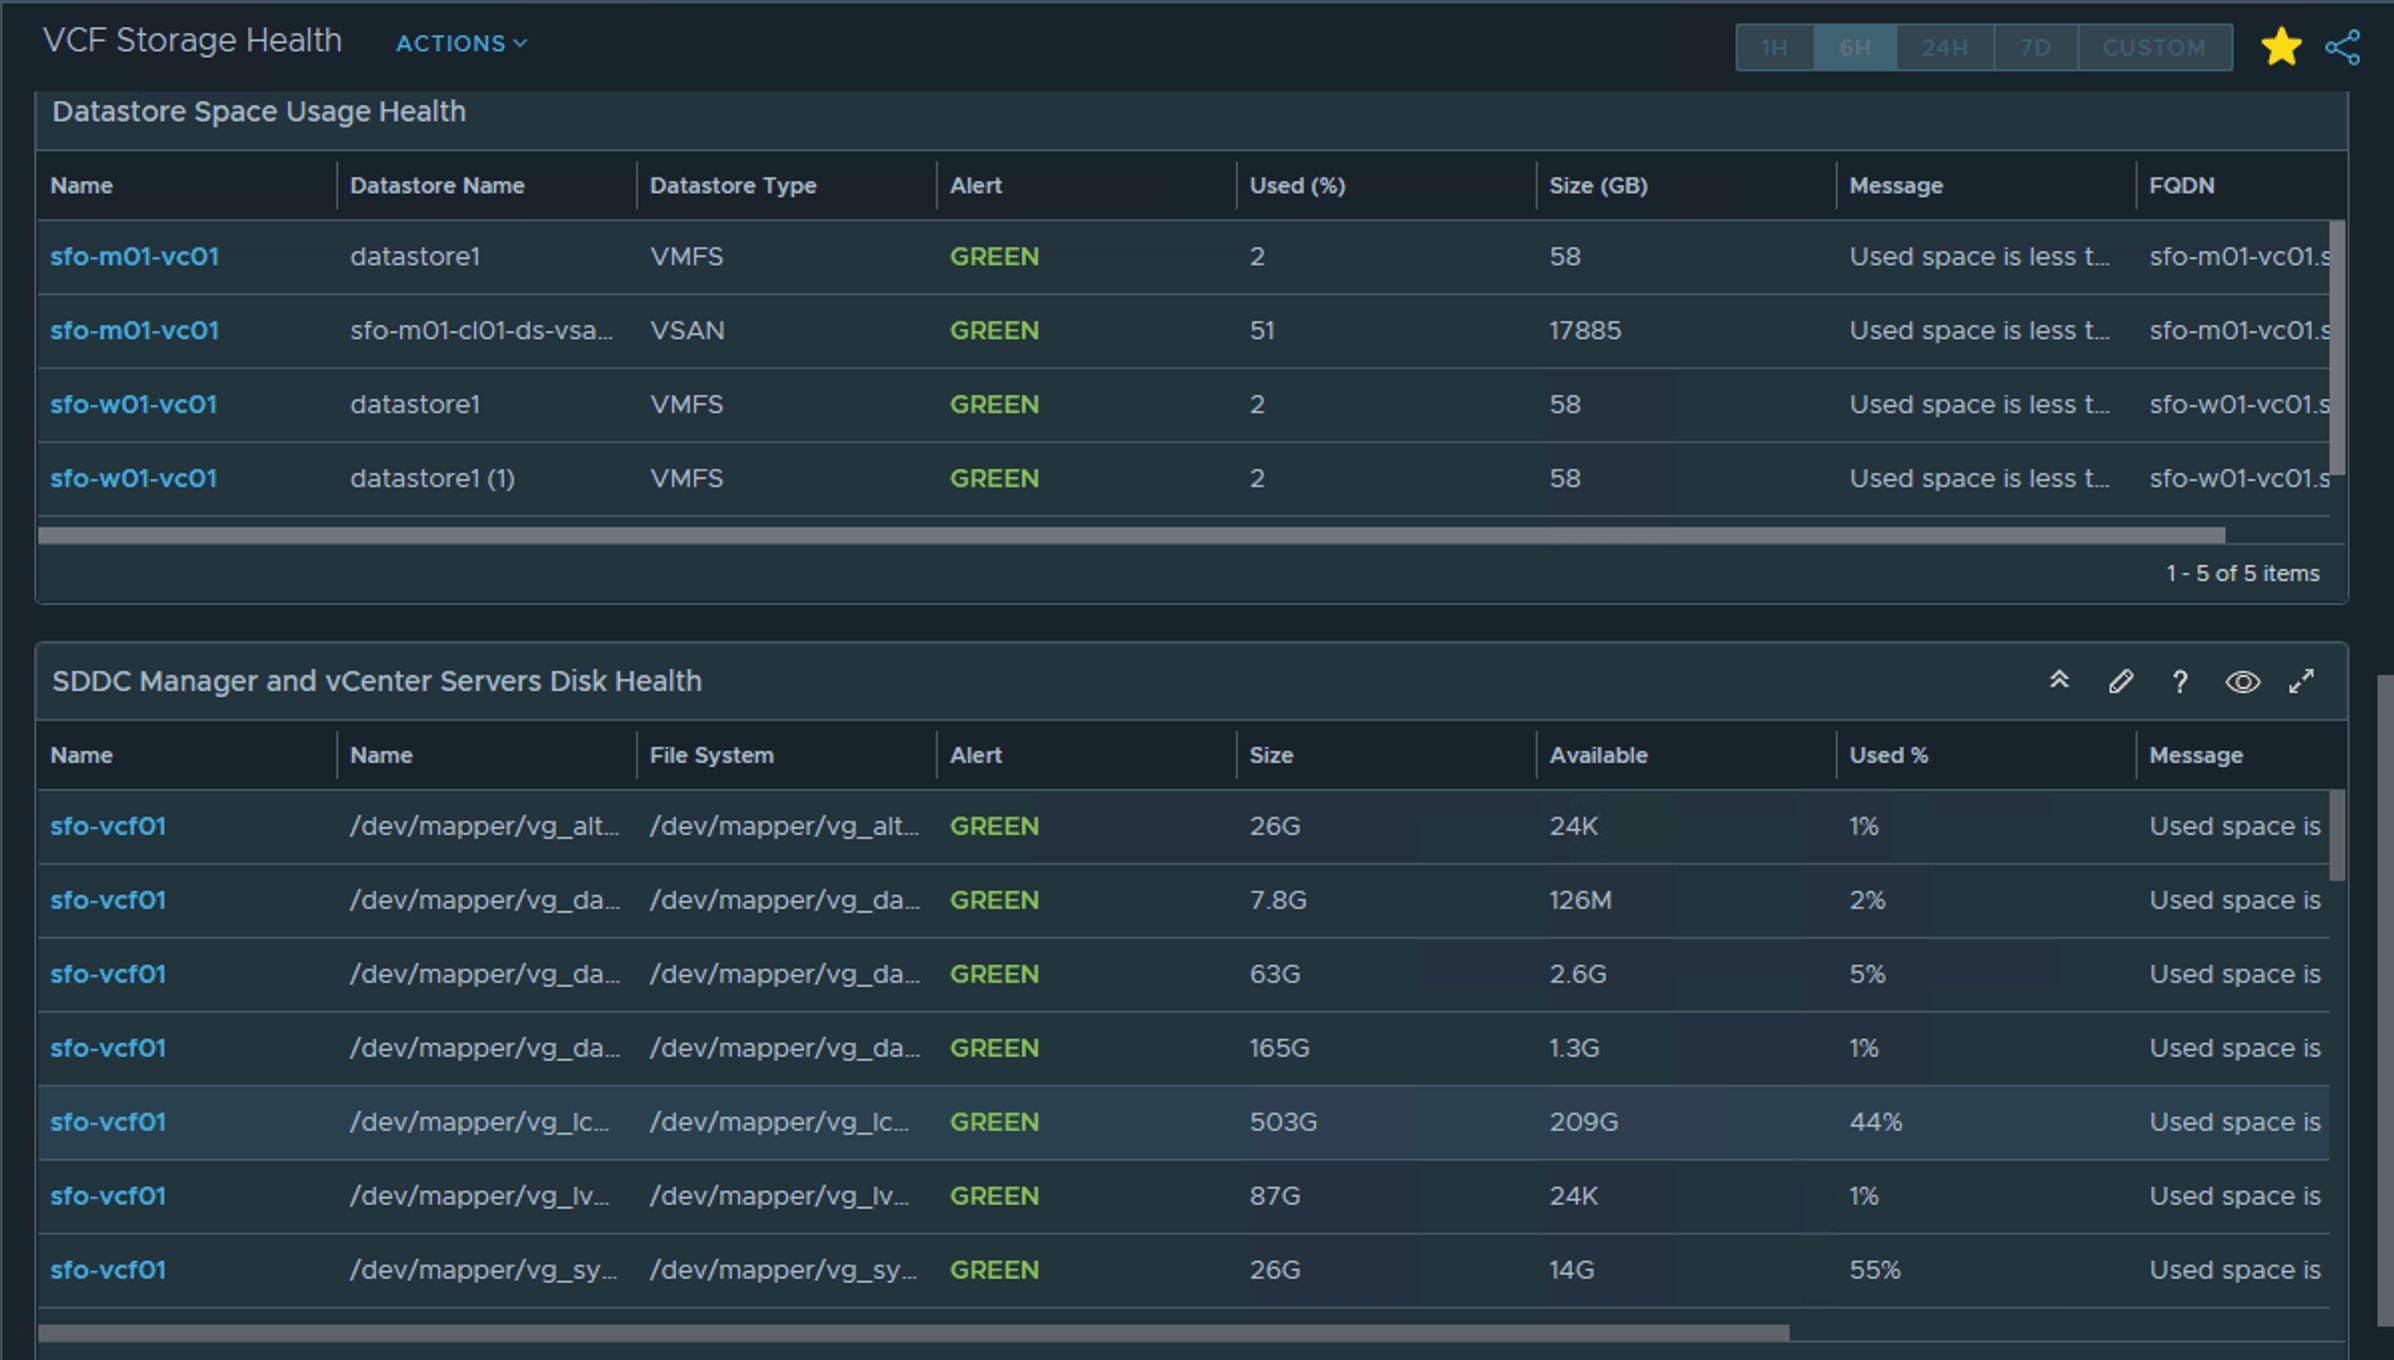
VCF Storage Health

-
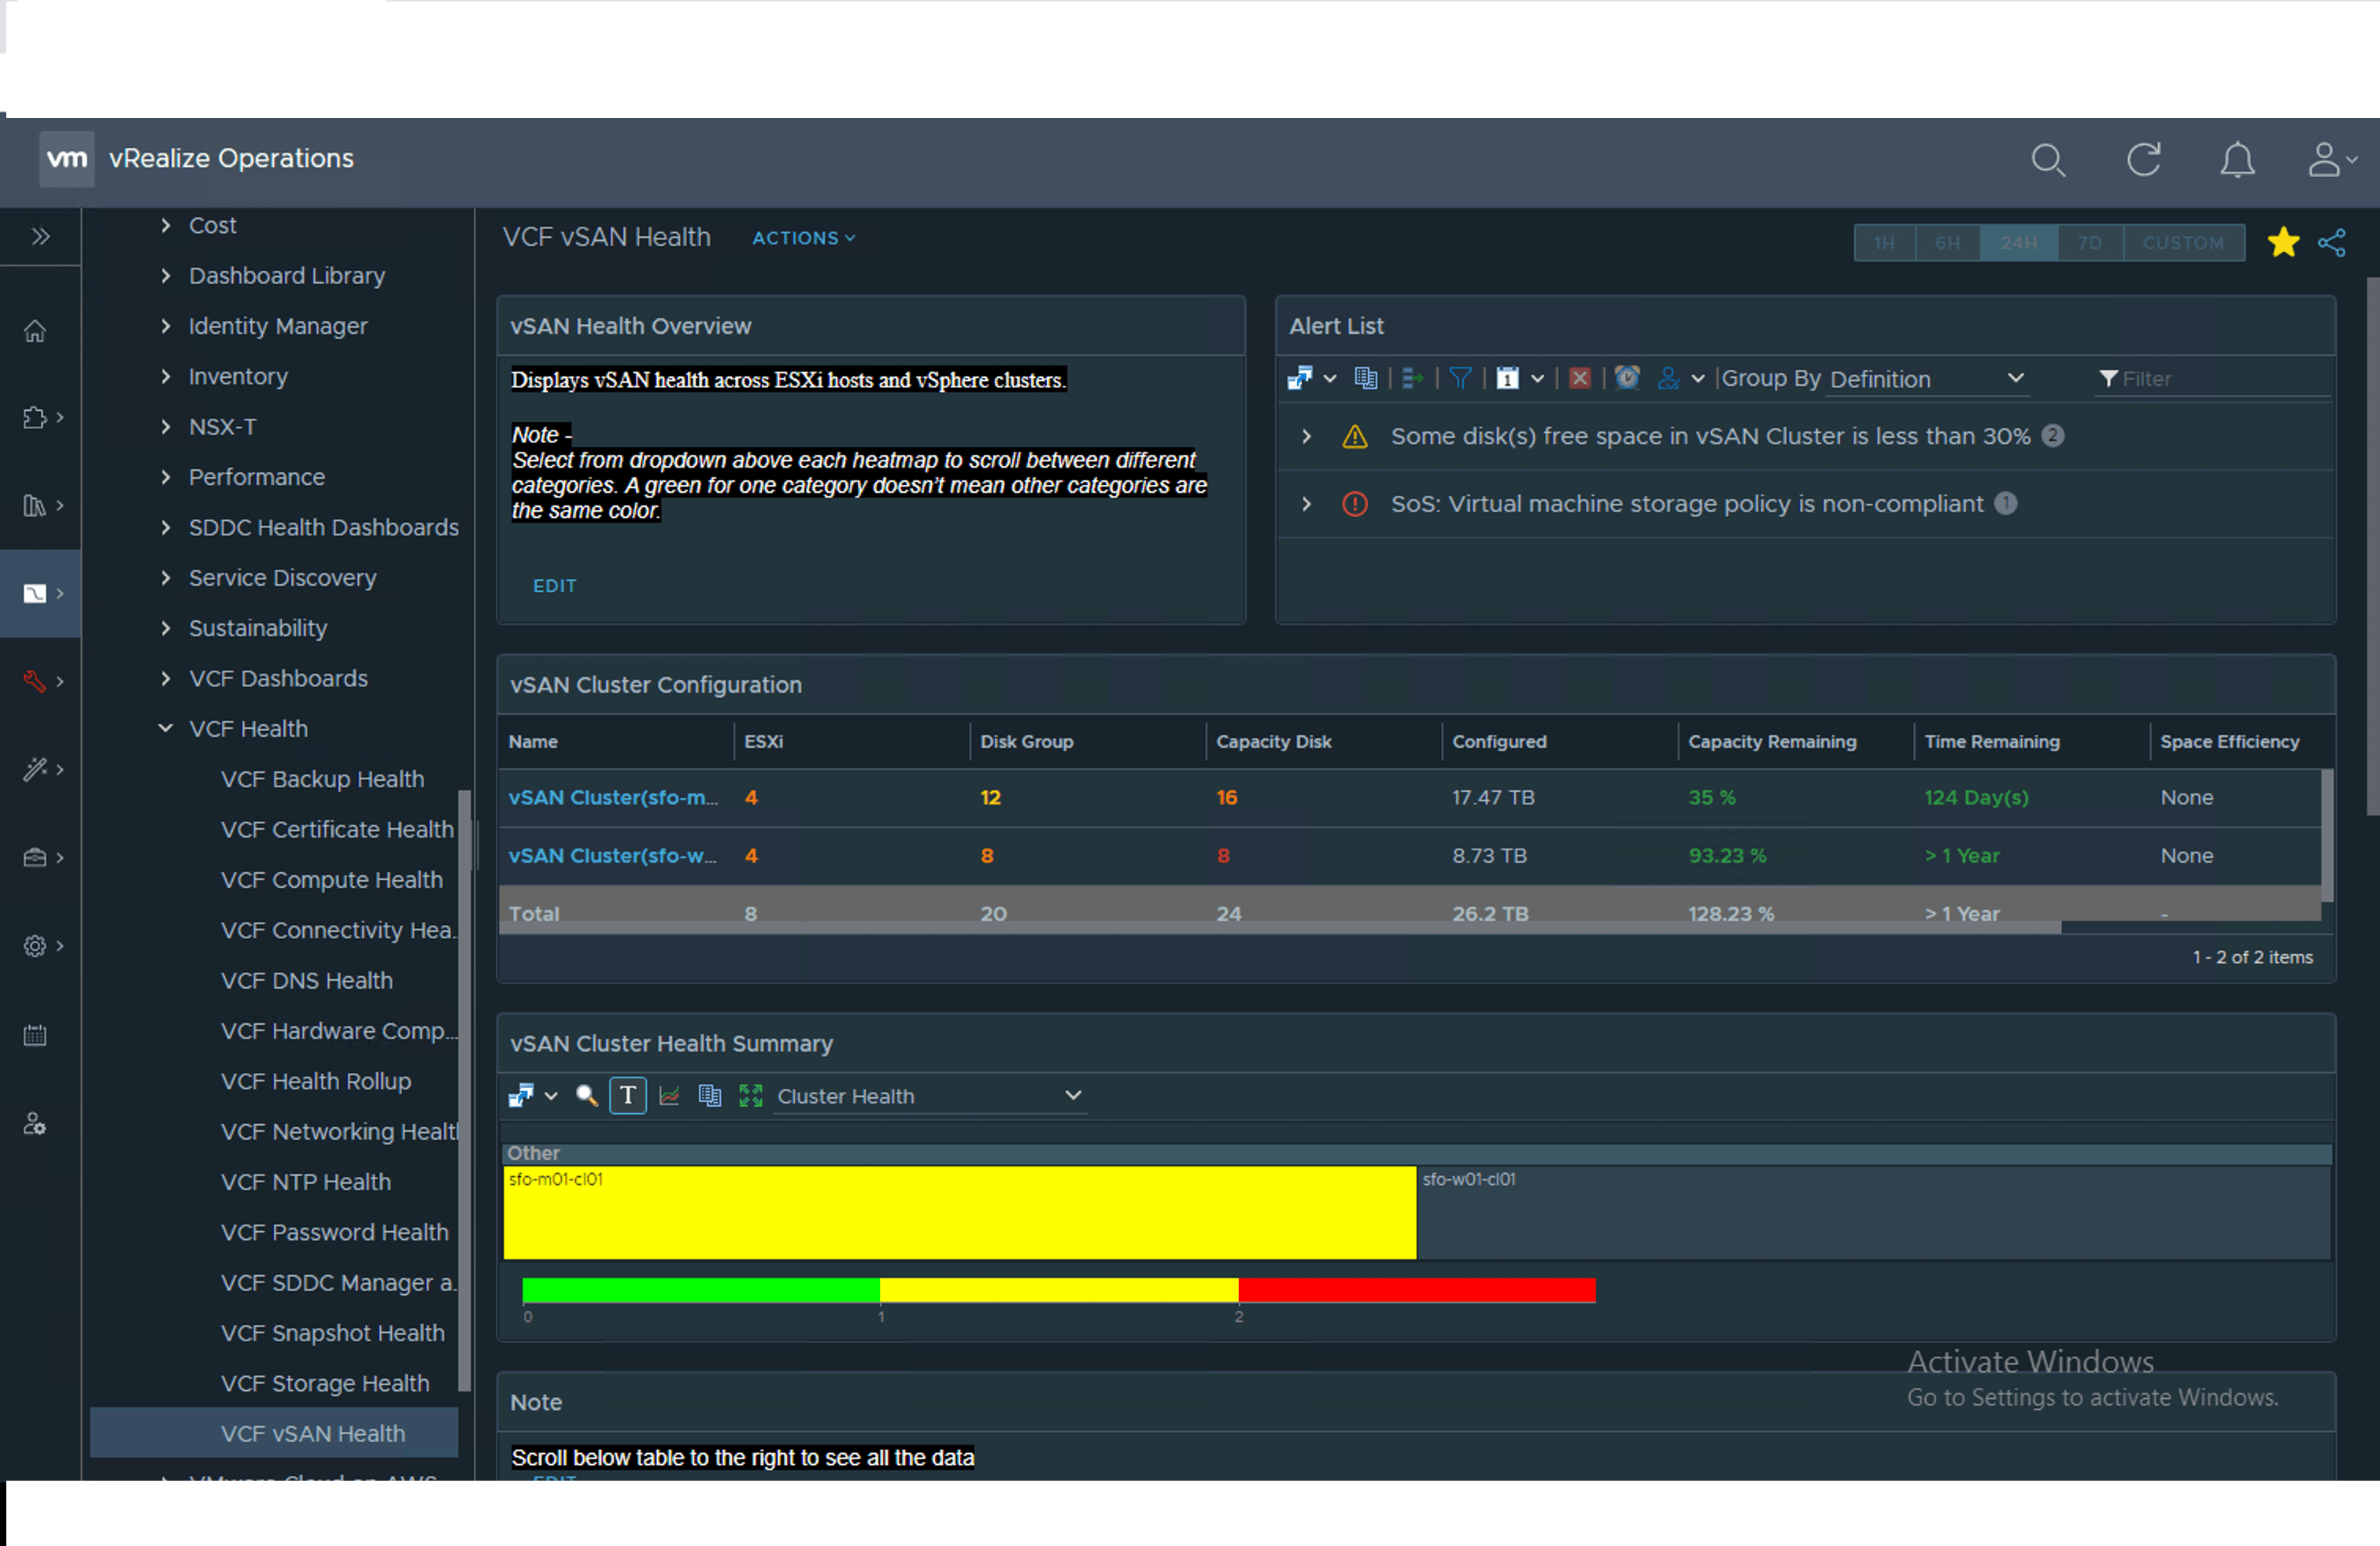
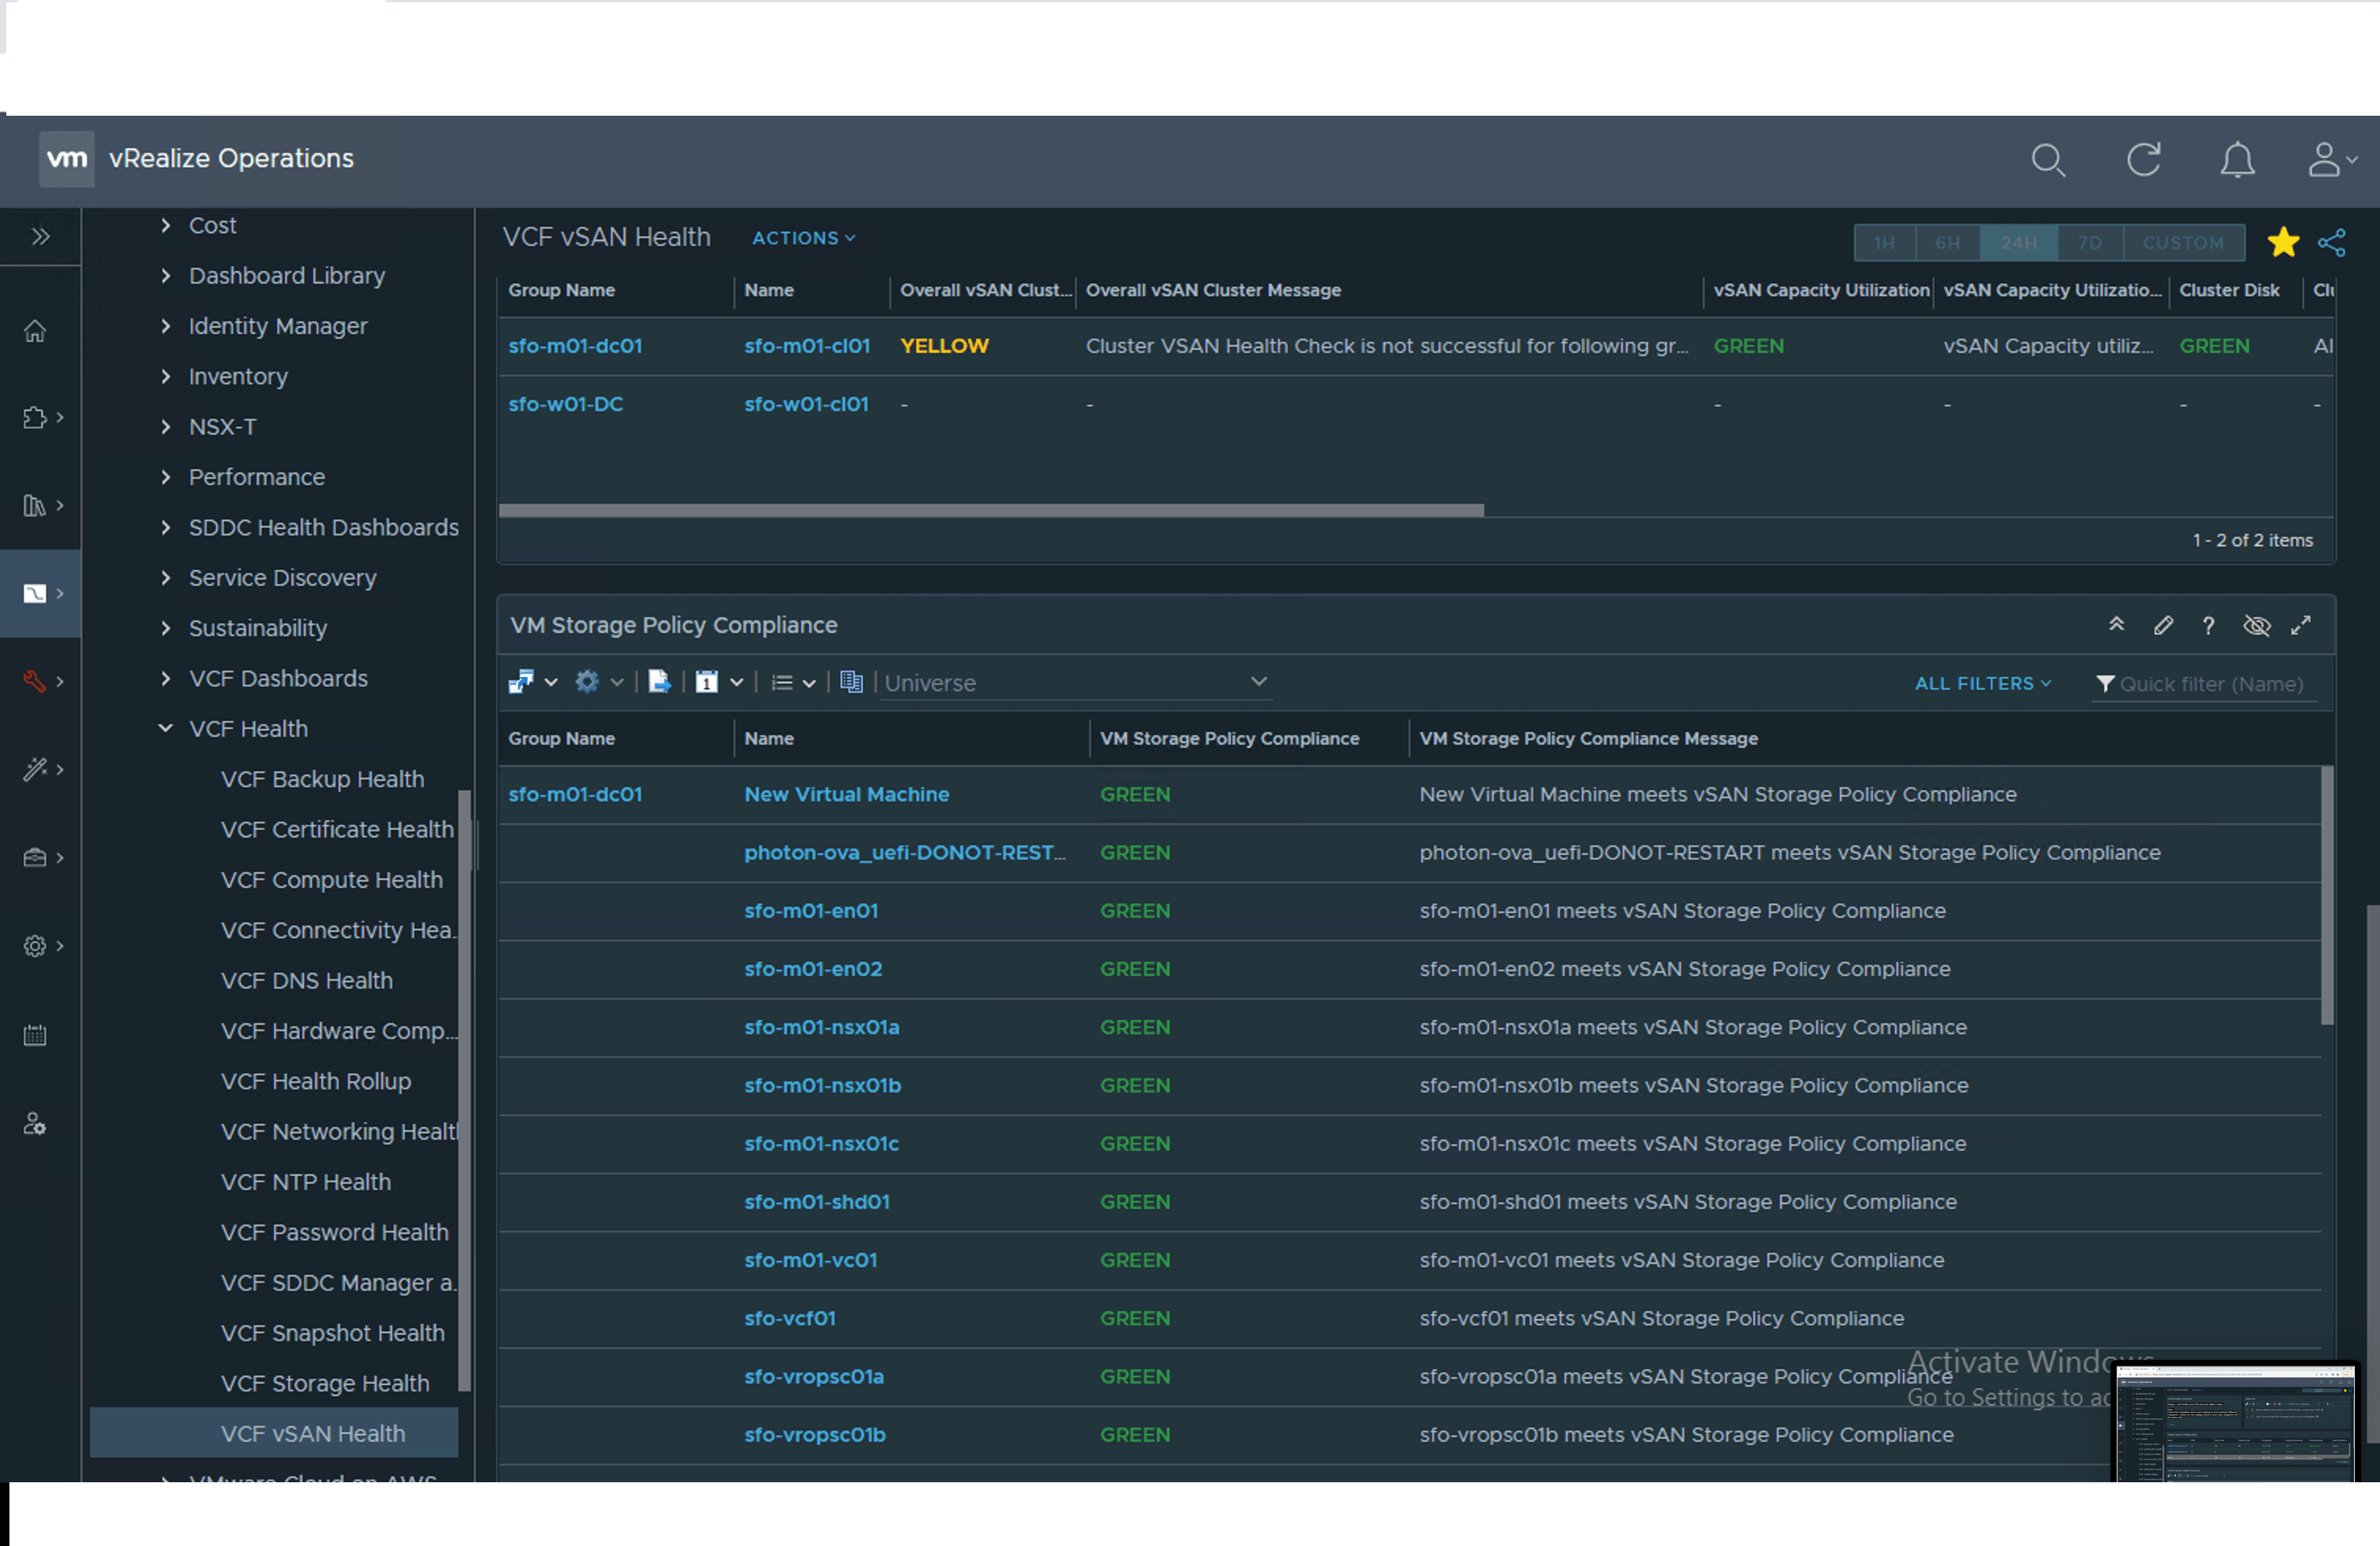
VCF vSAN Health
-
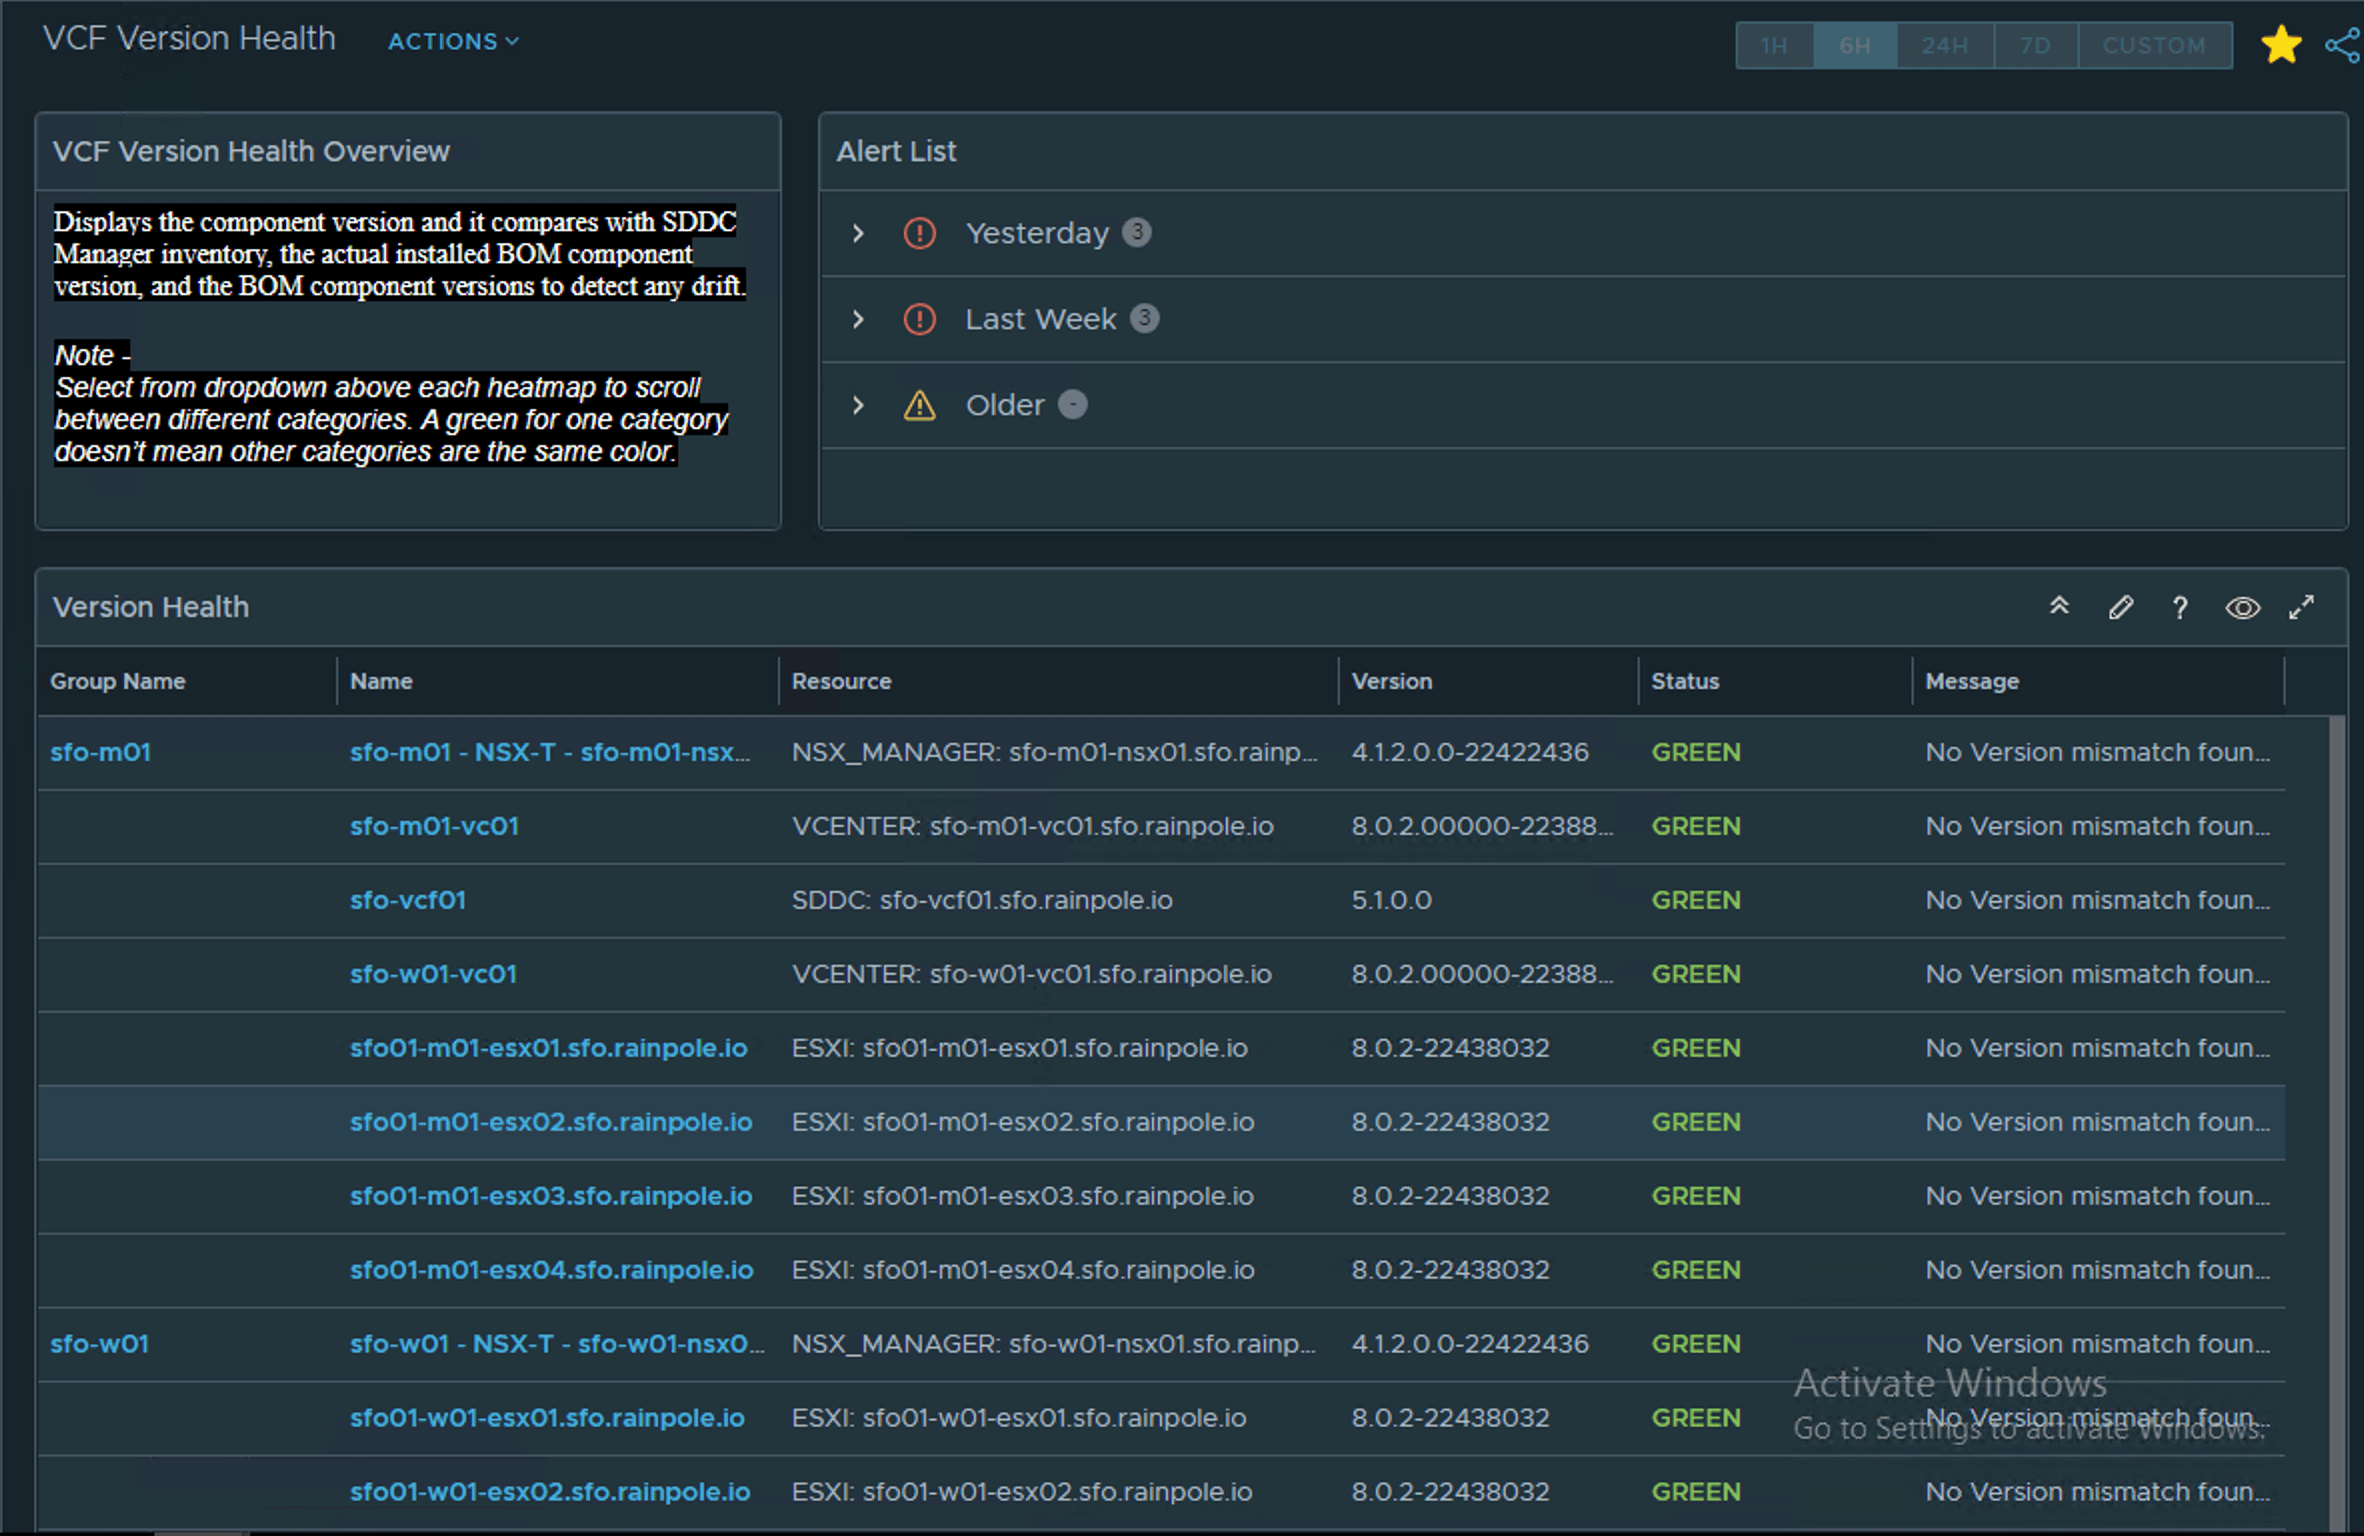
VCF Version Health
-
Please make sure that your NSX-T account name is configured as mentioned in this issue.
-
The vCenter Server name needs to be updated in VMware Cloud Foundation 4.x. The filters on the VMware Aria Operations dashboards depend on the name.
To set the Product Name for the vCenter Server, follow the below steps:
- Log in to the management domain vCenter Server at
https://<management_vcenter_server_fqdn>/uiasadministrator@vsphere.local. - In the
VMs and templatesinventory, expand themanagement domain vCenter Servertree and expand the management domain data center. - Select the first
management domain vCenter Server virtual machineand selectConfiguretab. - In the
Settingspane selectvApp Options. - Click the
Editbutton. TheEdit vApp Optionsdialog box opens. - If vApp options are disabled, select the
Enable vApp optionscheck box and clickOK. - Click the
Detailstab and enterVMware vCenter Server Applianceas product name in theNamefield.
- Log in to the management domain vCenter Server at
-
Shades of red, green, and yellow may vary on VMware Aria Operations widgets
Shades of red, green, and yellow may be different in different widgets but they represent the same thing. Ignore the shades as this is a VMware Aria Operations product limitation.
We welcome you to use the GitHub Issues to report bugs or suggest enhancements.
In order to have a good experience with our community, we recommend that you read the contributing guidelines.
When filing an issue, please check existing open, or recently closed, issues to make sure someone else hasn't already reported the issue.
Please try to include as much information as you can. Details like these are incredibly useful:
- A reproducible test case or series of steps.
- Any modifications you've made relevant to the bug.
- Anything unusual about your environment or deployment.
© Broadcom. All Rights Reserved. The term “Broadcom” refers to Broadcom Inc. and/or its subsidiaries.
Licensed under the BSD 2-Clause license.